Music Prodigy with S-Cubed - Getting Started
2020
Table of Contents
2 – What You’ve (Hopefully!) Already Done
2.1 – Purchased Music Prodigy with S-Cubed!
2.2 – Received a Purchase Receipt (by Email)
2.3 – Received a Welcome Email
2.4 – Activated Your Account & Logged In
3.2 – Get Students Set Up with Music Prodigy
3.3 – Practicing with Music Prodigy
3.4 – Using the S-Cubed Content
Key Components of the S-Cubed Curriculum
Materials to Display in Your Classroom
What Materials Should Students Bring to Class?
3.5 – Monitoring Student Performance
Appendix A. Network Configuration
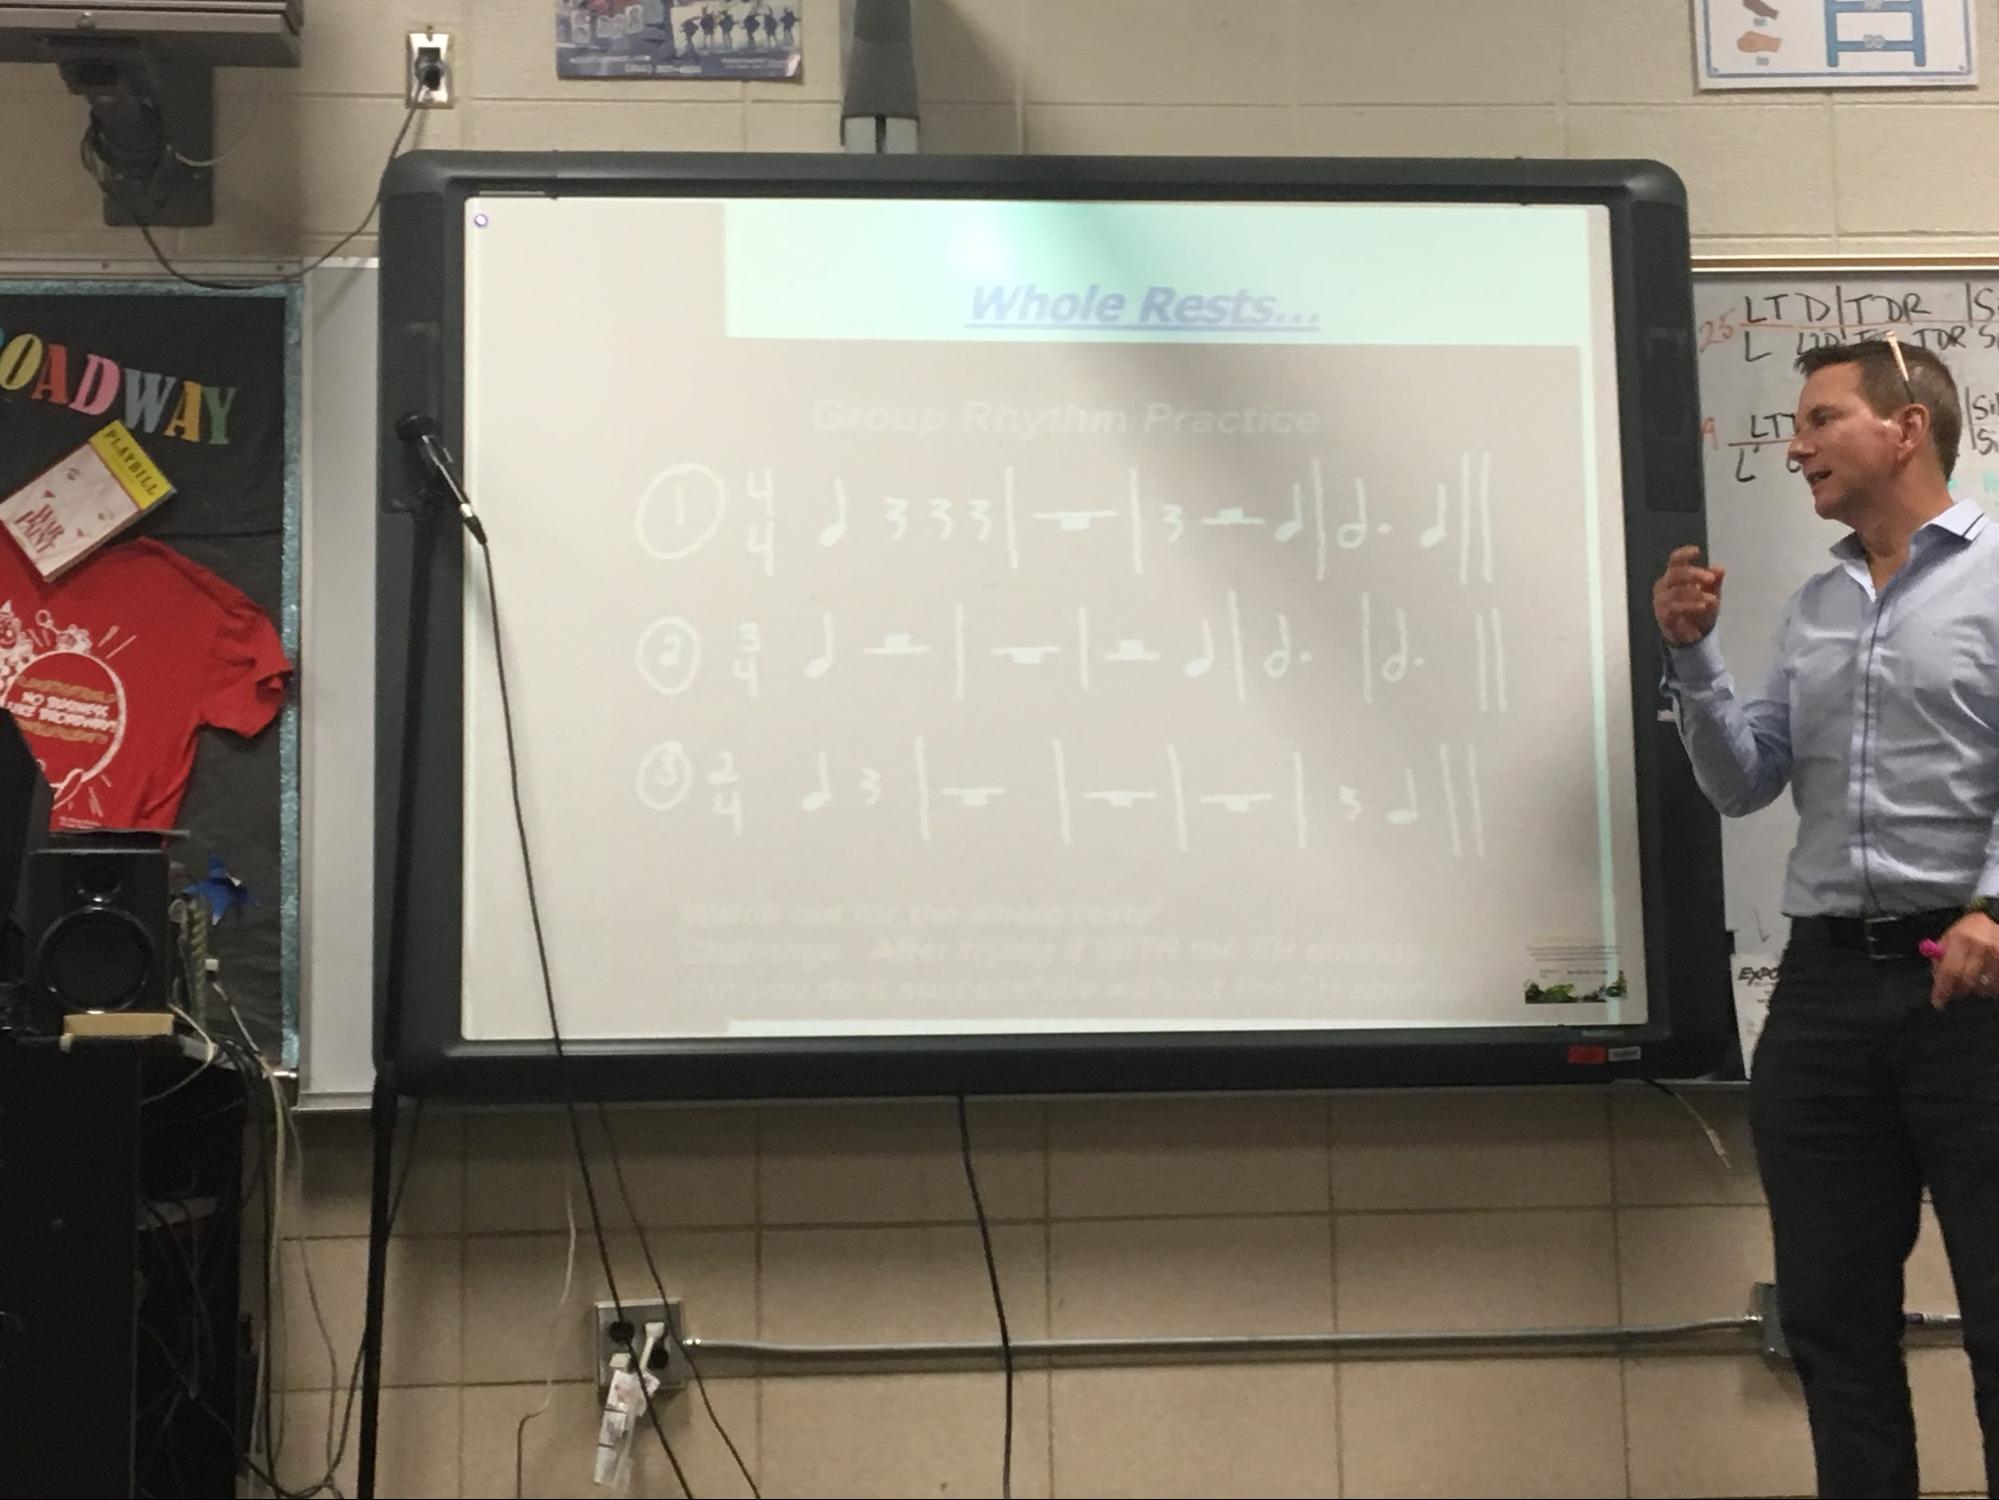
Dale Duncan is the author of S-Cubed Success Sight Singing materials and curriculum.
I poured my heart and soul into this program and shared everything I’ve learned over the last
25 years of teaching this age group as openly as I know how to do. I spent thousands of hours on it. I did it in order to help other teachers succeed as they teach beginners.
Music Prodigy is a computer/app based program that allows students to practice and teachers to assess their students. I tried the program for one year with my 340 middle school students, and I liked it so much that I decided to supplement S-Cubed by creating homework examples specifically for Music Prodigy.
— Dale Duncan, In the Middle with Mr. D.
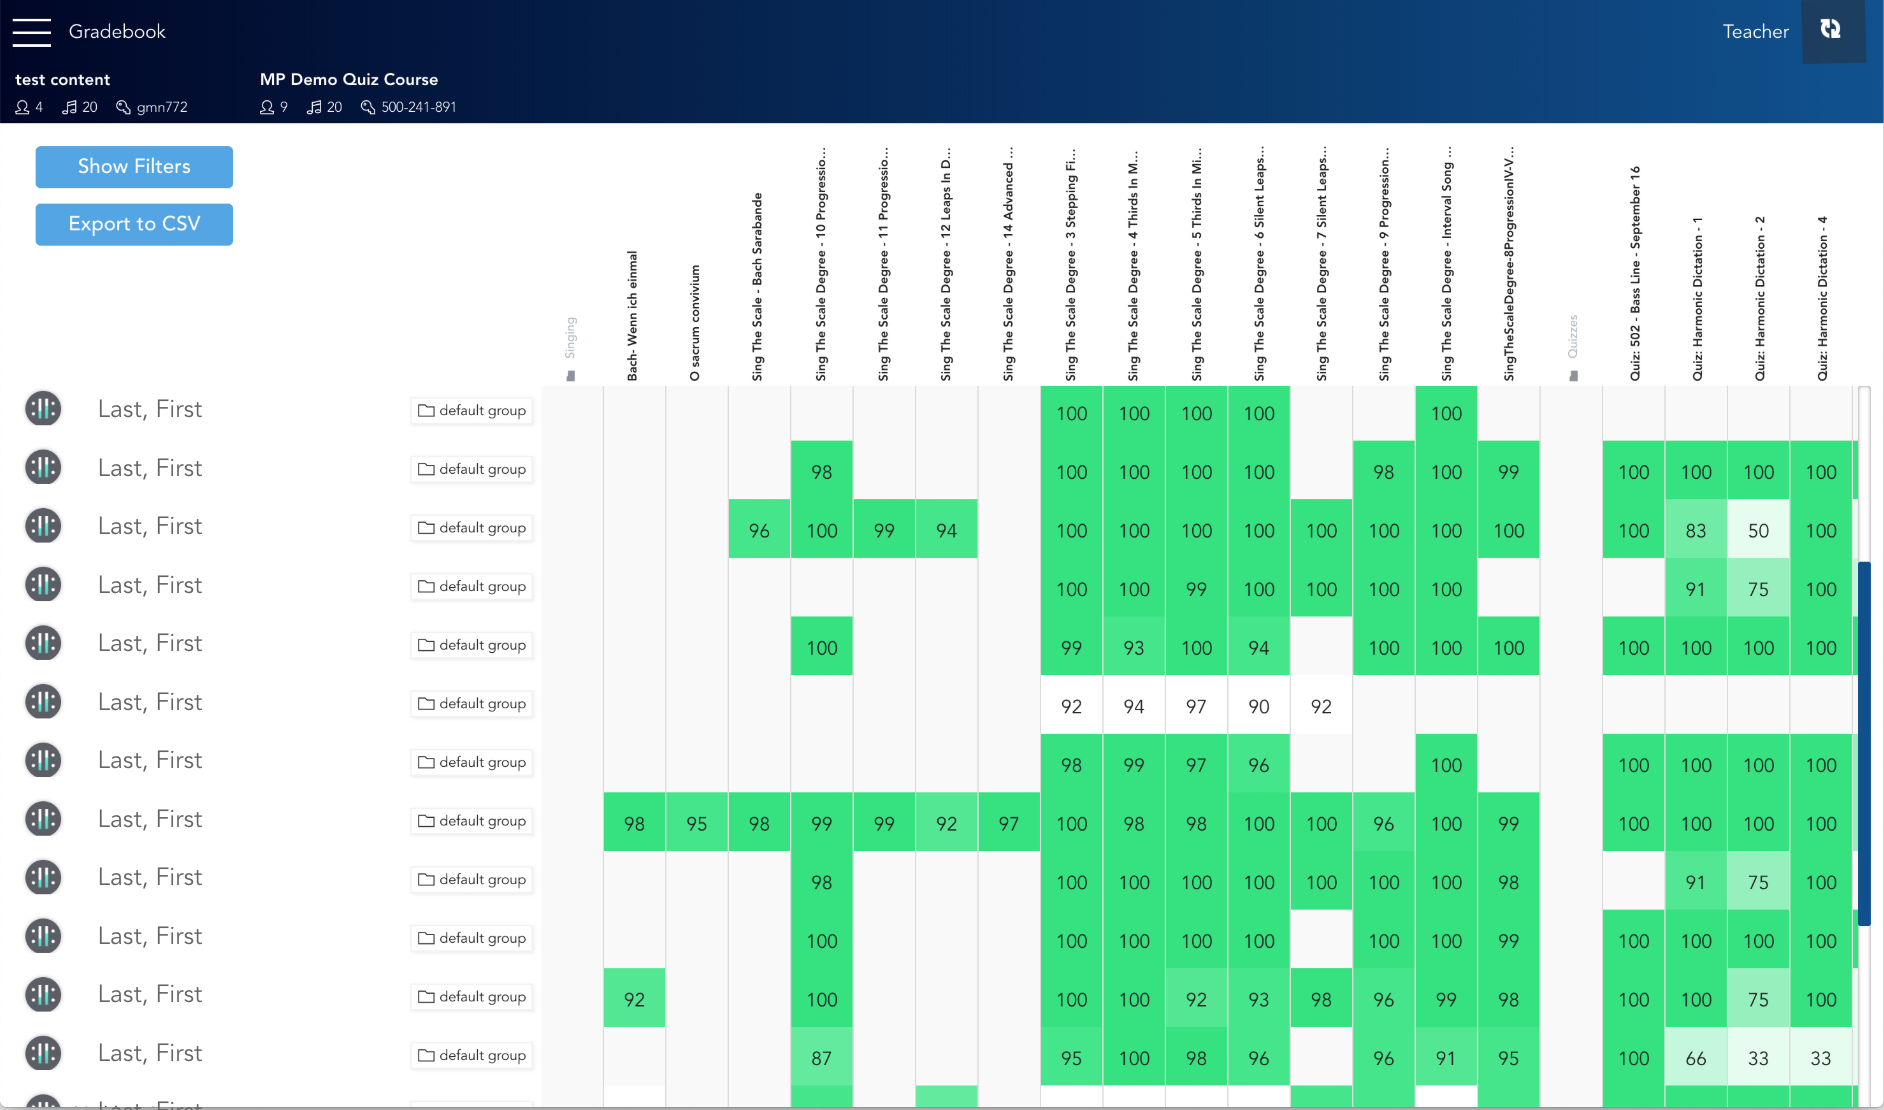
Music Prodigy Teacher’s Dashboard - Gradebook - Someday your Gradebook will be this filled-up!
This is a guide to help you understand and get the most out of the Music Prodigy Teacher’s Dashboard web application and the accompanying S-Cubed curriculum materials. The Dashboard application (which is what you have logged into and probably where you found this guide) is a central hub or portal which gathers together and contains the classes you will be teaching, the students in those classes, their performance histories (their scores / grades) and all of the curriculum content, collateral materials and guidance you will need to successfully teach sight singing using Music Prodigy with S-Cubed!
Here are a few of the conventions used in this guide:
In addition, the following types of extra information appear in this guide:
|
|
Key Action - for those “skimmers” who like to “cut to the chase” with a bare minimum of guidance, feel free to skim this guide reading only these sections! |
|
|
Notes - incidental or extra information. Helpful to know, but not essential. |
|
|
Warnings - point out an action or situation that poses a risk, has important consequences or that might be irreversible. |
|
|
Tips & Tricks - extra information that can help you get the most out of the Teacher’s Dashboard. |
Updates
We will try to keep this guide up-to-date as much as possible. In our pursuit of providing the best educational experience for teachers and students, the information is subject to change without notice.
Please write us at support@musicprodigy.com with feedback, questions, comments and suggestions.
Rejoice! Music Prodigy with S-Cubed is in your hands!
|
|
Attention Skimmers! Unless you feel like you may have missed something you should have already done, feel free to skip down to the next Key Action section! |
Thanks again for purchasing Music Prodigy with S-Cubed, America’s premier
sight-singing curriculum. Our goal is to help you make learning to sight sing easy and fun!
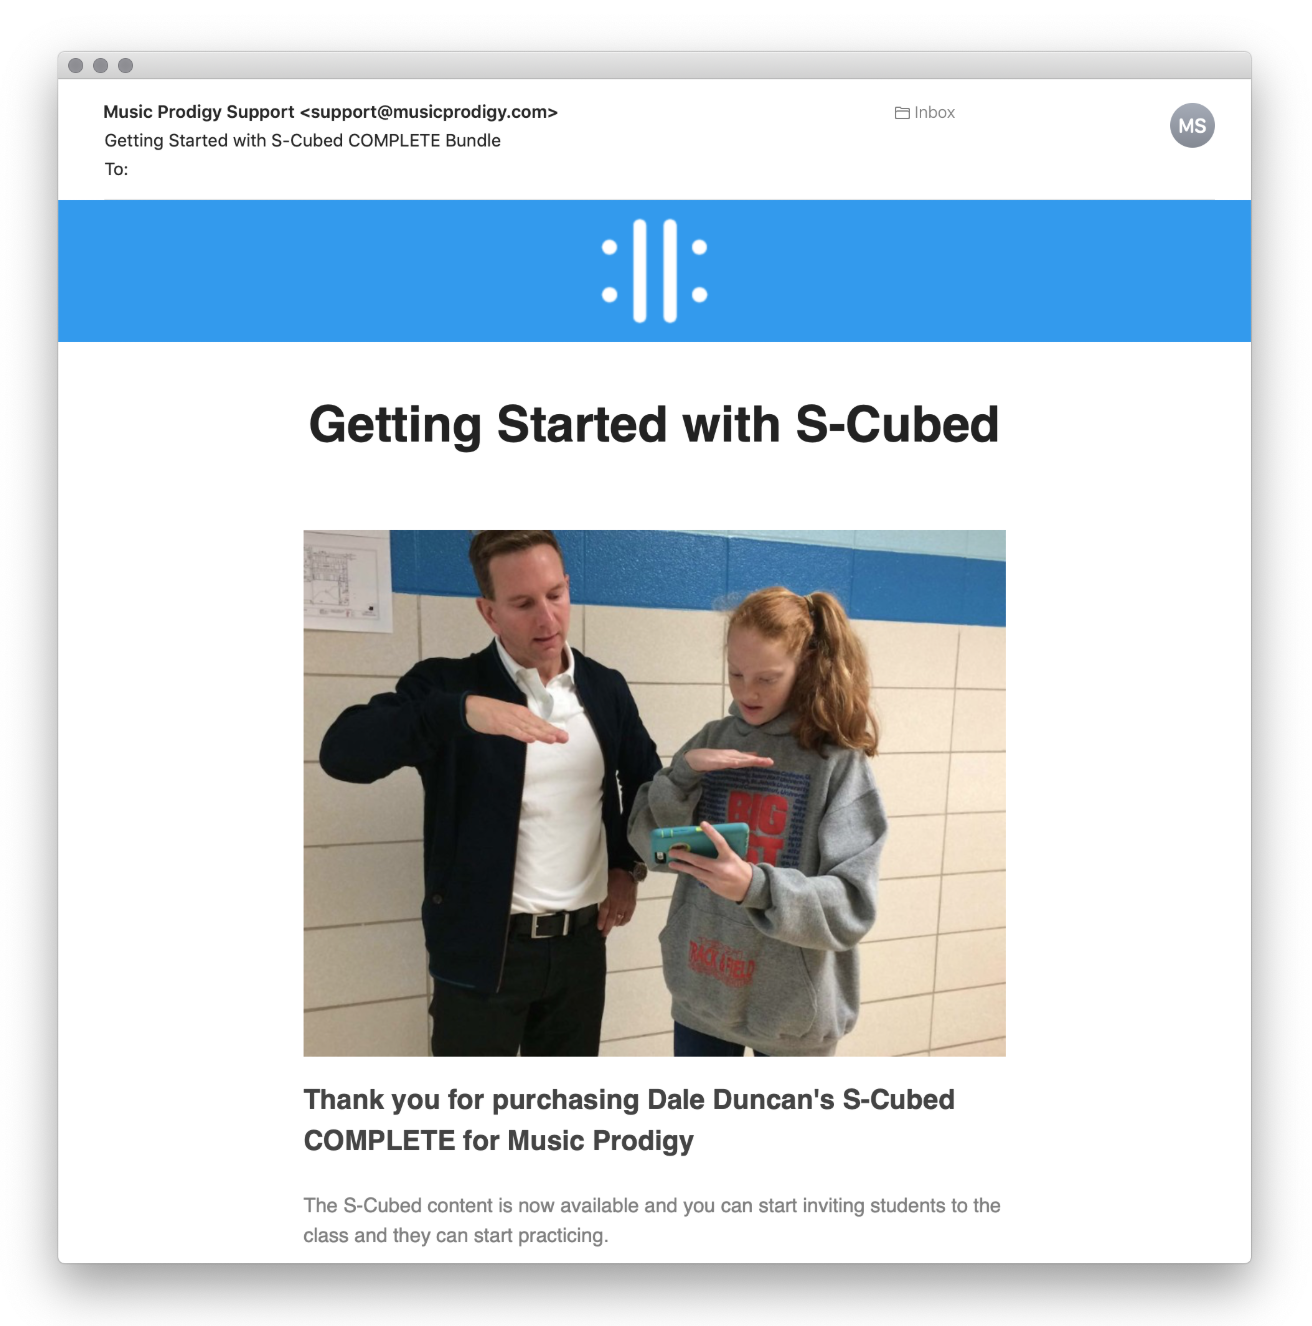
The first of two emails you will have received after making your payment, it contains your invoice number, receipt number and a record of your payment. Keep it for your records and as proof of purchase.
Your welcome email looks something like the above.
This is the second email you will have received after making your payment. This email contains a button that takes you to your newly-created Music Prodigy account and allows you to set-up or change your login and password information. It also contains the contact info for our customer care team (support@musicprodigy.com) who are always looking out for you and would love to hear from you if you have any feedback or would like to share your experiences using Music Prodigy with S-Cubed.
Using the “Activate Account” button in the welcome email, you confirmed your login information and logged into the Teacher Dashboard application.
You can change your login information as well, if you wish
You wouldn’t be reading this if you hadn’t found it! The Getting Started Guide is always available in the Main Menu under Getting Started.
If you are using Google Chrome to view this guide, you may also download a .pdf copy of this guide, by clicking the download icon at the top right (see below for an example of what this looks like).
The Download Icon - try it!
In the next part of this guide, we’ll show you how to perform a few essential tasks that you’ll need to know to get up and running.
|
|
Reminder - if you just want the bare essentials, feel free to skip through, reading the key actions (which look like this!) You can always return to this guide at any time to “fill in the gaps” in your know-how. |
Everything starts with creating a class. You may have only a single class or you may have many, but all classes are created from the Classes screen. If you’re ready to create your first class, let’s go there now!
|
|
From the Main Menu, select Classes. |
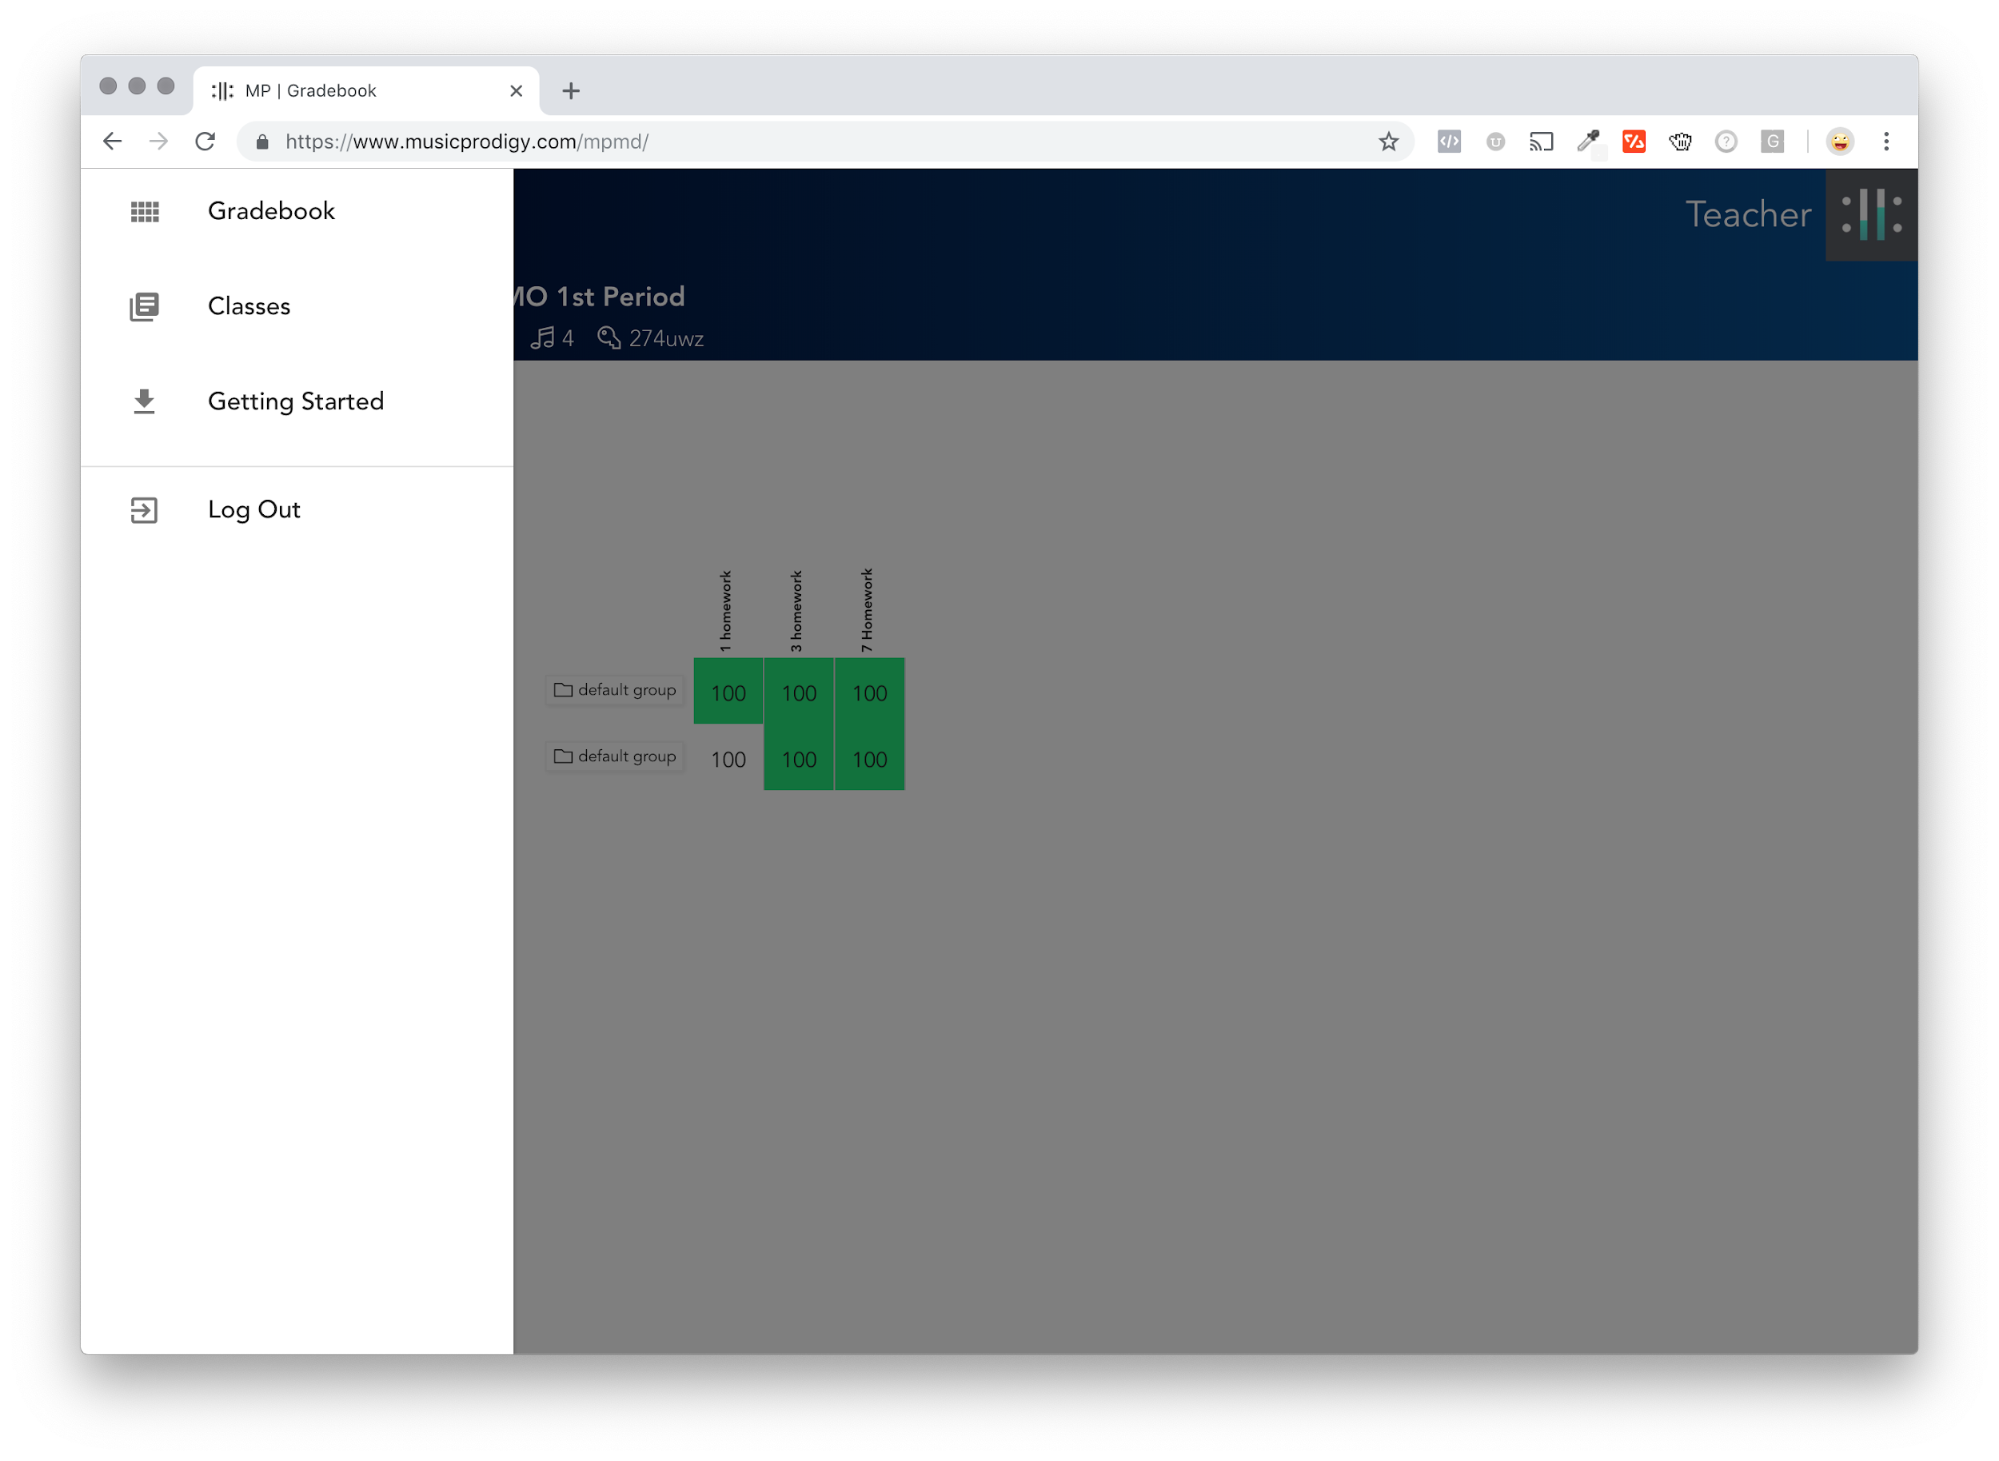
The Main Menu is always visible at the top left of your screen, no matter where you are. It gives you quick access to all the main functions of the Dashboard. (See below for an example).
The Main Menu Icon - always visible at the upper left.
When you click on the Main Menu, you should see something like this:
The Main Menu - after clicking the icon!
The menu appears on the left side of your screen and will stay open until you make a selection (by clicking on an item) from the list of options, or until you click “away” somewhere outside the menu (which will leave you on the page you were already on).
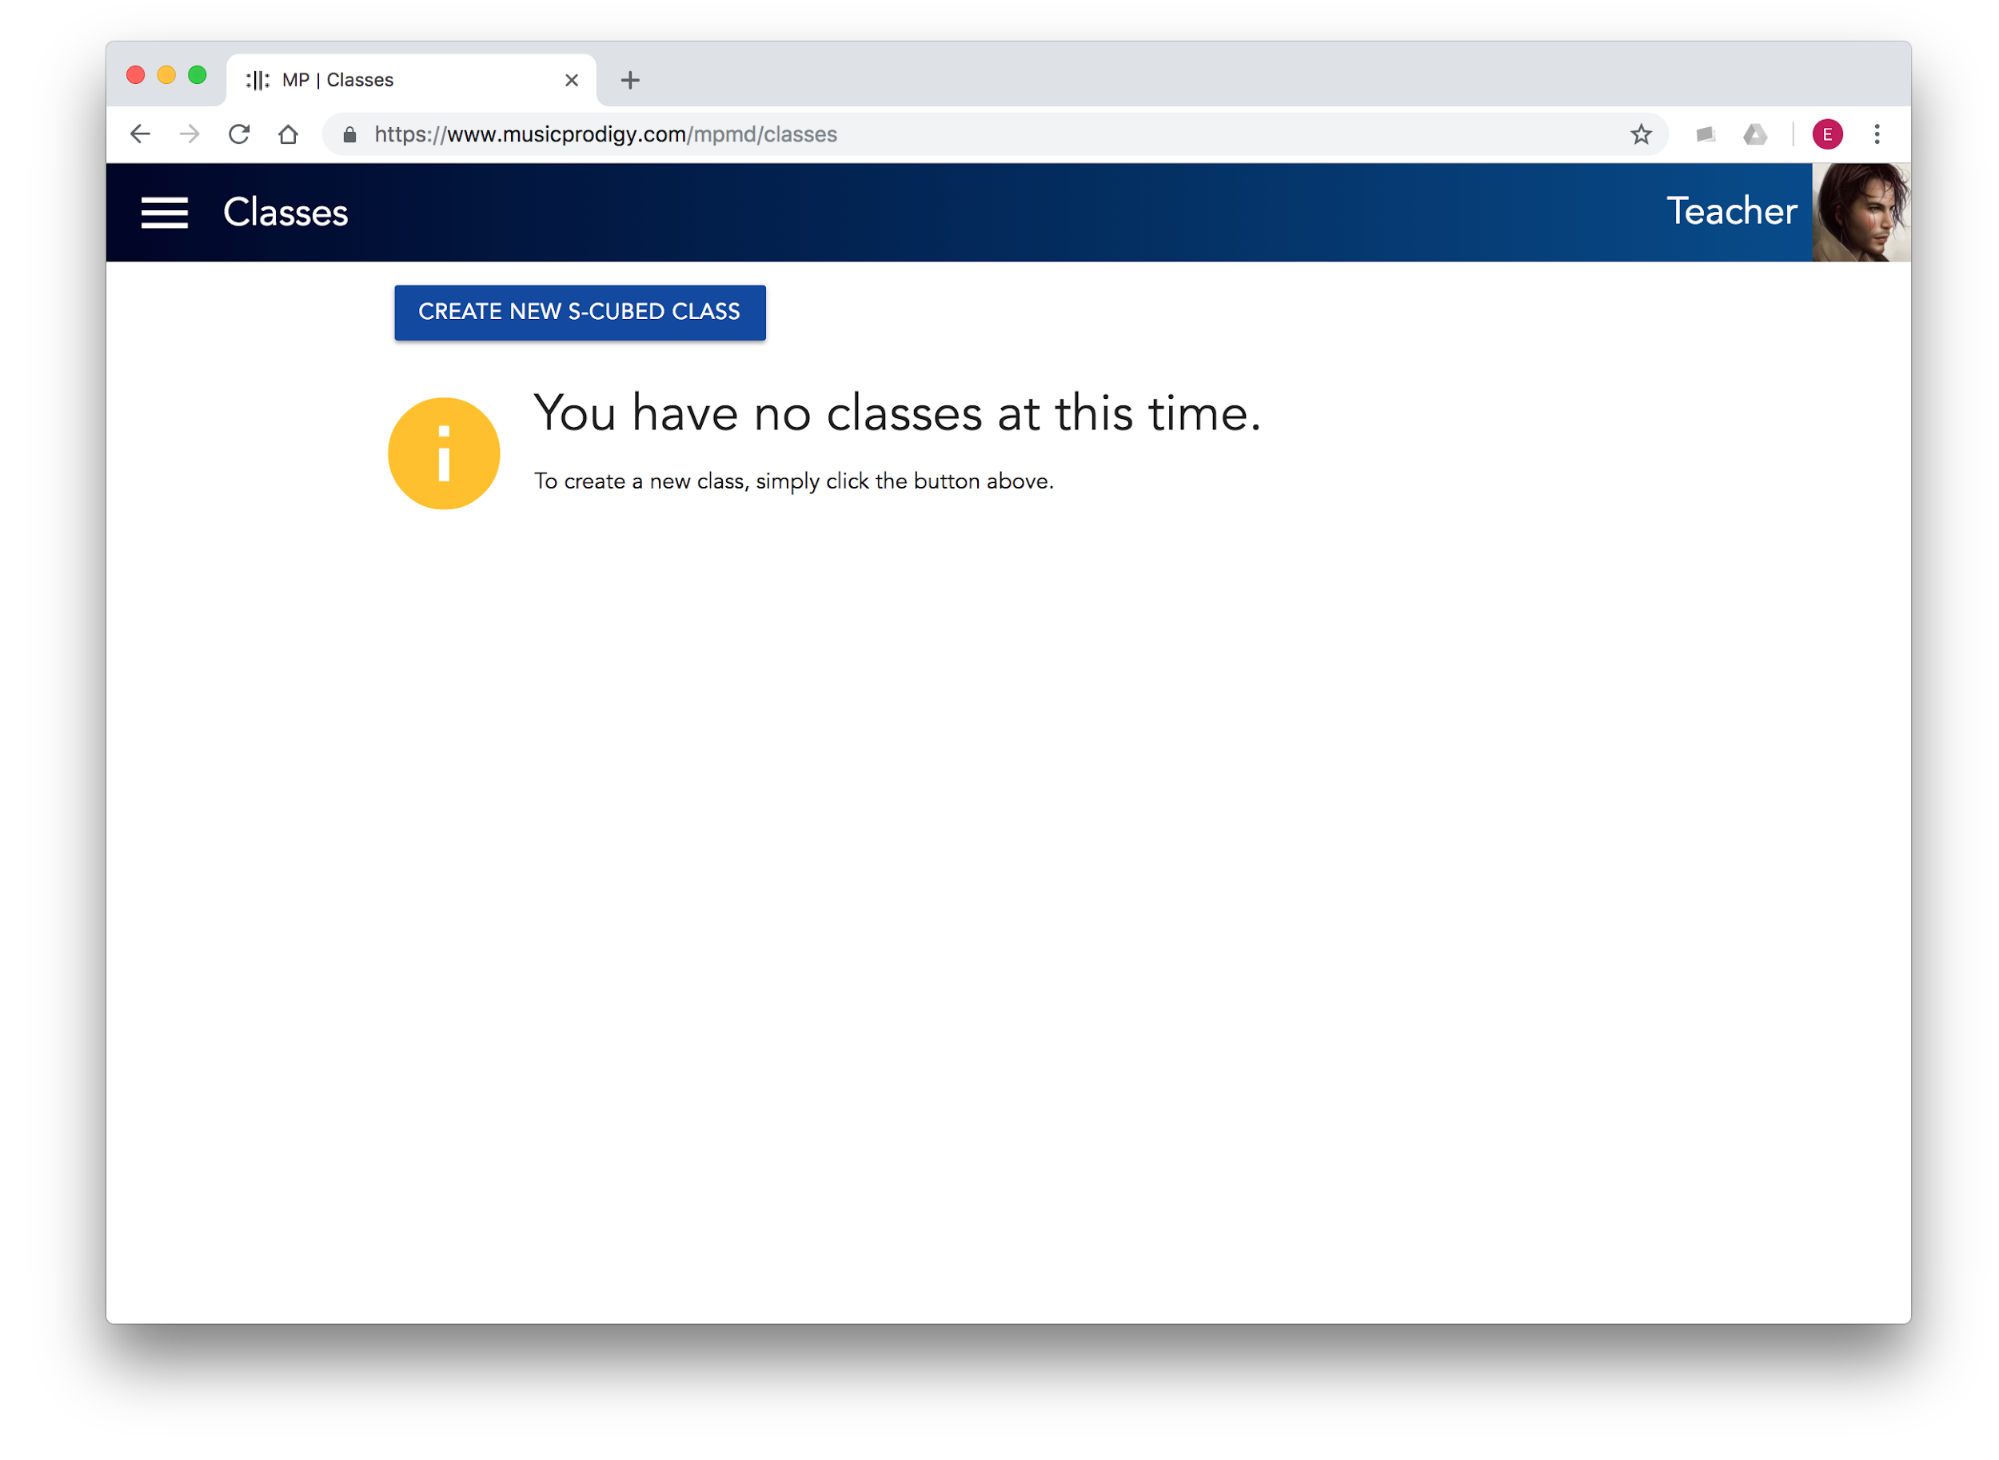
After you select Classes from the Main Menu, you should see a page like this:
The Classes screen - nothing to see here, move along!
Not very exciting is it? Unless you’ve already created one or more classes, you won’t see much except a message telling you that there’s nothing to see yet! Let’s fix that by creating a class.
|
|
Click the “Create New S-Cubed Class…” button. |
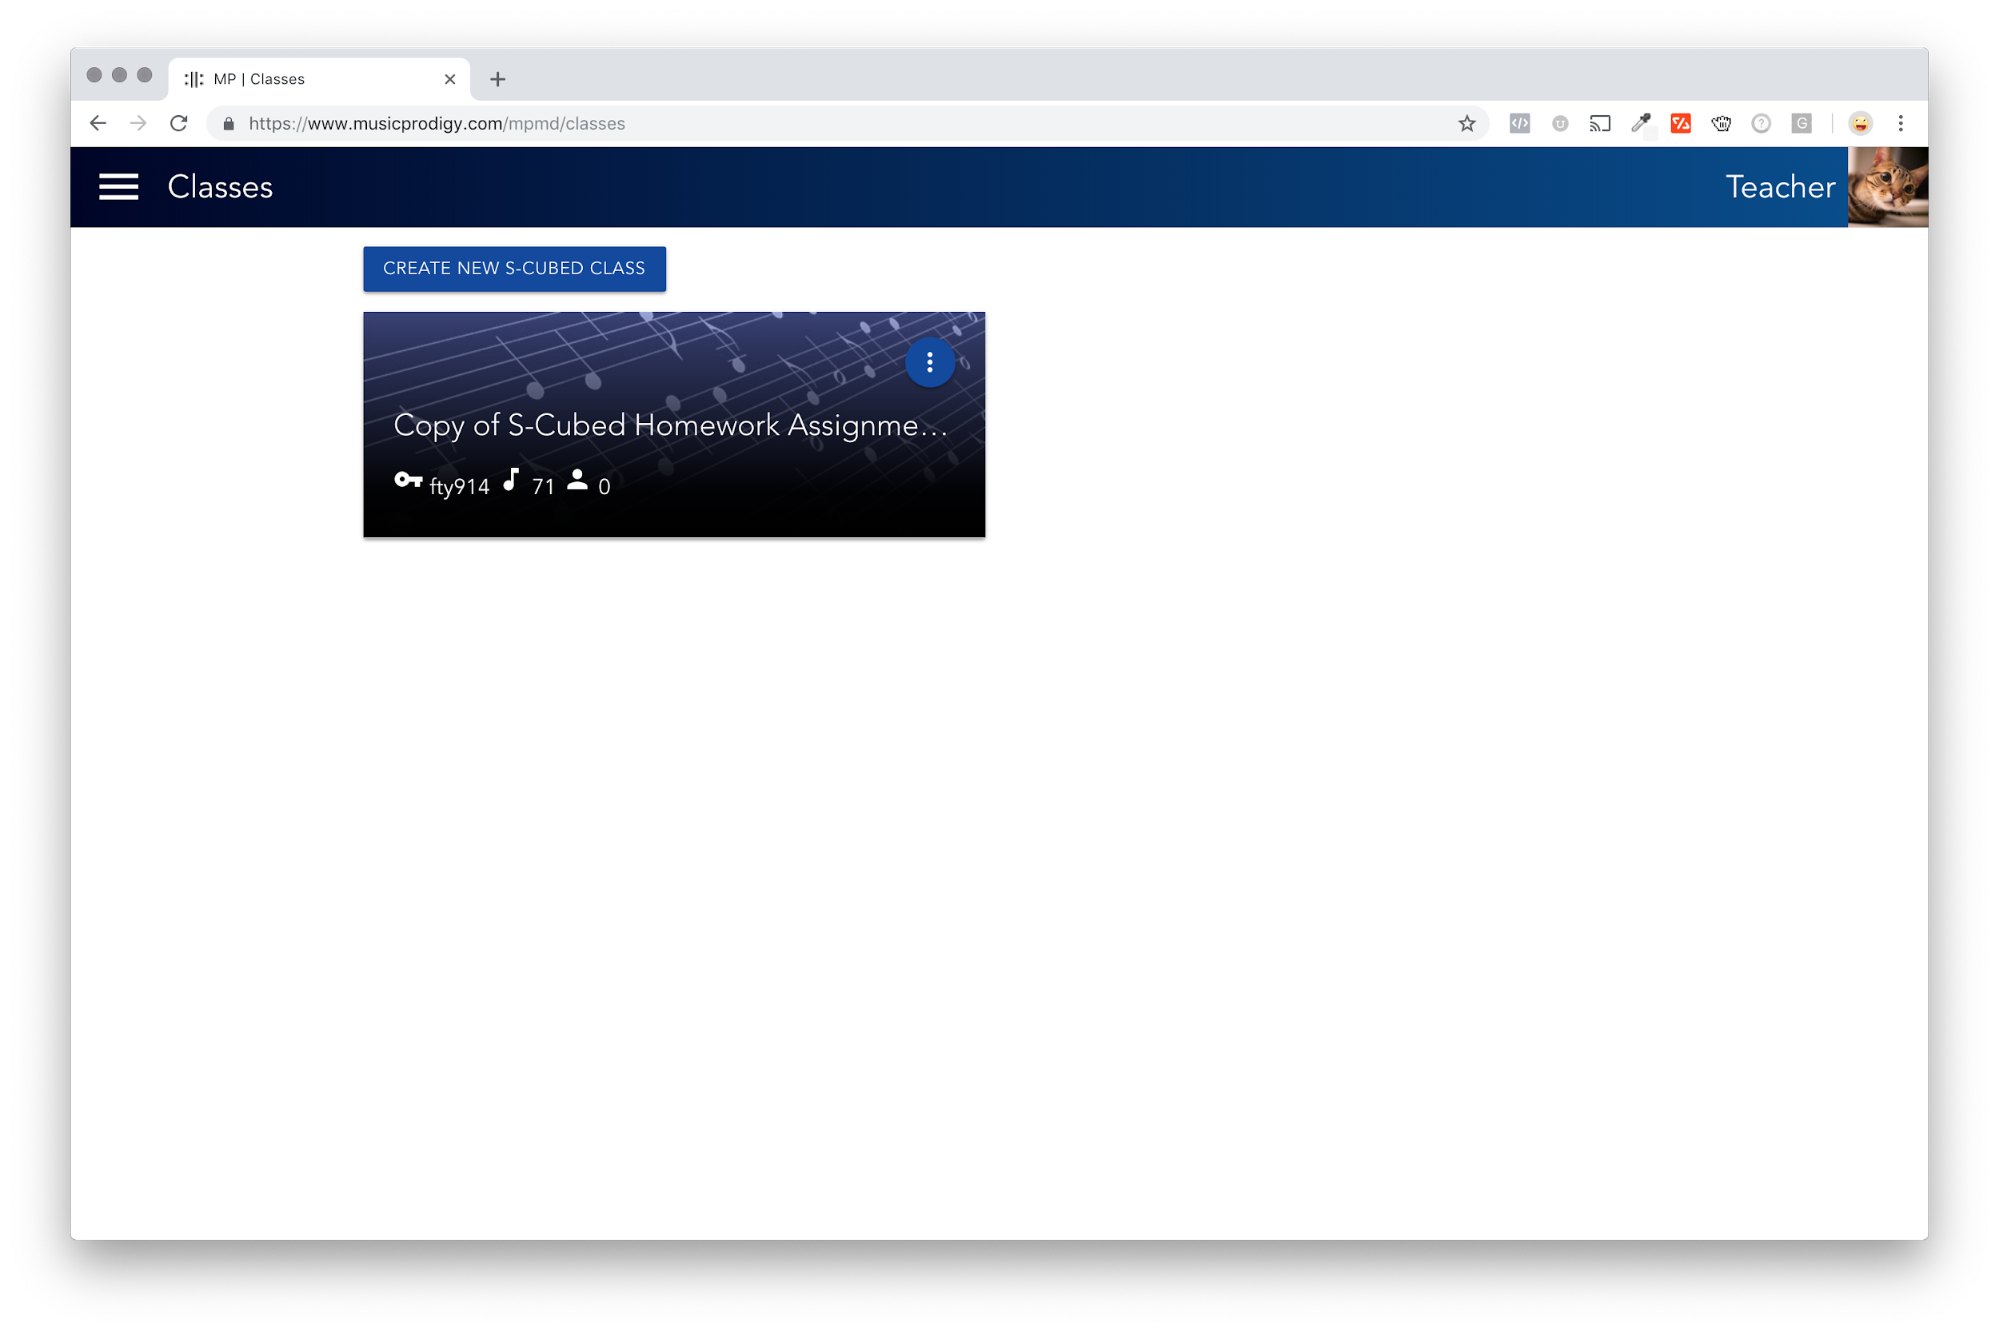
The process may take a few seconds, but afterward you should see something like this:
Your first class!
Let’s hope your first class looks different than the class from Ferris Bueller's Day Off!
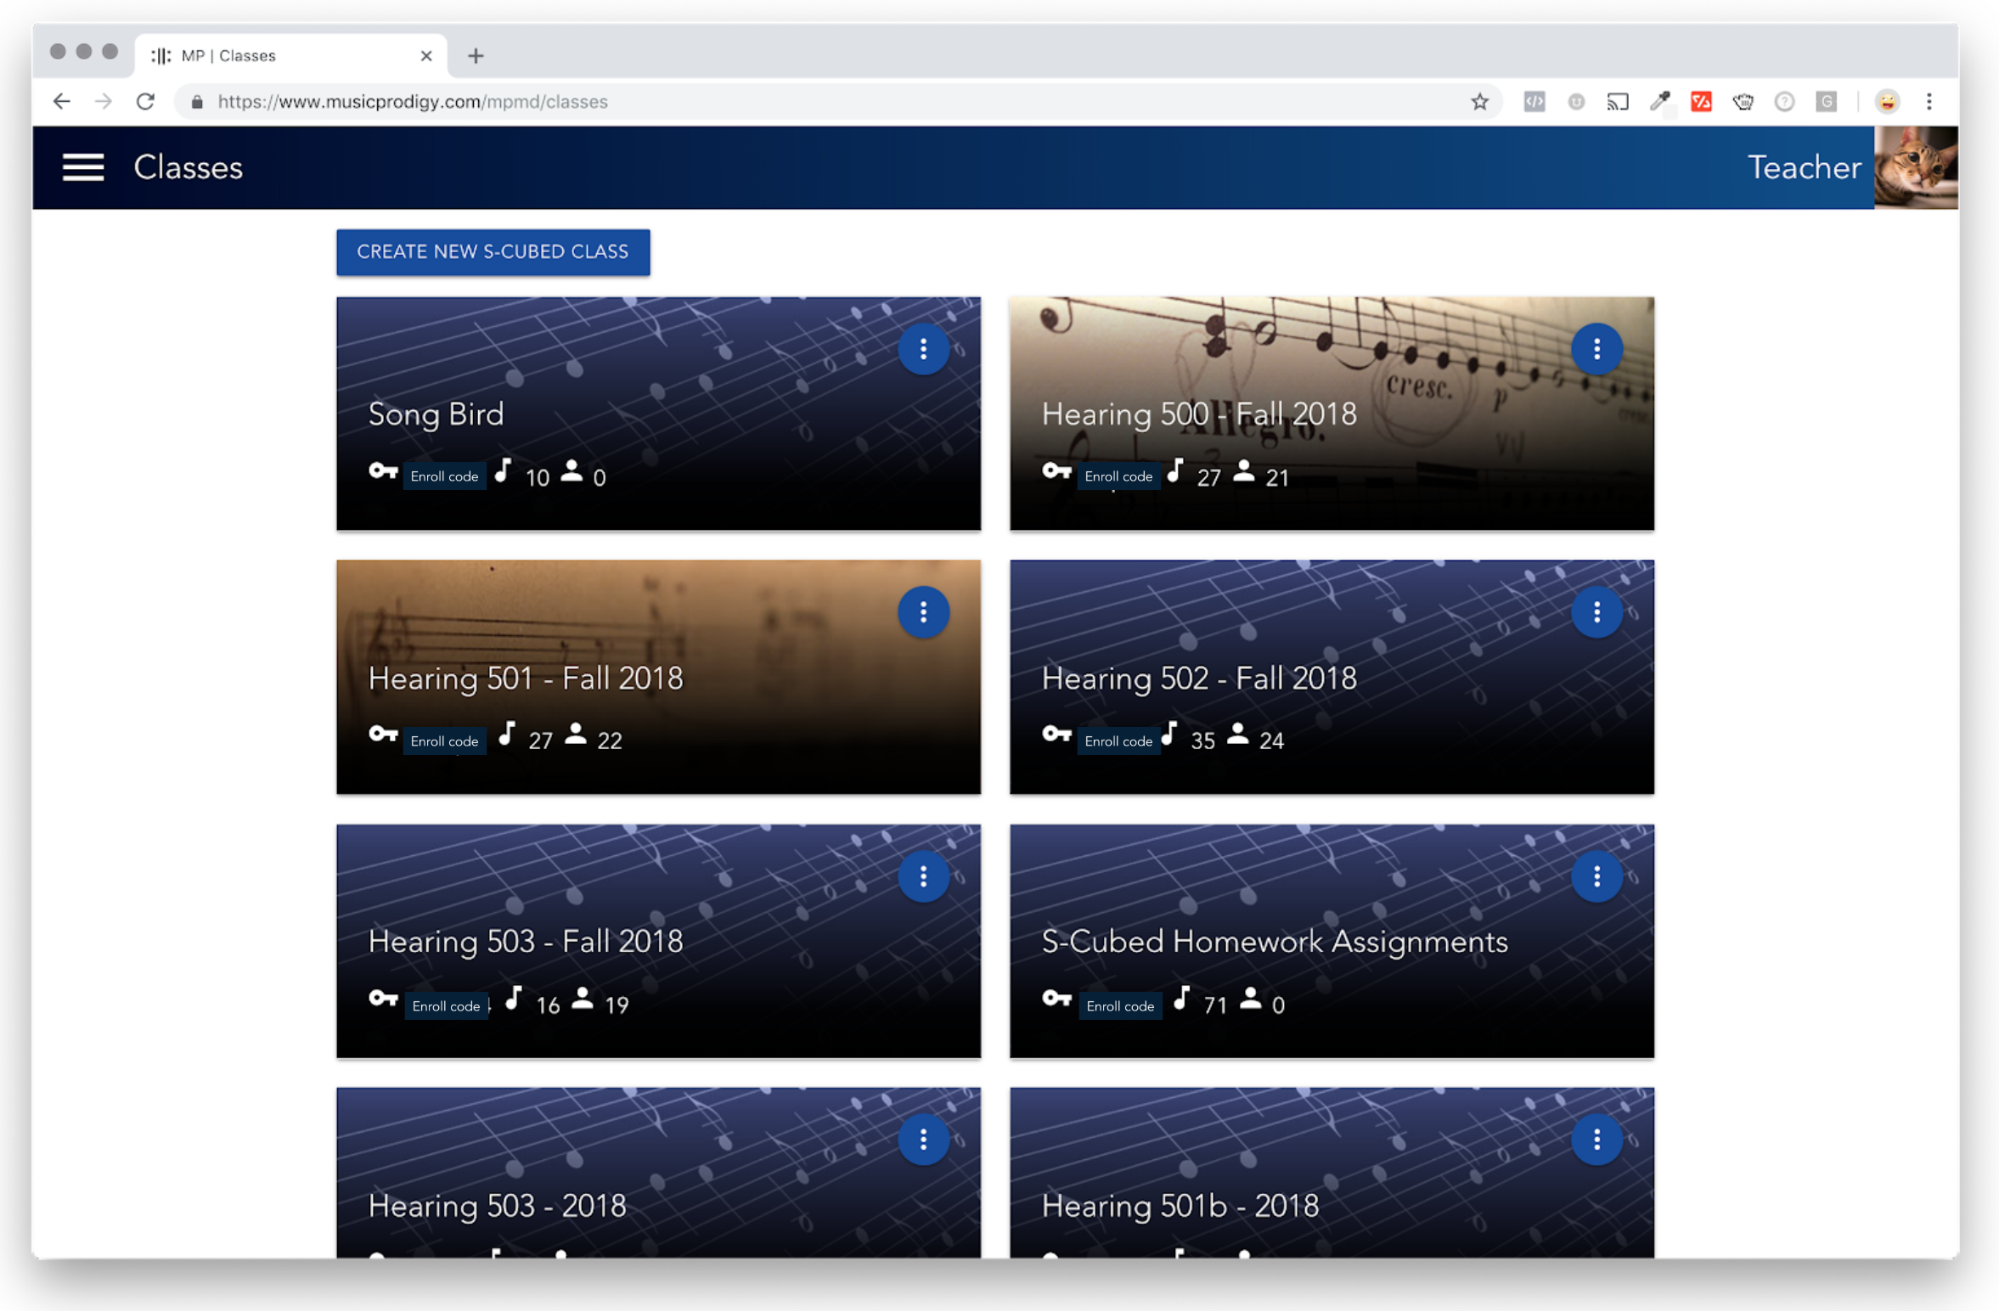
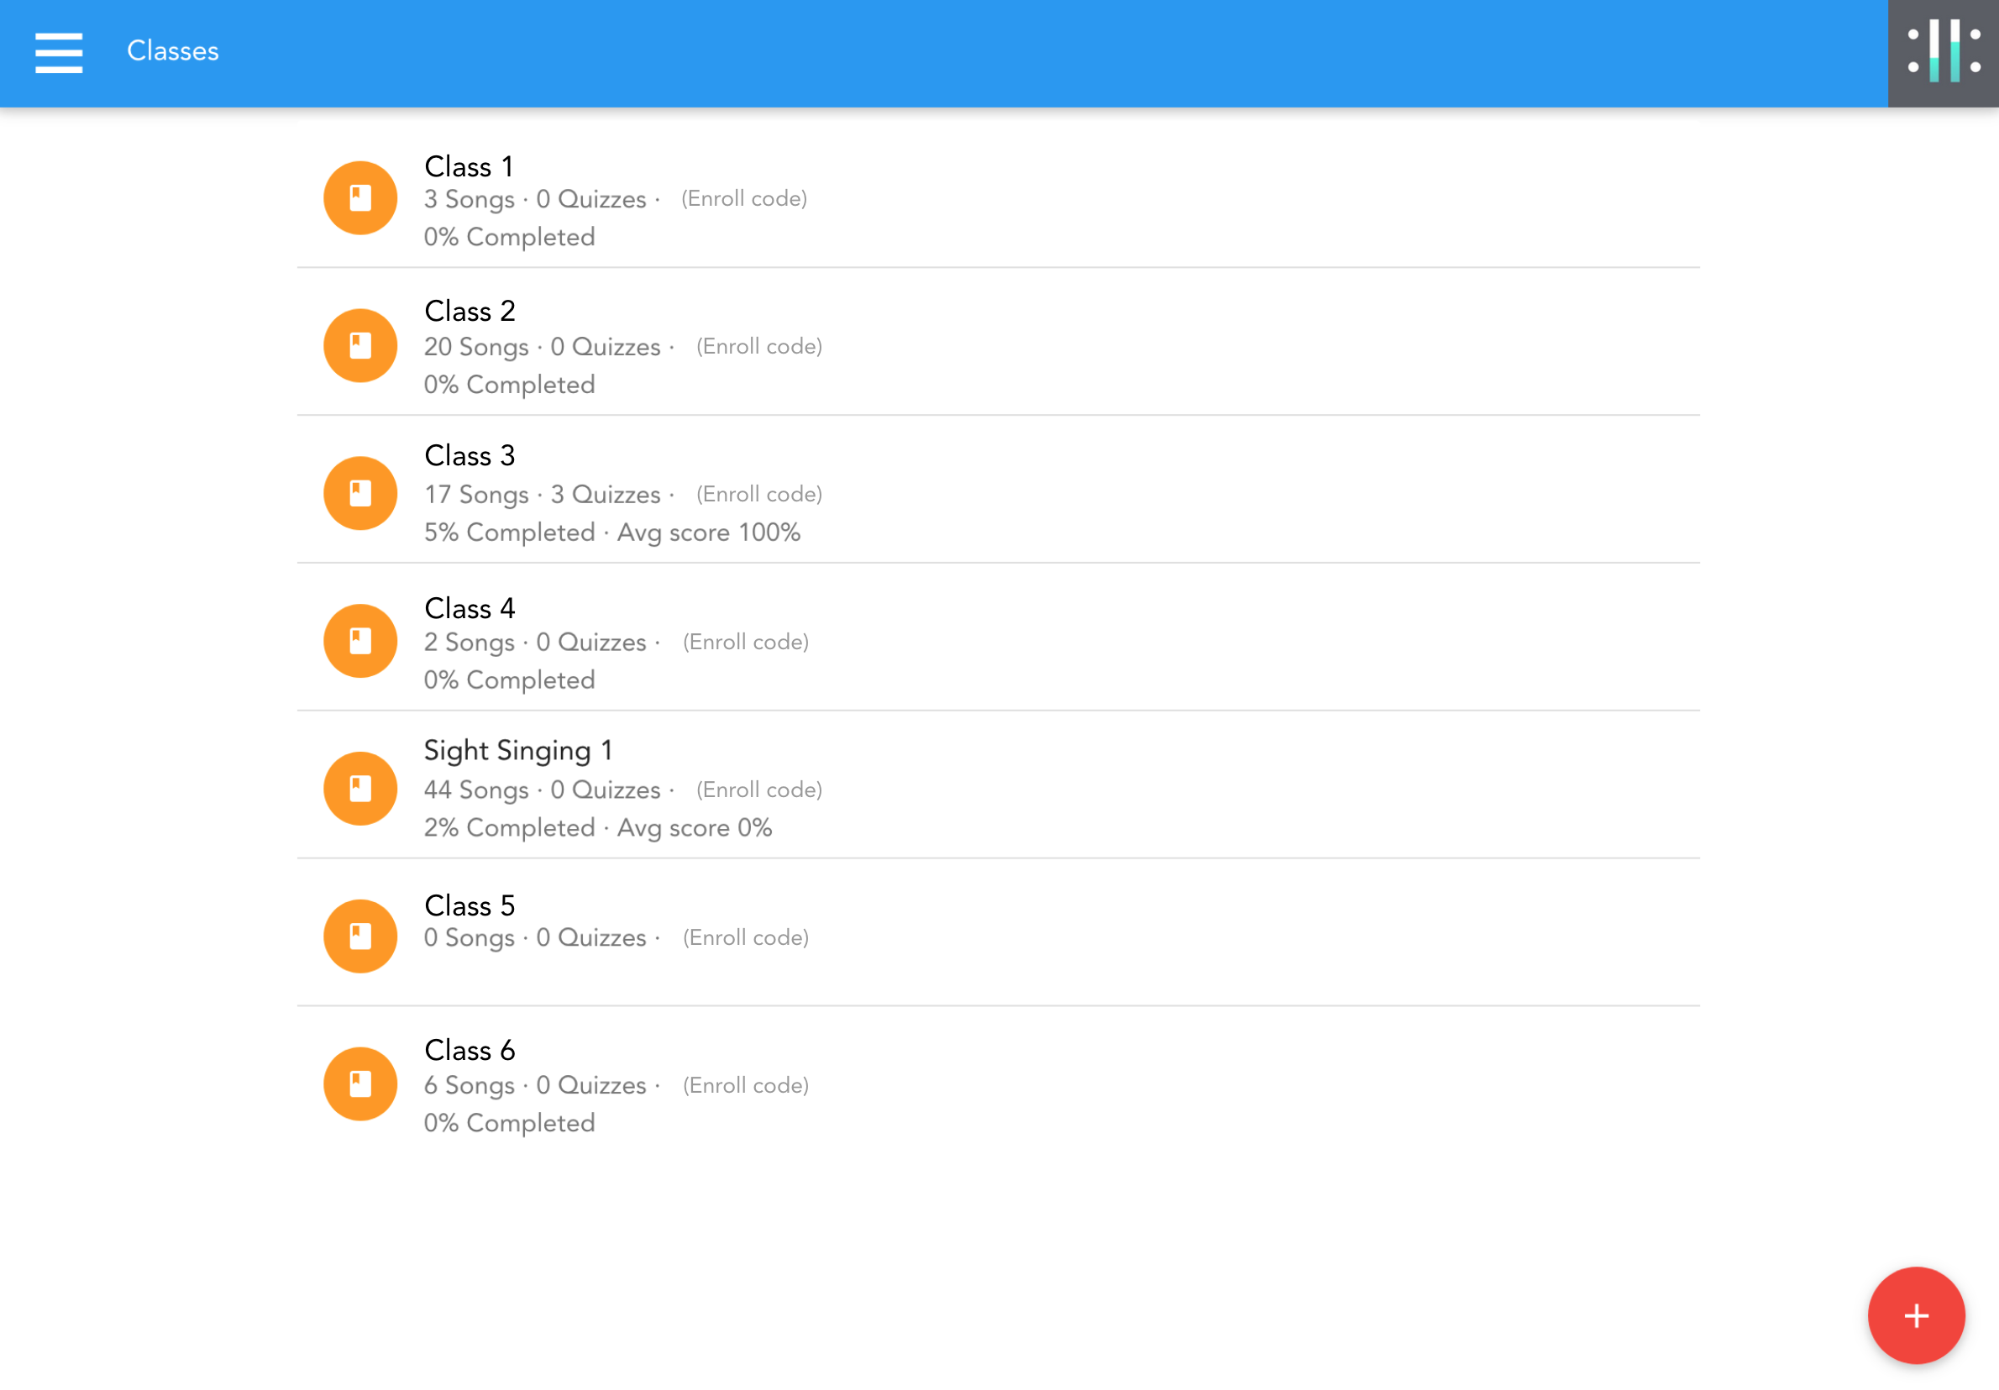
Eventually, you may have a few classes appearing here. The Classes screen is where you select which class you’d like to work with.
A Classes Screen with several classes.
|
|
Tip: If you have an existing class that you’d like to duplicate or clone, you may do so using the Pop-Up Menu on the class card (see below for an example of what the Pop-Up Menu menu looks like).
The Pop-Up Menu - It’s that circle at the top right of every class card.
Select Copy and a duplicate of that class will be created, with all the same content but no students enrolled. |
|
|
For now, simply select the new class you’ve just created (by clicking on it) and we’ll set it up. |
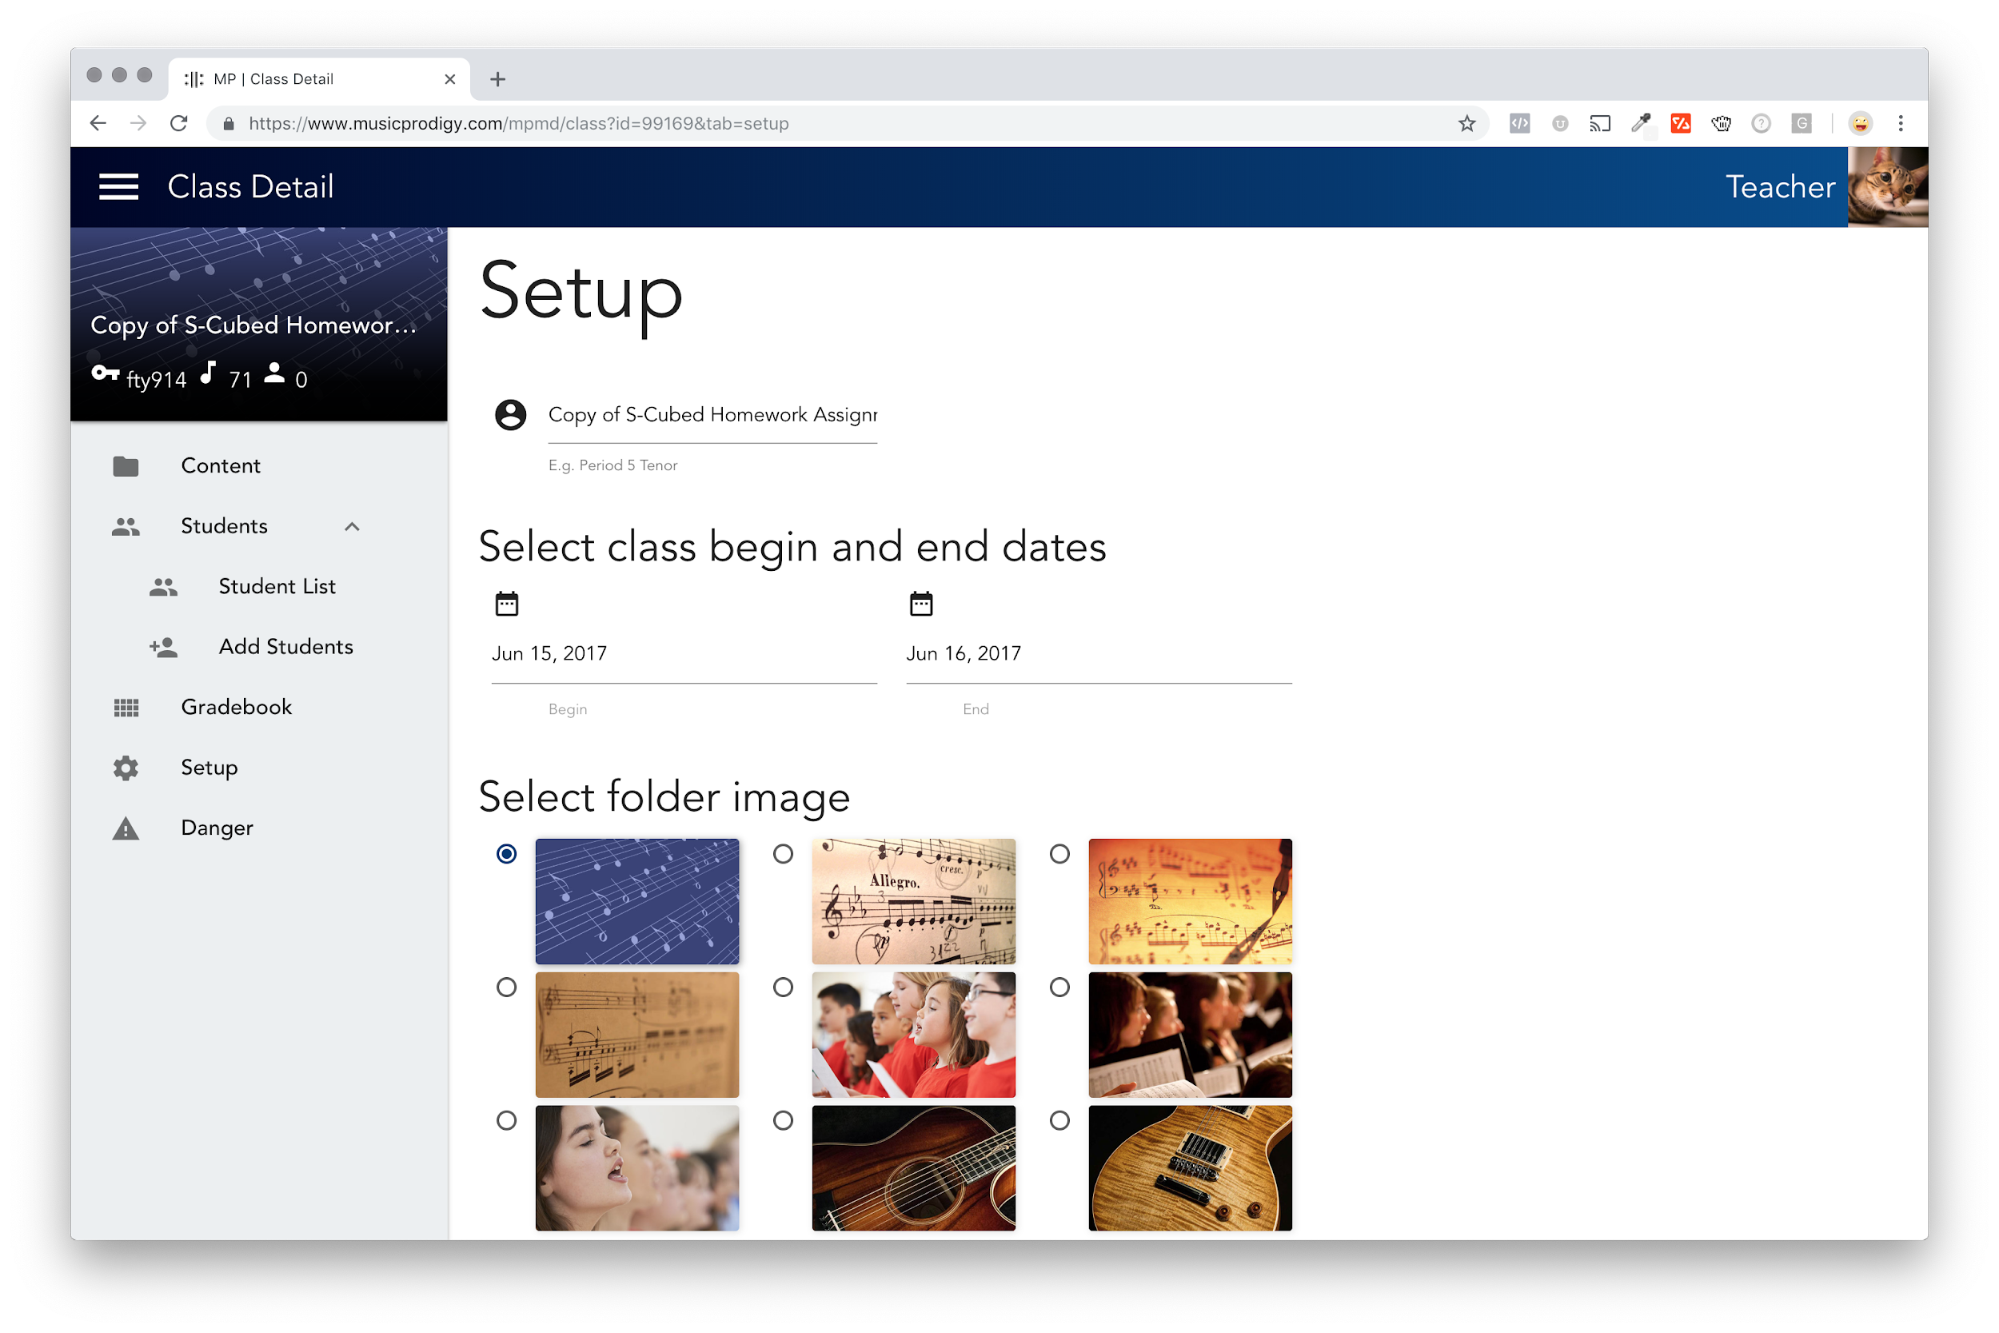
The Class Details screen! Notice that the left side (“sidebar”) has a number of options for editing the class.
You will work with the details of a particular class using the Class Details screen. On the Class Details screen a “sidebar” area will appear at the left which contains several options for the things about that class that you can control or change. Each option has its own values and controls which will appear in the central area of the screen when that option is selected. The currently selected option will be highlighted so you will always know what option you are looking at.
|
|
Setup should be highlighted currently, but if not, select it by clicking on the word Setup in the sidebar at left. |
The Setup screen is where you set up some basic aspects of the class. These include the name of the class, the begin and end dates, and an image that will help you identify this class at a glance.
|
|
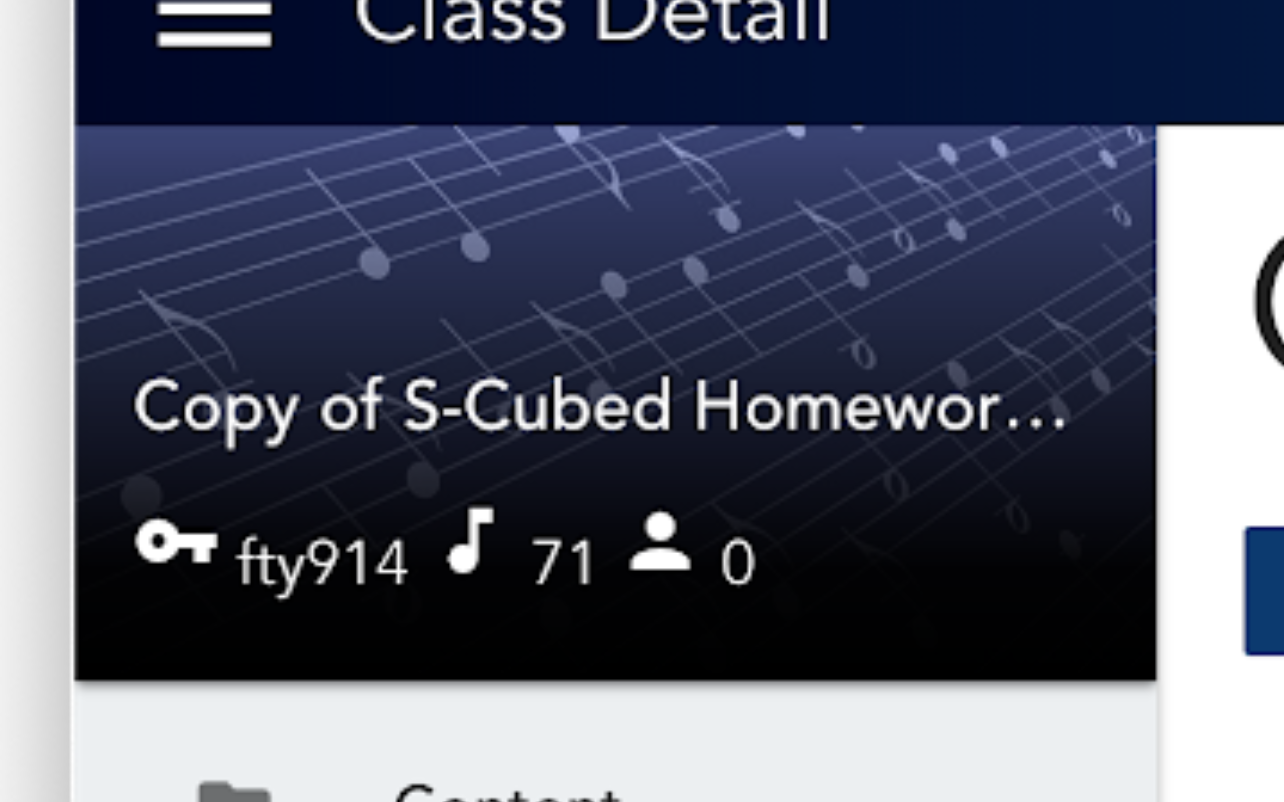
Note: You may name your classes any way you see fit, but very long names may not always appear, in full, on screens where space is limited! For that reason, the Class Details screen includes a typically-sized preview which shows how your class might appear in actual use elsewhere in the Dashboard. This preview is at the top left corner of the Class Details sidebar and it will update in real time as you change the class settings (see below).
The Class Card preview area - Super-long names may not display well!
If you must use longer names for your classes, your class name may be shortened with an ellipsis at the end of the name. |
|
|
Type a name, pick dates and select an image for your class, click the “Save Setup” button at the bottom of the screen. |
Later, if you’re not happy with these settings, you can always return to the Setup screen to change them.
A class without students isn’t much use. Let’s add some students now! Select Students ^ from the sidebar at the left of the screen.
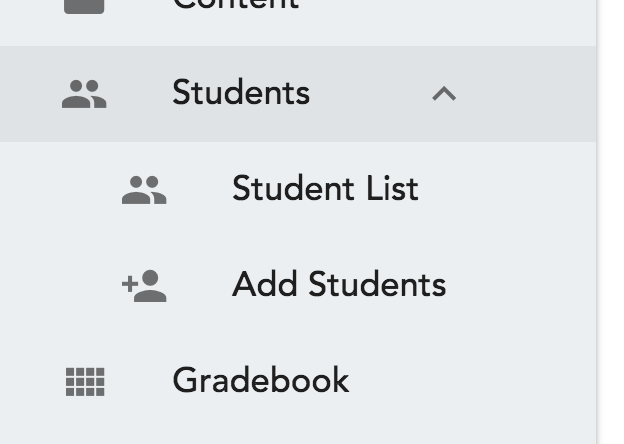
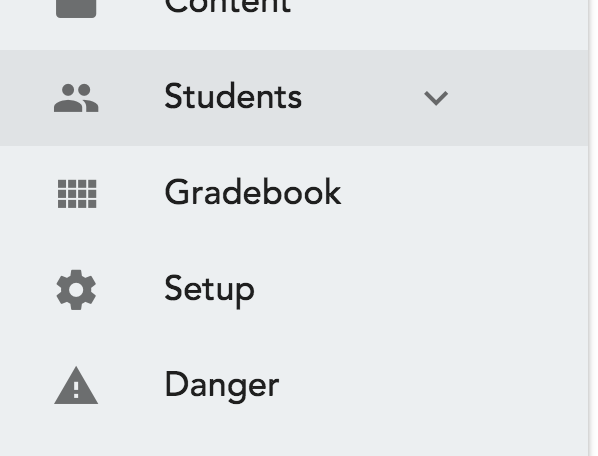
The first thing you may notice about the Students ^ option in the sidebar area is that it has two sub-options under it which are shown or hidden (in other words they toggle between visible and hidden) when you click on the main Students ^ option. These are Student List and Add Students.
Student List & Add Students - Now you see them… now you don’t!
The main students view is Student List which, just like it sounds, is a list of all students enrolled in the class. When the class is first created, of course (like now) there will be no list of students to see. So...
|
|
Click on the “Add Students…” button at the bottom of the Student List Screen -or- click on the Add Students option in the sidebar. |
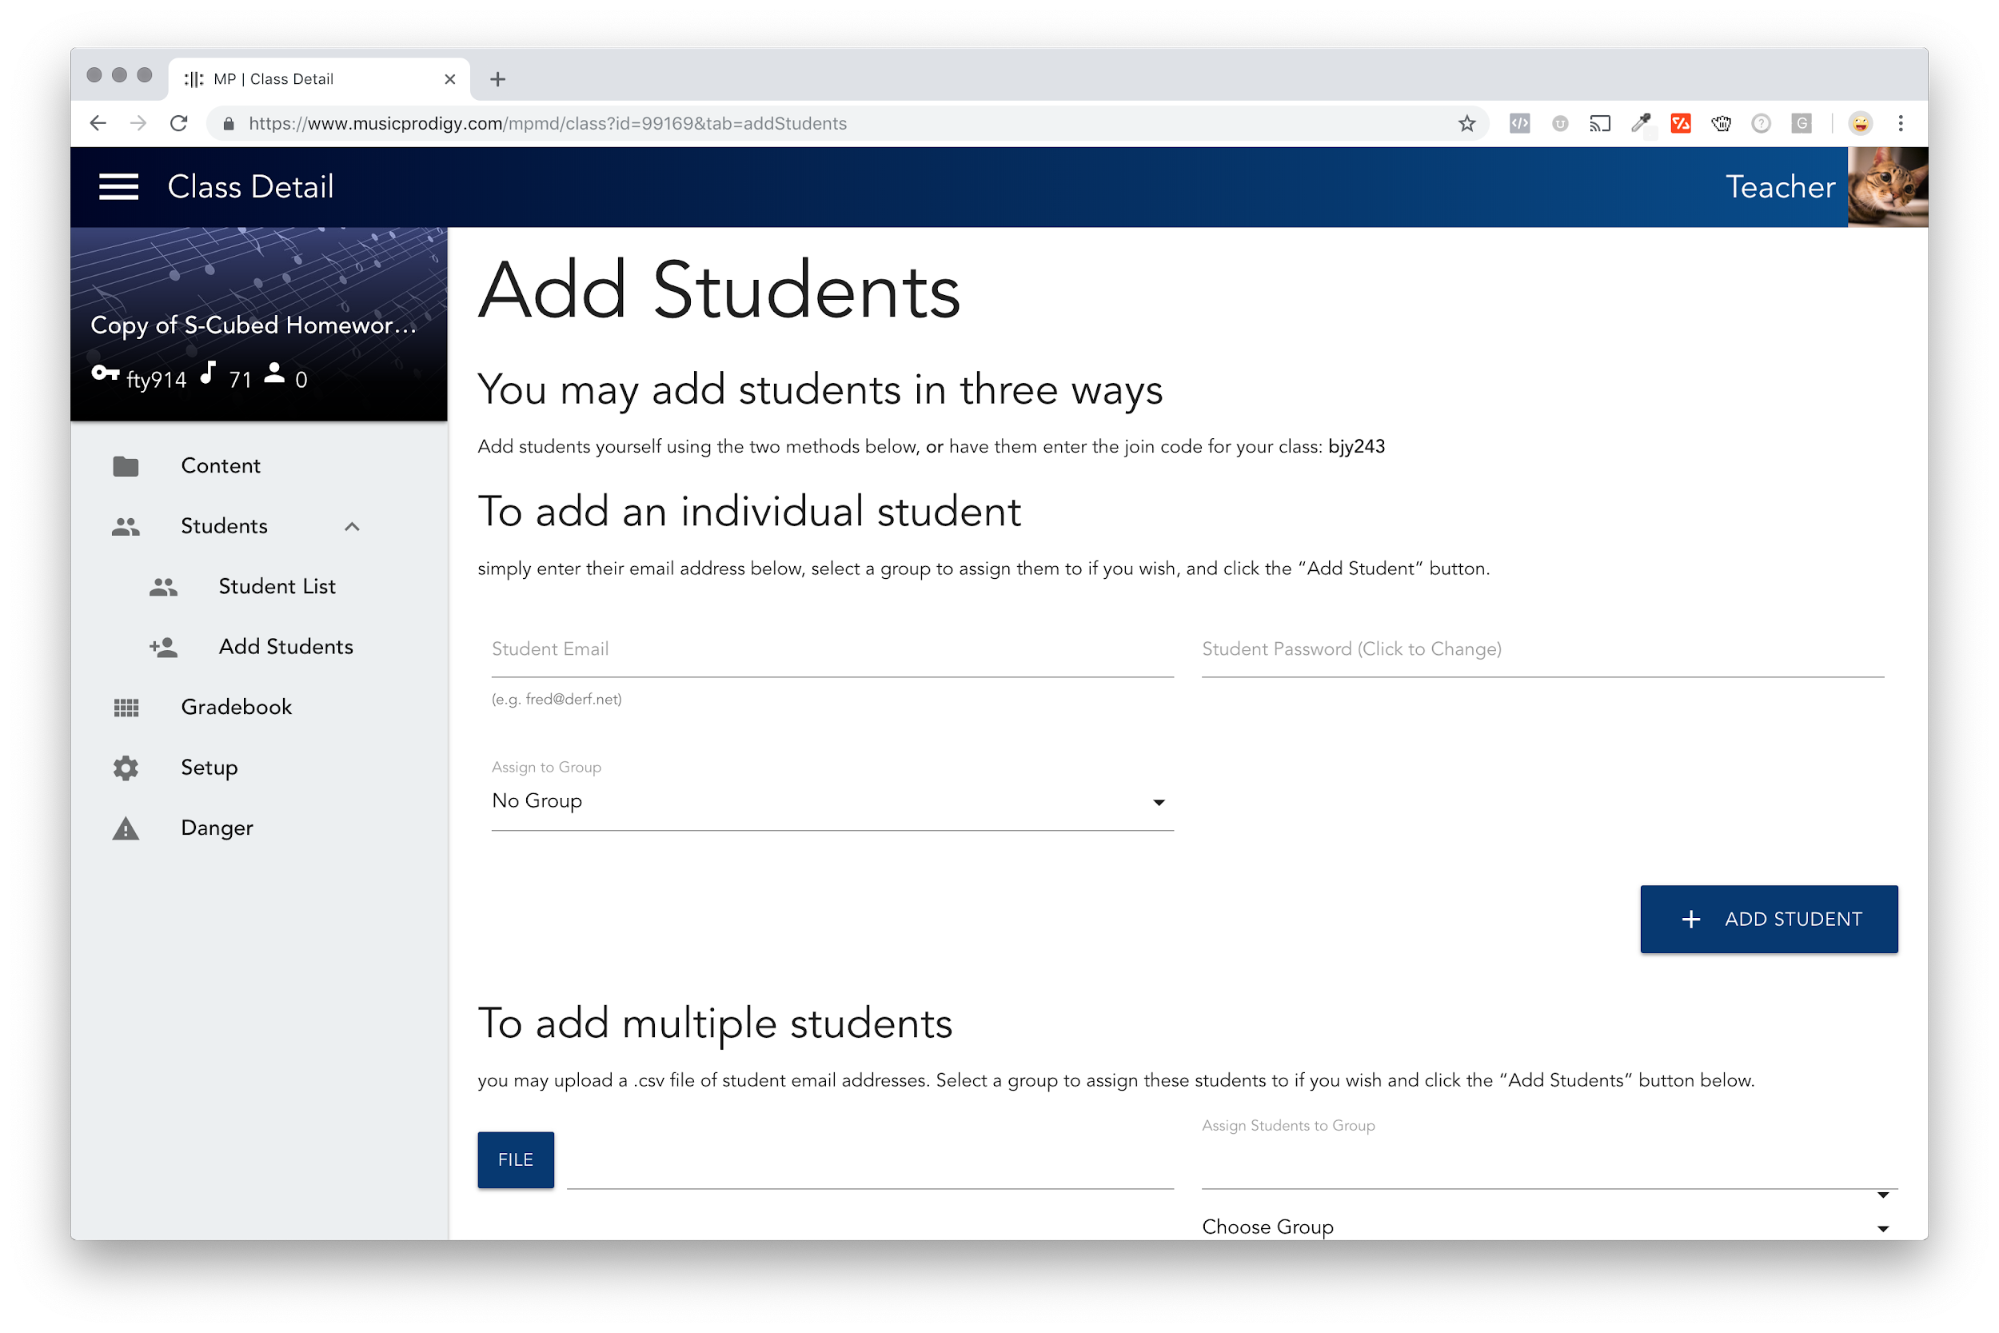
The Add Students screen will now be visible.
The Add Students screen.
There are three ways to add students to your class and we’ll take a look at each of them.
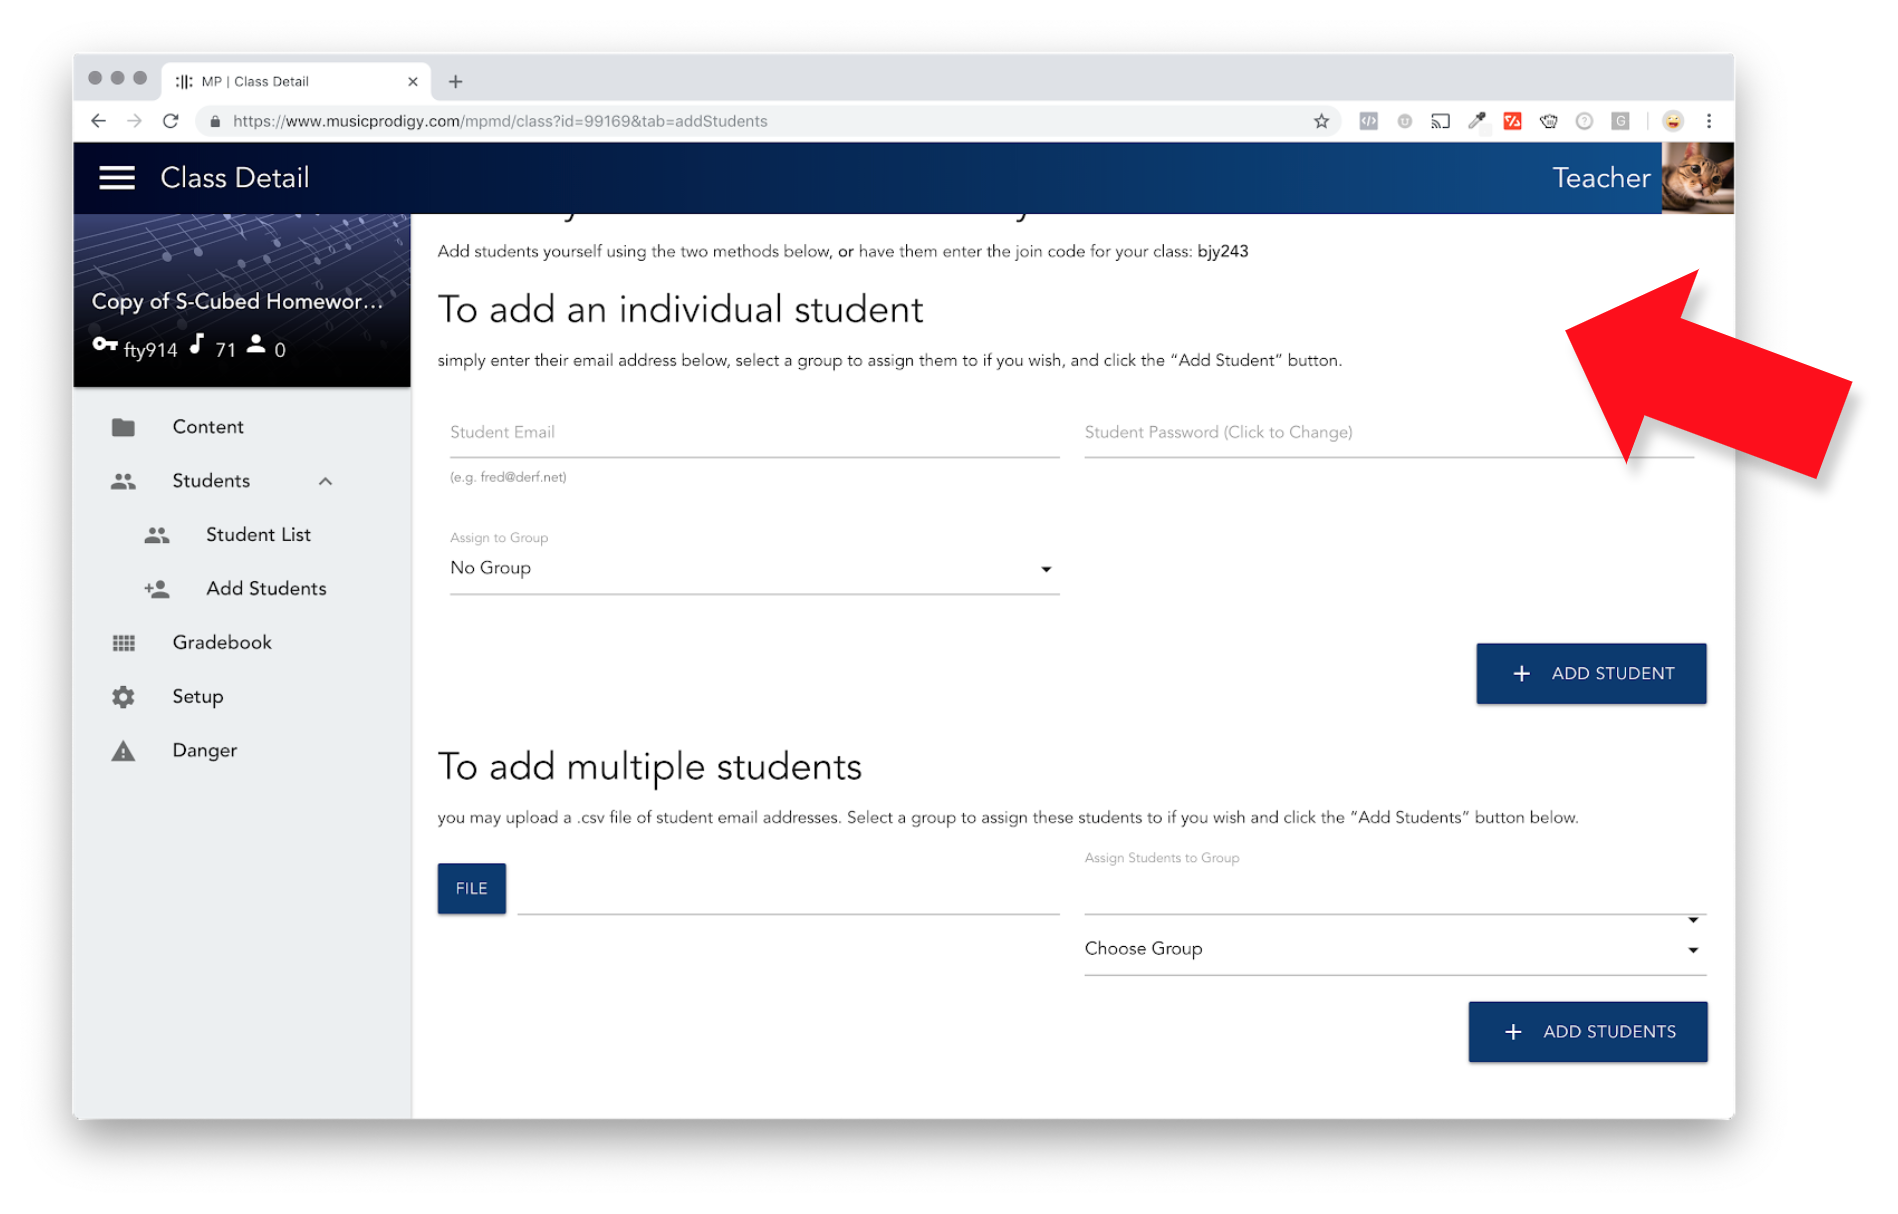
The simplest way is to add students individually, by entering the email address for that student and clicking the “Add Student” button.
The Add Individual Student section - You won’t see this huge red arrow on your actual screen!
|
|
Note: When you add a student or students, you are creating a Music Prodigy account for them if they don’t already have one. If they do already have an existing Music Prodigy account you are simply adding or enrolling them in this class. Either way, they will receive an email notifying them about your class and inviting them to log in. |
|
|
Warning: if your student is not able to receive email at the address you enter, that will be a problem. Schools commonly block incoming outside email to students. What’s to be done about this? - You’ll need to get your schools email administrators to “whitelist” (which is to say “allow”) email from the @musicprodigy.com domain. (Don’t worry if this sounds confusing, hopefully it will make perfect sense to them!) |
|
|
Tip: Optionally, you may select (or create) a group name for that student. Groups are a quick way to show / hide or select only certain students in the Gradebook screen or other places where long lists of students appear. You may define and assign as many groups as you like, so use them as you see fit. |
|
|
For now, enter the email address of one of your students, and click on the “Add Student” button. |
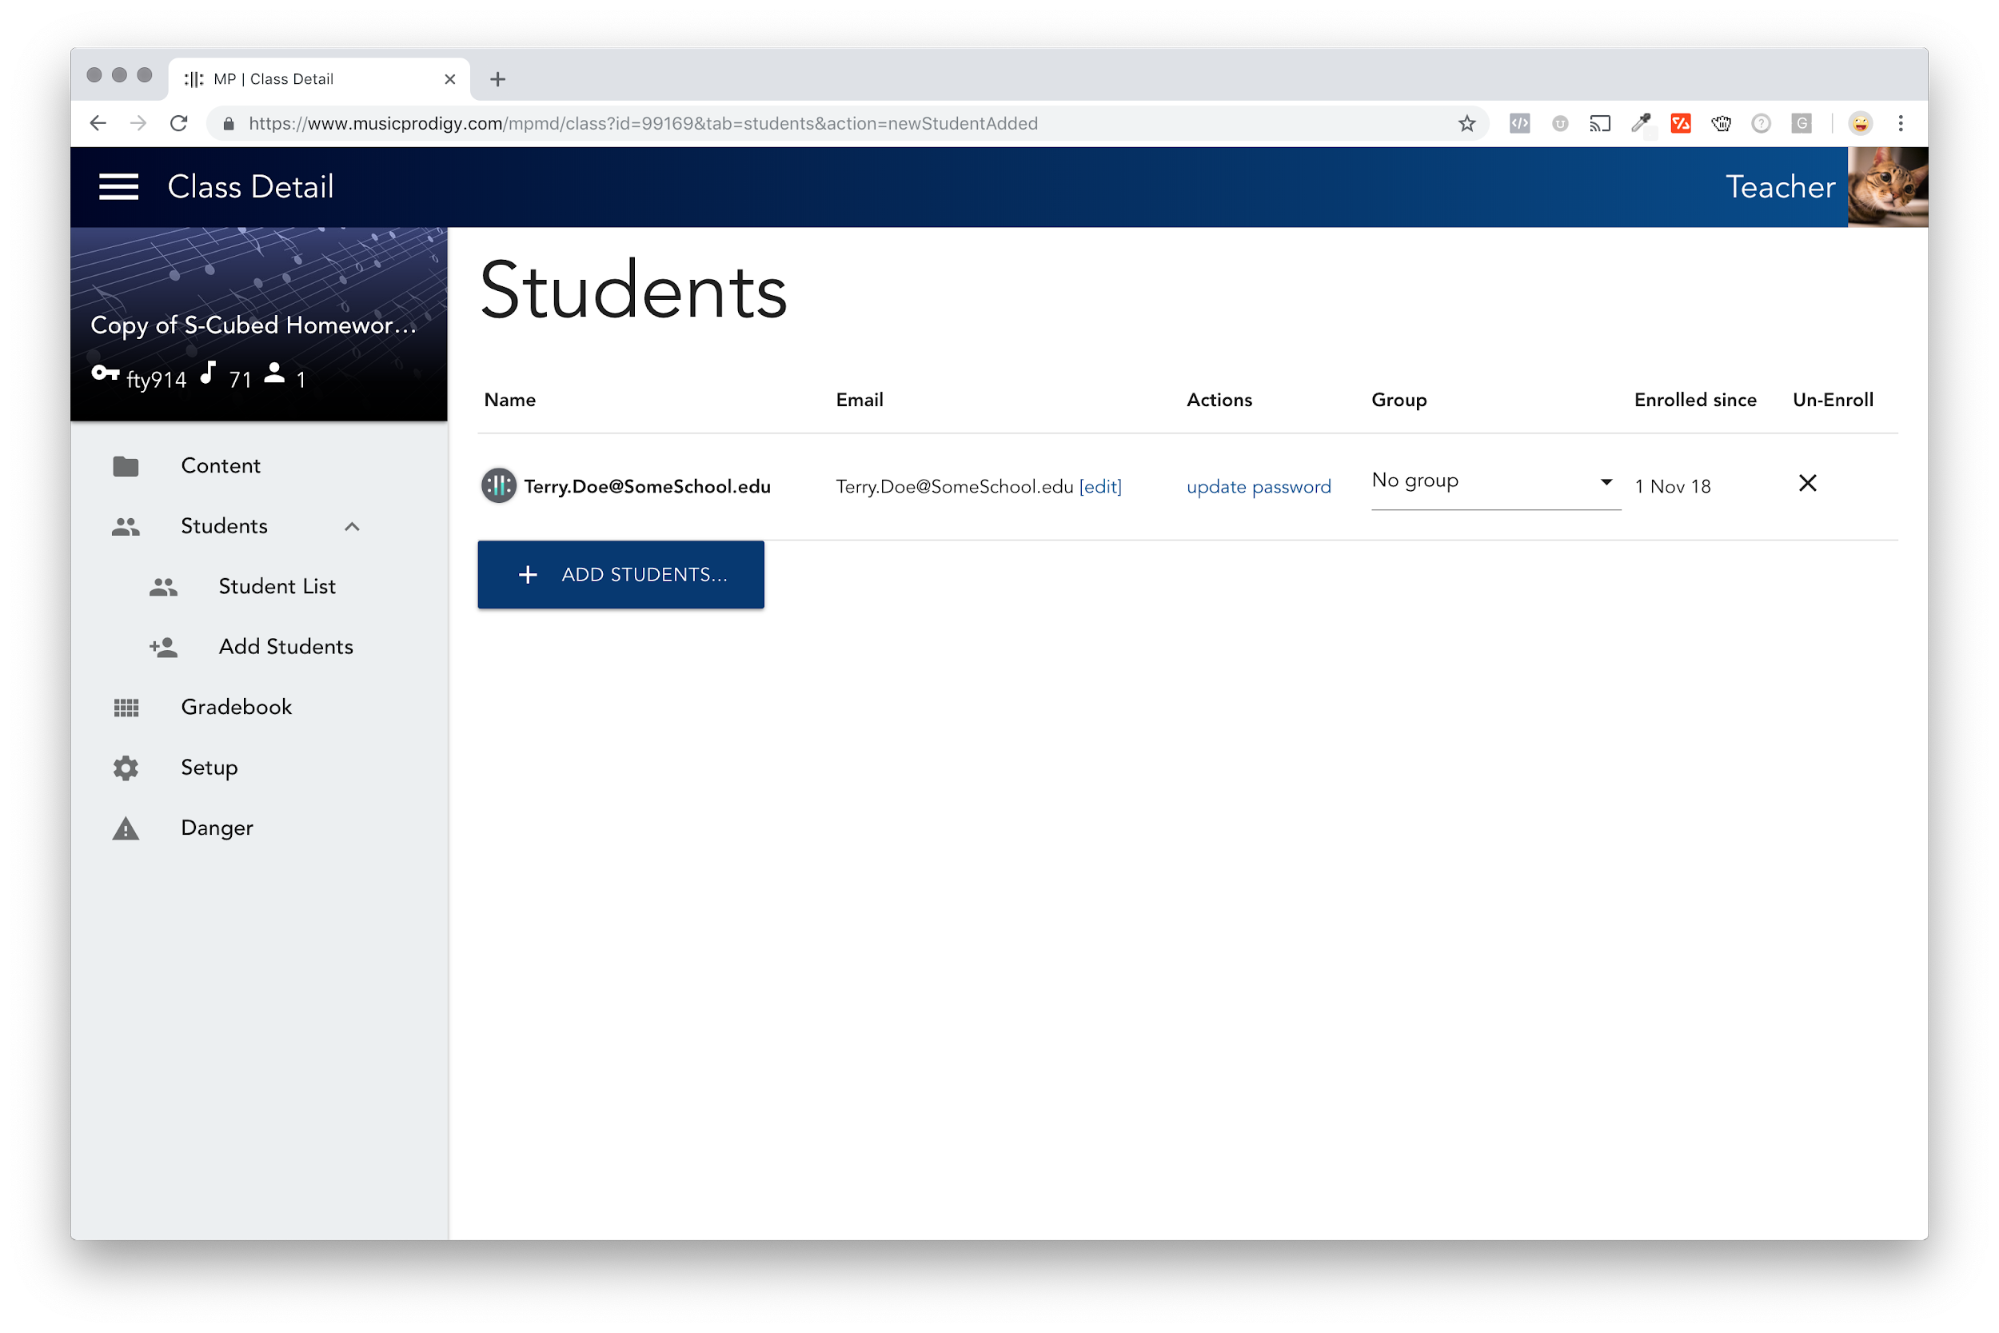
Return to the Student List screen by clicking on the Student List option in the Class Detail sidebar, and you should now see your student on the list!
You first new student - Terry Doe!
|
|
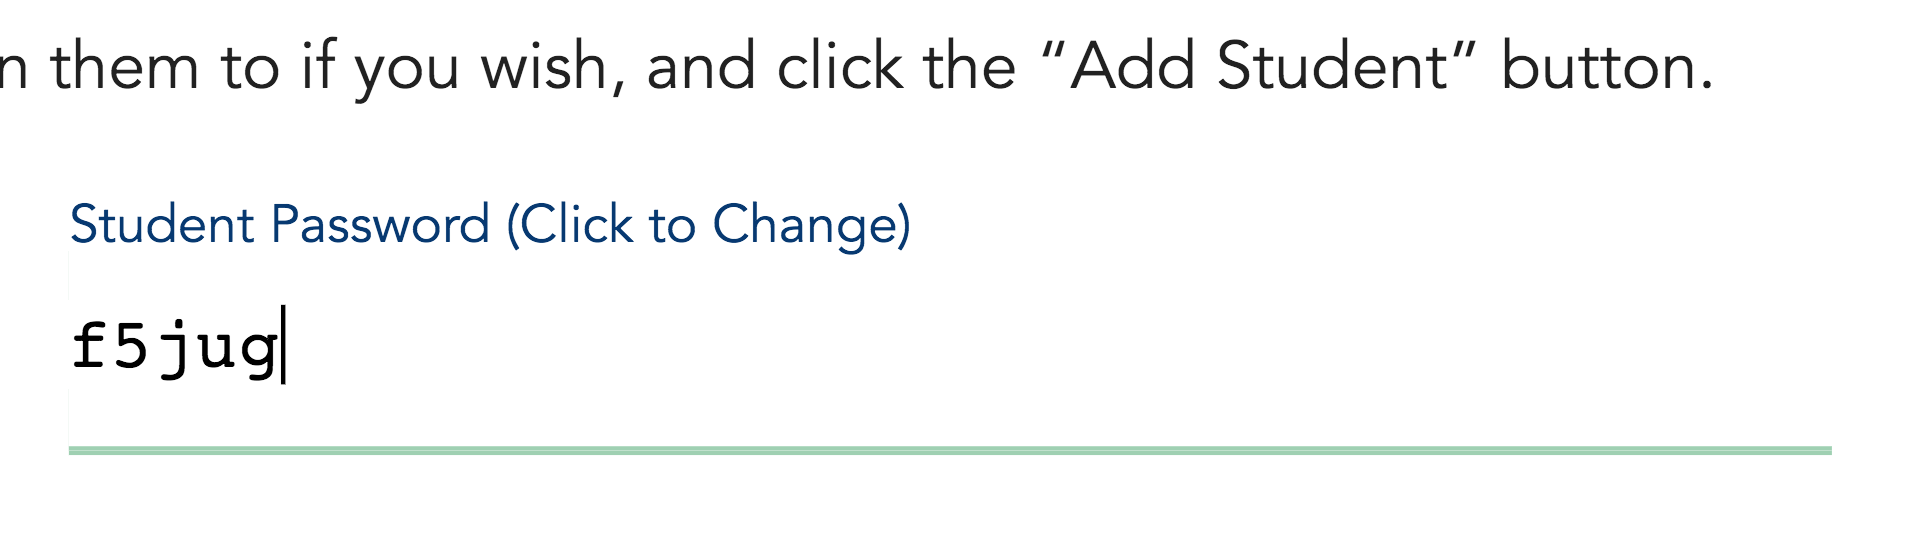
Note: When student accounts are created, they are assigned a randomly-generated password (see below for an example of this).
A random password.
You may change this password to anything you like now, or modify any student’s password later from the Student List screen. |
Another easy way to add students to your class (especially if you have a large number of students to enroll at once or have a list with student email addresses) is to create / enroll them all at once by uploading a file containing their information.
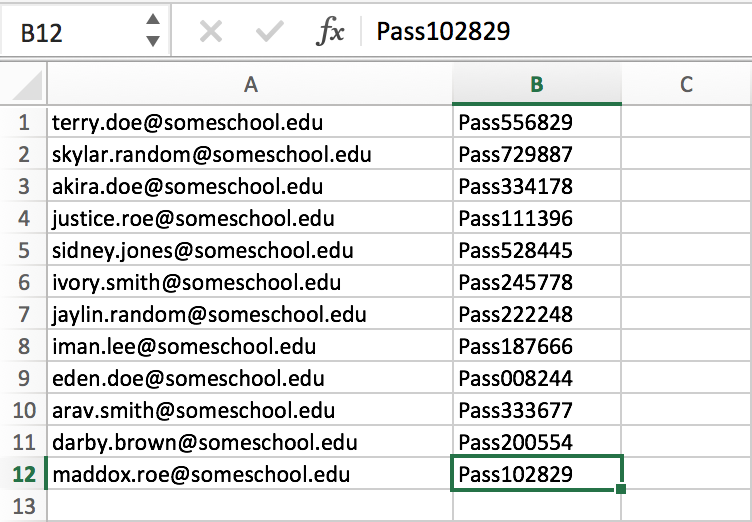
Your student file must contain a list of student email addresses in the first column and it may optionally contain passwords in the second column. The file must be saved in .csv format in order to be readable by the file processor (see below for an example of how a typical list might look in Excel).
Student email addresses in column A, student passwords in column B.
|
|
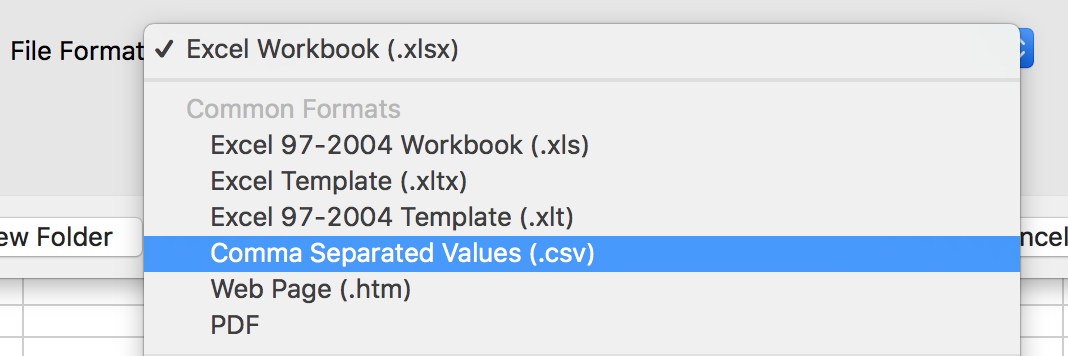
Note: .csv stands for “comma separated values” but you don’t need to worry about typing any commas if you have your list in Excel (or similar program) - you can simply Save As… and select Comma Separated Values (.csv) from the File Format drop down when you save the file (See below for an example).
Saving as a .csv from Excel. |
|
|
Warning: The .csv uploader isn’t very smart or very forgiving of errors! Bad data may not process completely (or at all!) so be sure that your file is in good form before you attempt to upload it (see the Tip below for some help).
The .csv Uploader: is it server-side magic, or just a mouse in a pointy hat? |
|
|
Tip: If all of this talk of file formats seems confusing, you can download an example file that is already correctly formatted from the Add Students screen by clicking the “Download Example .csv” button. Then just type over the example names (and add more rows of names as needed). Save the file in the same format (.csv) and upload it as described below. |
|
|
Once your .csv file of student email addresses (and passwords if you wish) is prepared, click the “File” button and locate your file on your computer to select it. The file name should appear on the line to the right of the “File” button. Now click the “Add Students” button to add your students. |
Return to the Student List screen by clicking on the Student List option in the Class Detail sidebar, and you should now see your students on the list!
There is a third way for students to enroll in your class if they already have an existing Music Prodigy account (or if you would like your students to create their own accounts independently).
Existing Music Prodigy account holders may enter the join code for your class. When a student logs in to Music Prodigy, a red “+” button will be visible at the bottom right of the Classes screen. Clicking the “+” button will allow them to enter your class join code into the field provided and click the “Enroll” button.
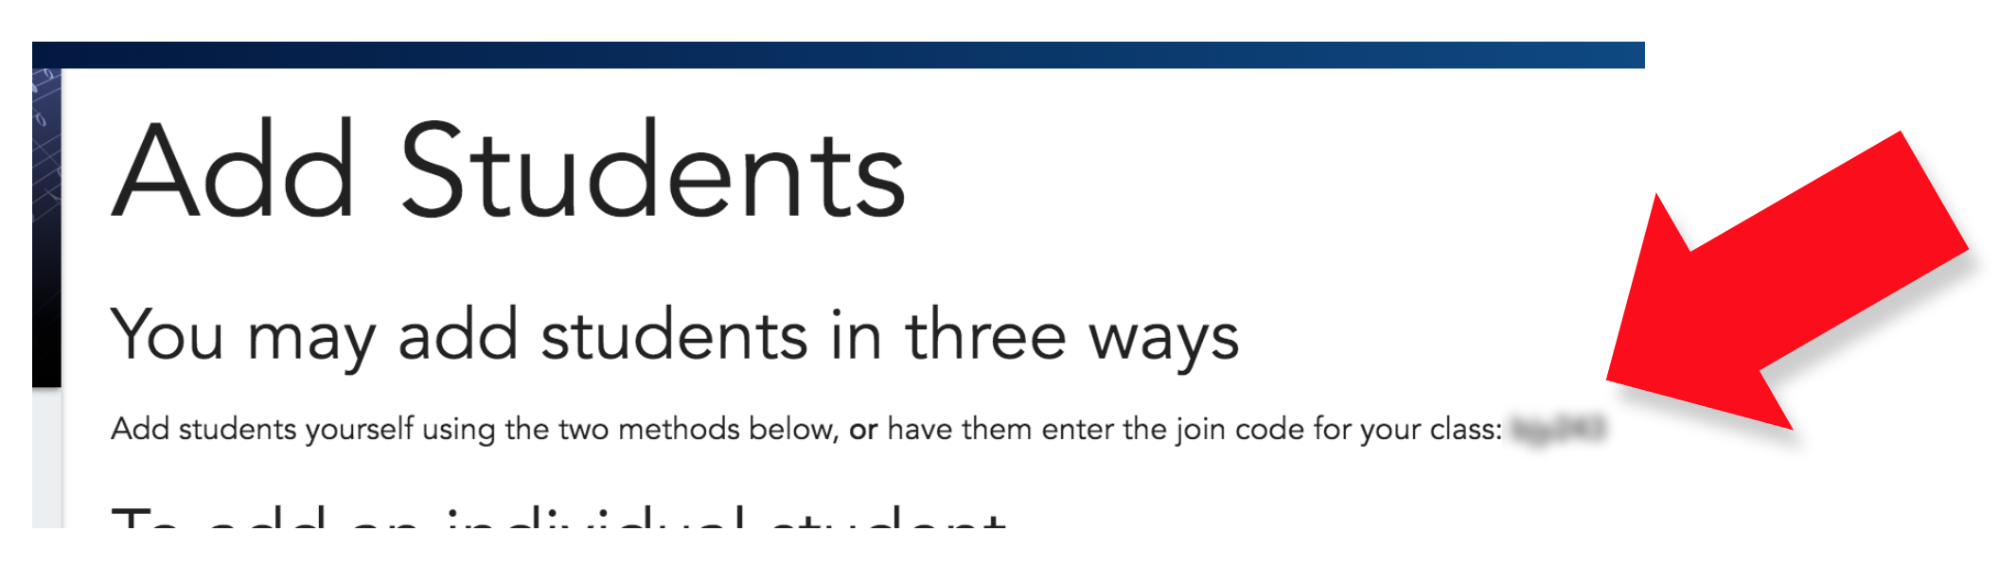
The join code for your class appears at the end of the third line of text on the Add Students screen:
The join code for your class will appear here - huge red arrow for illustration purposes only!
Students who enroll by entering the join code will appear on the Student List screen which you can check by clicking on the Student List option in the Class Detail sidebar.
|
|
Note: If you would like your students to create their accounts on their own, they will need to complete the following steps and then use the join-code method described above in order to be enrolled in your class.
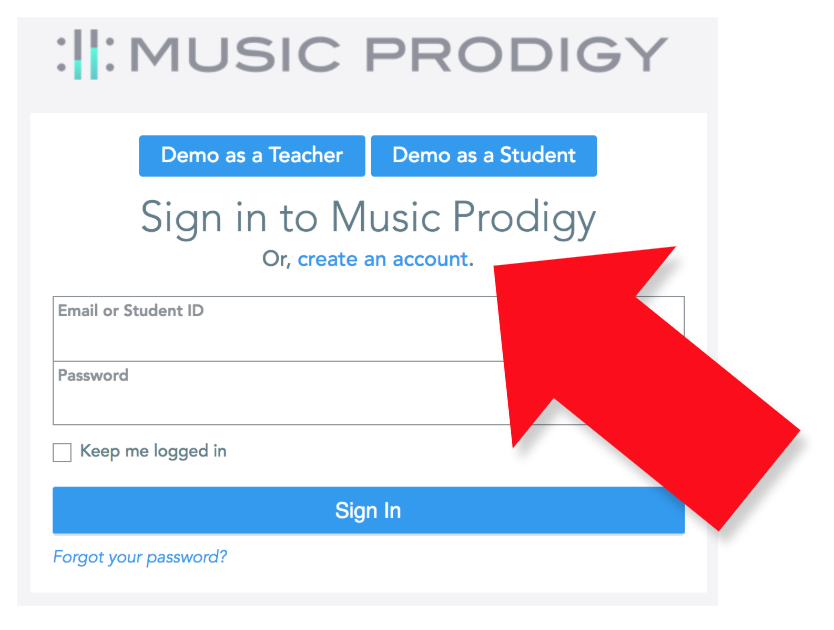
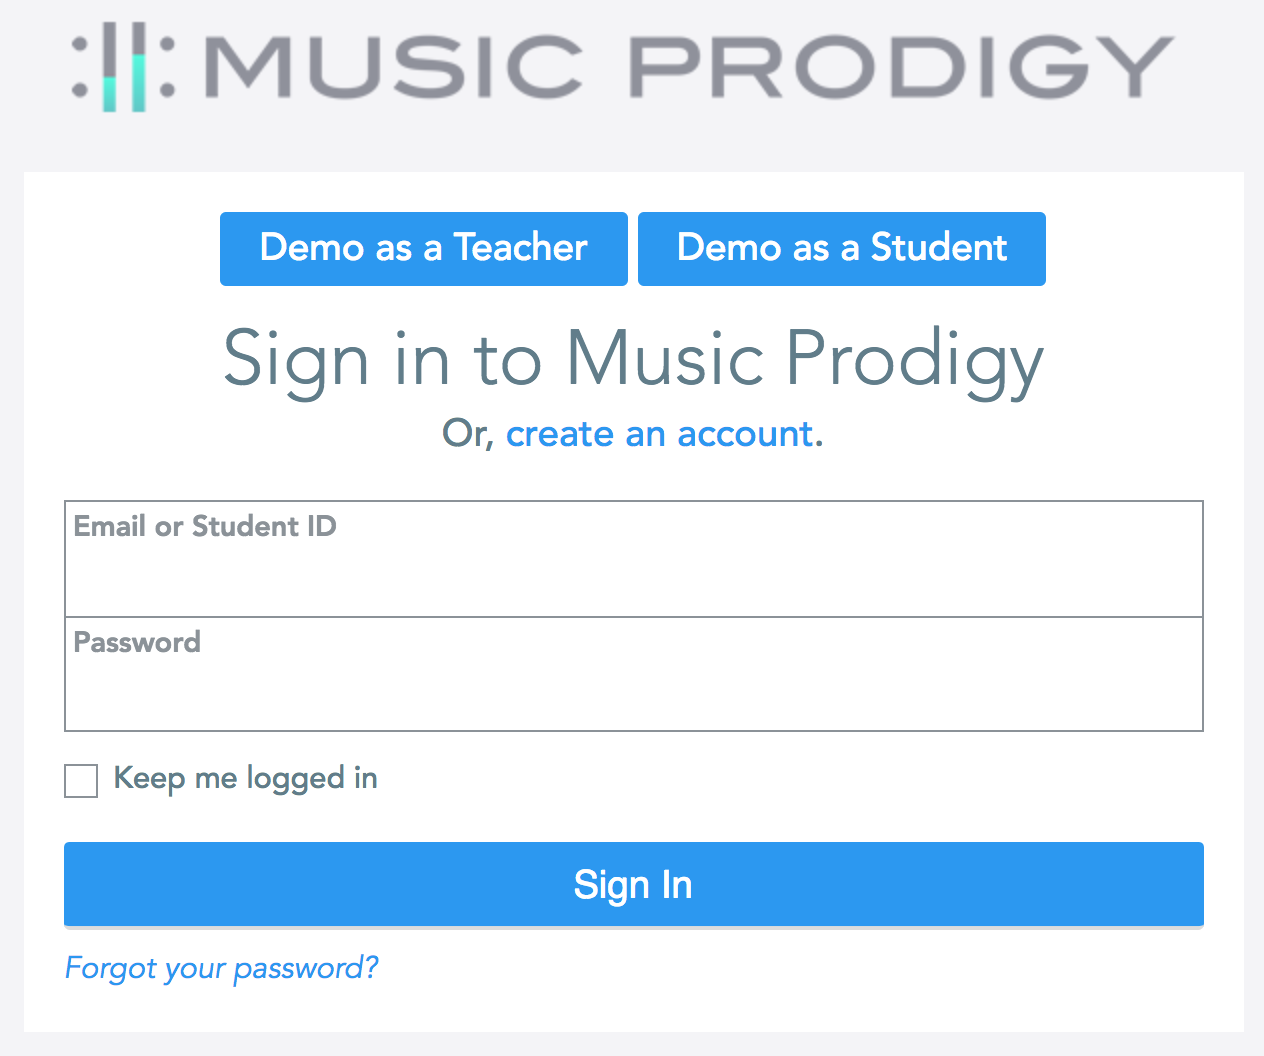
First, have your students visit musicprodigy.com and click the “LOG IN” button at the top right of the Music Prodigy landing page. That will take them to the Music Prodigy Log In screen.
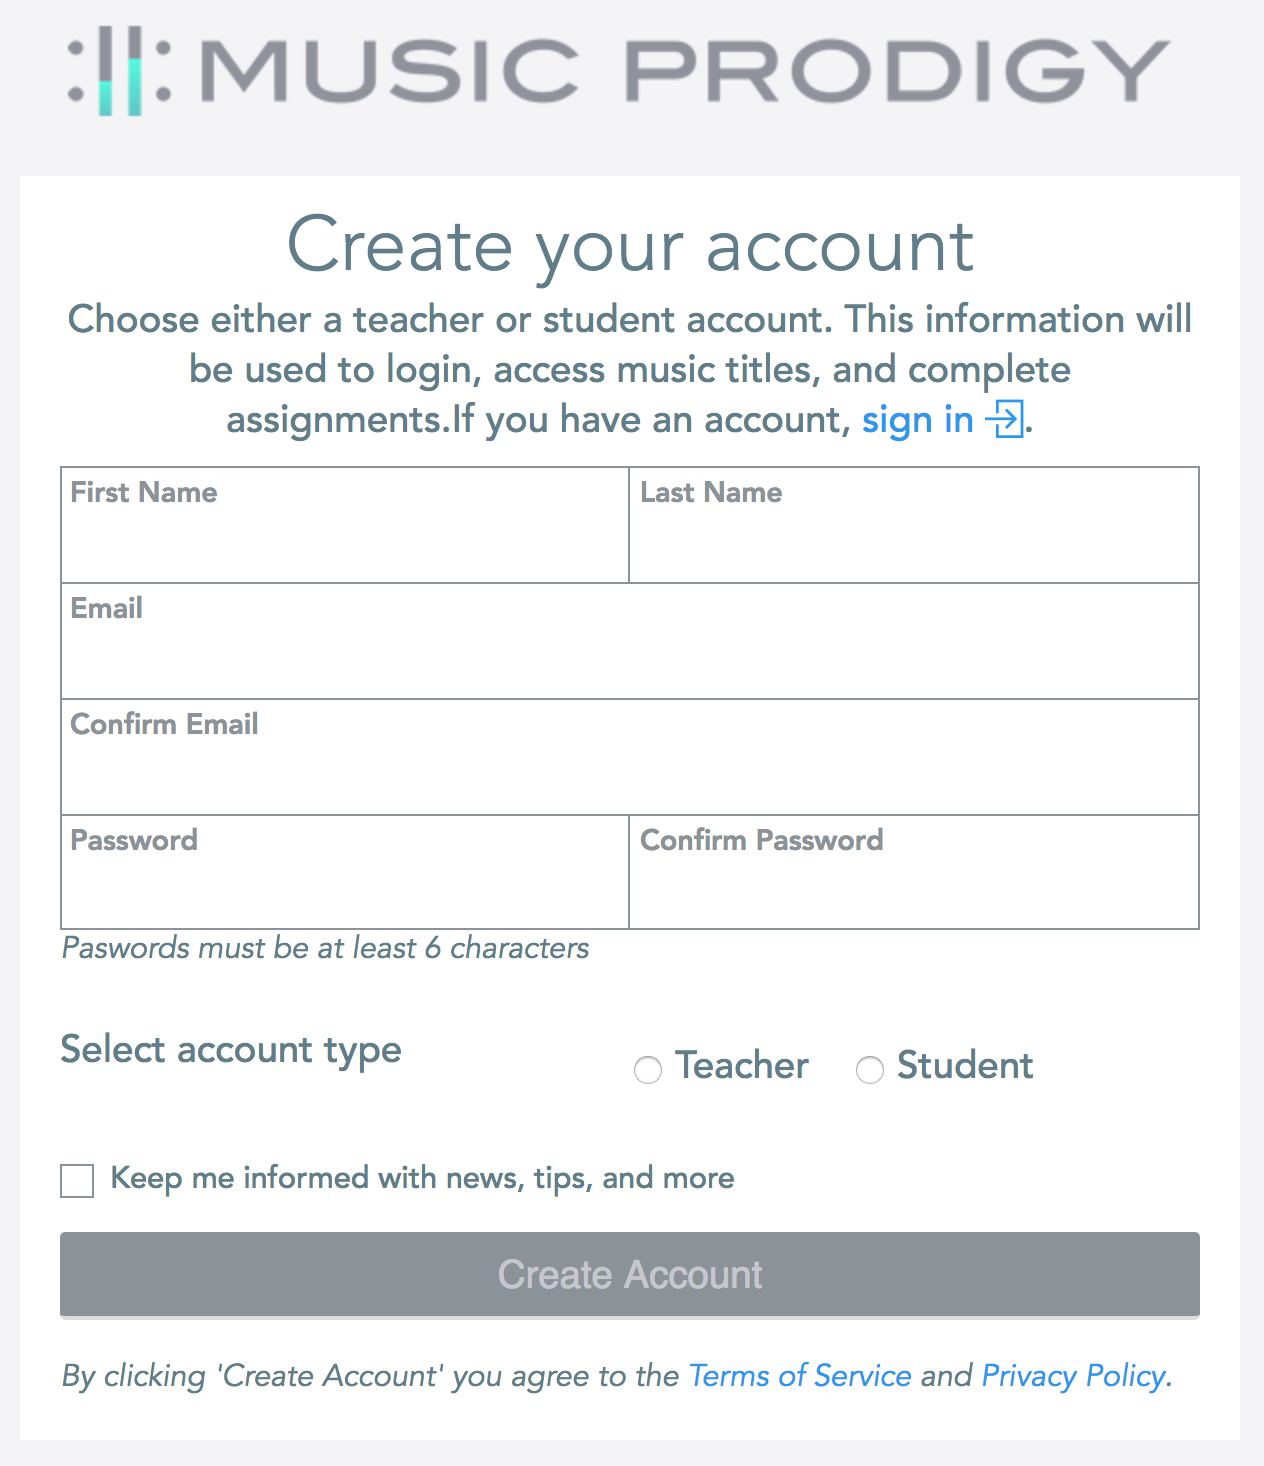
Next, students should click on the create an account link which appears in the center of the screen right under the words “Sign in to Music Prodigy”. This will bring up the Create Your Account screen.
The Music Prodigy Log In screen and Create Your Account screen - Students will need to find the “create an account” link without benefit of the giant red arrow!
Students will need to keep track of the log in emails and passwords they use.
Once students have created their accounts, they will be able to use that information to sign-in to Music Prodigy and use the join code for your class to enroll themselves in your class. |
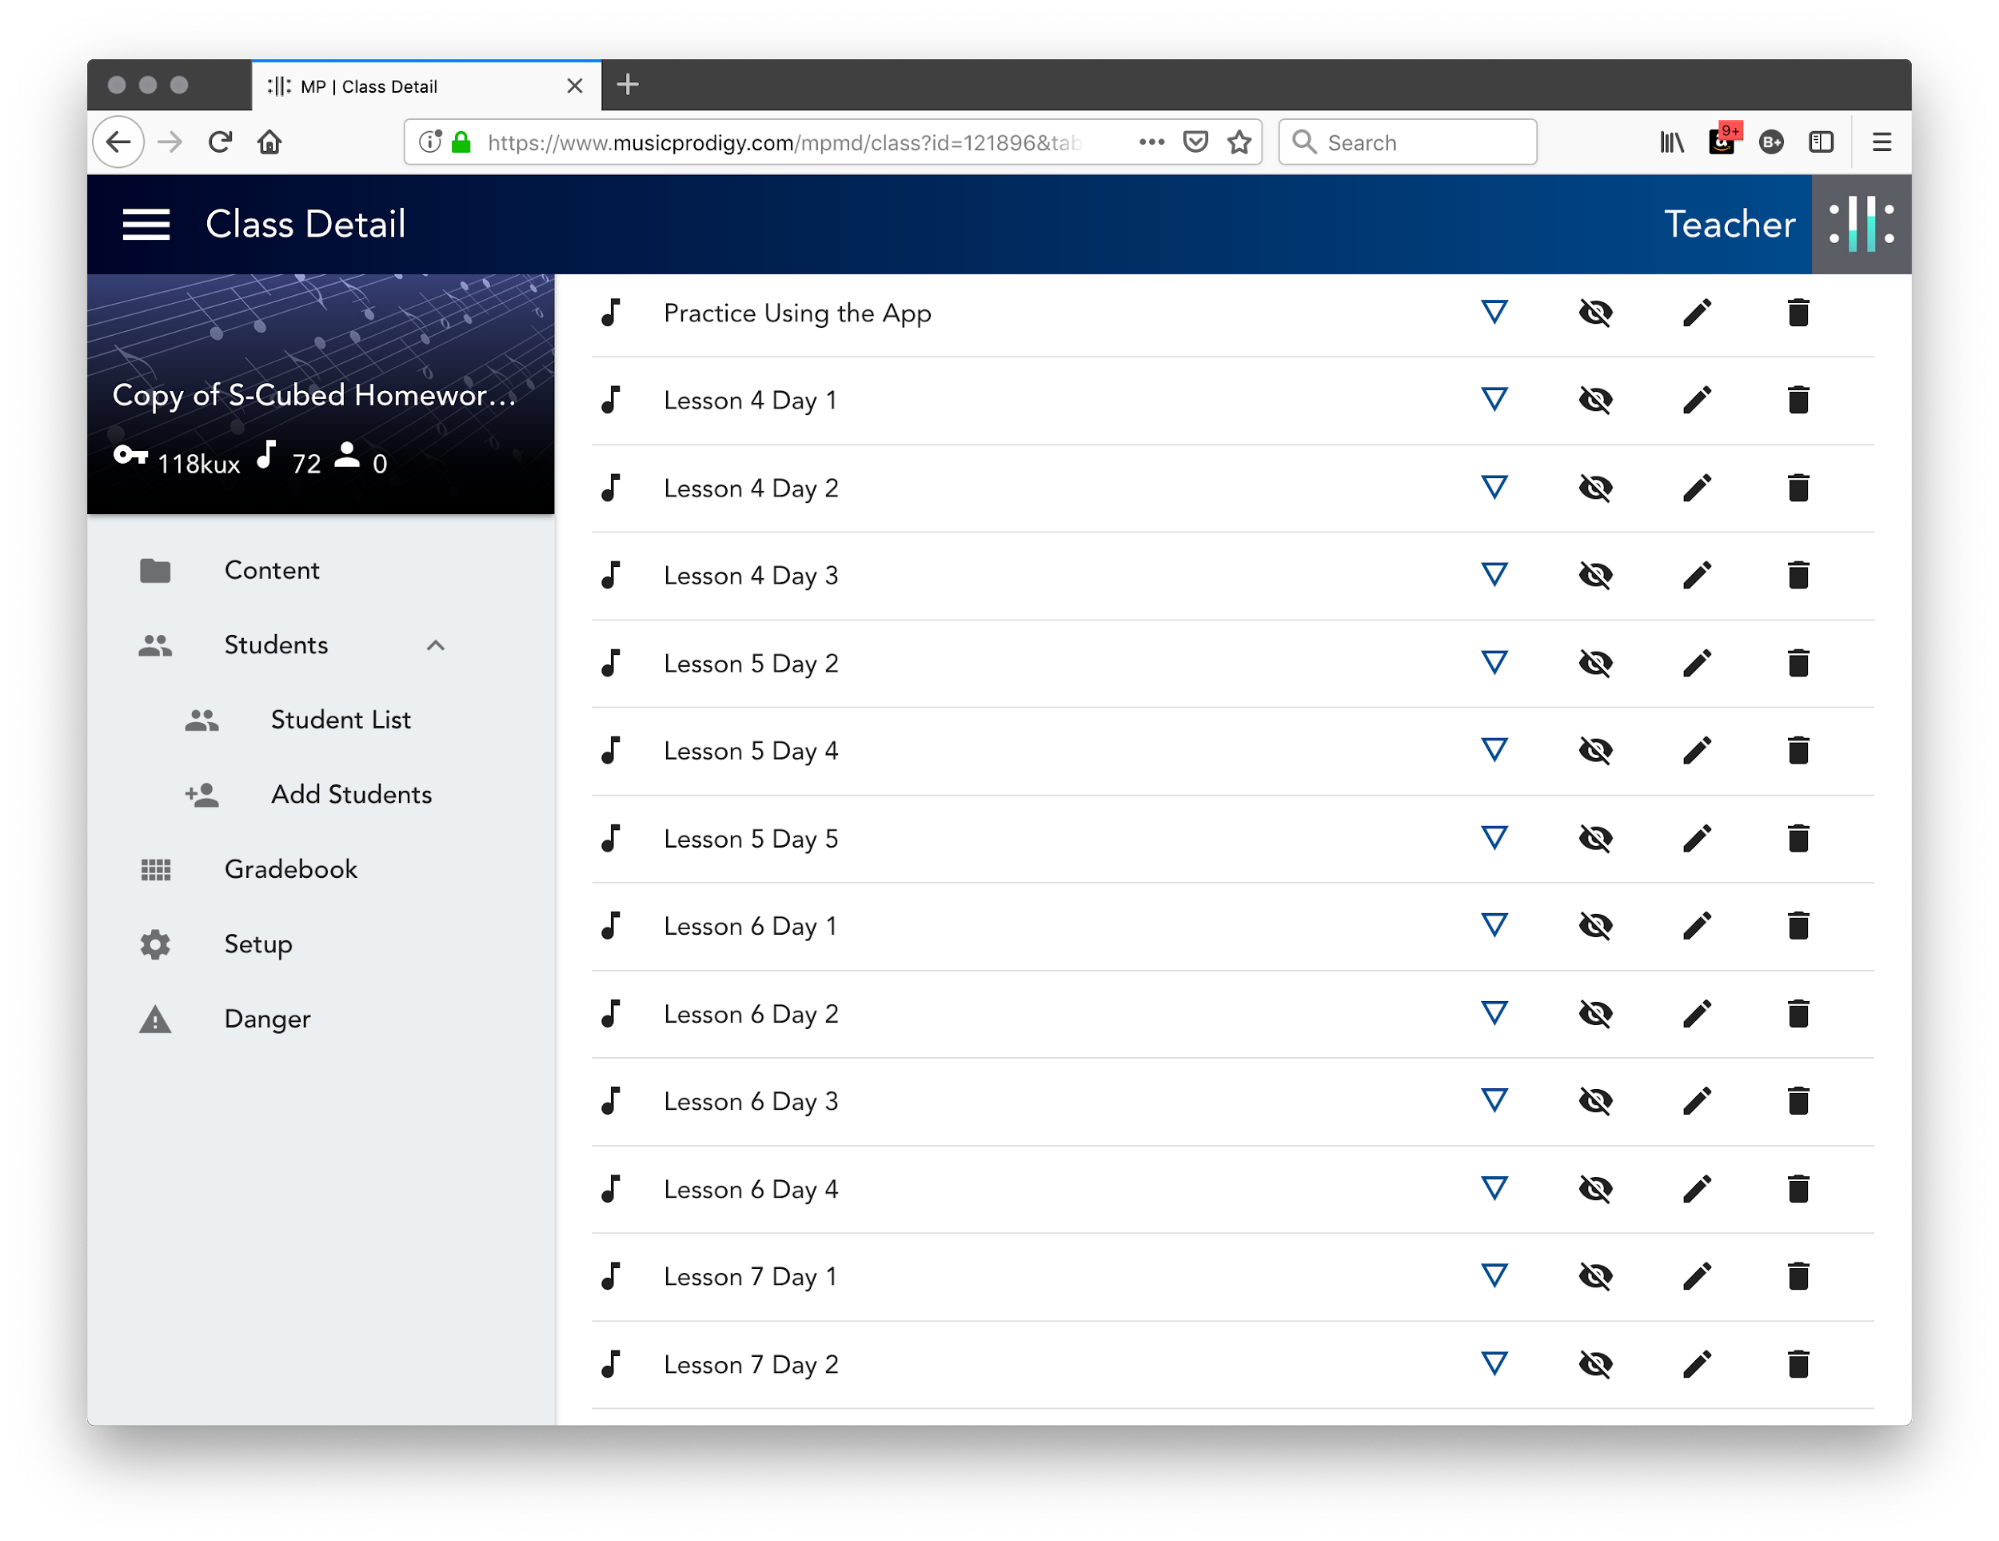
The topmost option in the sidebar area of Class Details is the Content option. Clicking Content will display a list of all exercises in the class.
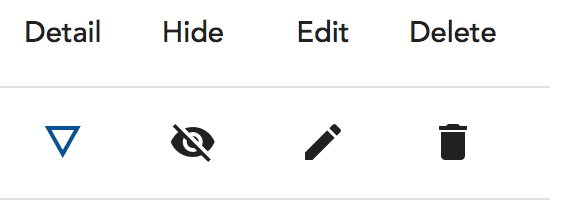
Each exercise appears on its own row with a number of action buttons (see below).
The Buttons of the Content section - can you guess what they do?
Each button performs an action on the exercise named in that row:
Lastly, the “Reorder Songs” button will allow you to drag and drop exercises into a new order, but use caution, there is no way to “undo” these actions aside from re-dragging everything back to its original order!
|
|
Warning: It bears repeating! Editing names, rearranging and deleting exercises can be dangerous! As the teacher, you are in complete control, so feel free to do so, but be warned: the only way to “undo” these changes is to create a new S-Cubed class from scratch and start again! |
Now that you’ve added students to your class (or classes) they will need to learn how to access their accounts in order to practice and complete homework exercises.
Music Prodigy supports multiple types of device, so you may recommend that your students use whichever device you prefer (see the list below). However, there is no reason a student shouldn’t be able to use multiple devices as well (for example, perhaps most students will be using Chromebooks but some students also have their own mobile devices they’d like to use at home). You may encourage students to use any and all methods that suit them.
|
|
Students will receive an automated welcome email with your name and the name of your class in the subject line as soon as their accounts are created. This email details all the steps necessary to log-in and practice. Feel free to direct them to that email, or you may walk them through the steps if needed. |
Here are the links To Download or Access the Music Prodigy Practice Application:
For iOS, Android, Mac or Windows Laptops:
Download now
|
|
Note: Students will need to select which device they are using, and follow the typical steps for installing an app on that device. |
For Chromebook users:
|
|
Note: Students will NOT need to install an app on Chromebook, they just visit the URL above each time they practice. |
|
|
Warning: Some schools may have network or device security settings which restrict access to outside websites. If this is the case at your school, you may need to get IT or network administrators to make some adjustments. See the following web page for more information (near the bottom under “Network Configuration”):
https://www.musicprodigy.com/requirements
(This information is also included in this Getting Started guide under Appendix A. Network Configuration). |
Once students are able to access Music Prodigy on their devices, they may use the log-in information you provided for them (and which was emailed to them) to log in to their accounts.
The Music Prodigy Log-In screen - the gateway to sight-singing enlightenment!
|
|
Note: The student view of Music Prodigy looks different and has different capabilities than the teacher view. Don’t let that alarm you. This was done on purpose, as a visual reminder of where you are at any given time. Students will never know there’s a difference, but you, the teacher, may occasionally log in as a student, or visit certain screens that show the “student perspective” of a class or exercise. The different look should help you keep your bearings! |
After logging in, students should see the student Classes screen with a list of the classes they are enrolled in.
If the student is new, the student’s Classes screen will probably contain only the one class you have added them to… or no classes at all (See the warning below).
|
|
Warning: If you are relying on students to use the class join code to enroll in your class, they will PROBABLY NOT see your class when they first log in to Music Prodigy. They will need to click the “+” button to enter the join code for your class. (See Adding Students above for more information on using the join code). |
Once students click on the name of the class, they will see the student Class Exercises screen containing a list of homework exercises.
Here’s where the fun really starts - on to the next section: Practicing with Music Prodigy!
|
|
Note: Strictly-speaking this section is not essential knowledge for teachers, but your students will need to be very familiar with the features and controls of the Music Prodigy student practice app and so it may be wise for you to familiarize yourself with it as well. |
Once your students are set up with the Practice App (see the previous section Get Students Set Up with Music Prodigy) they are ready to complete the homework that you will assign!
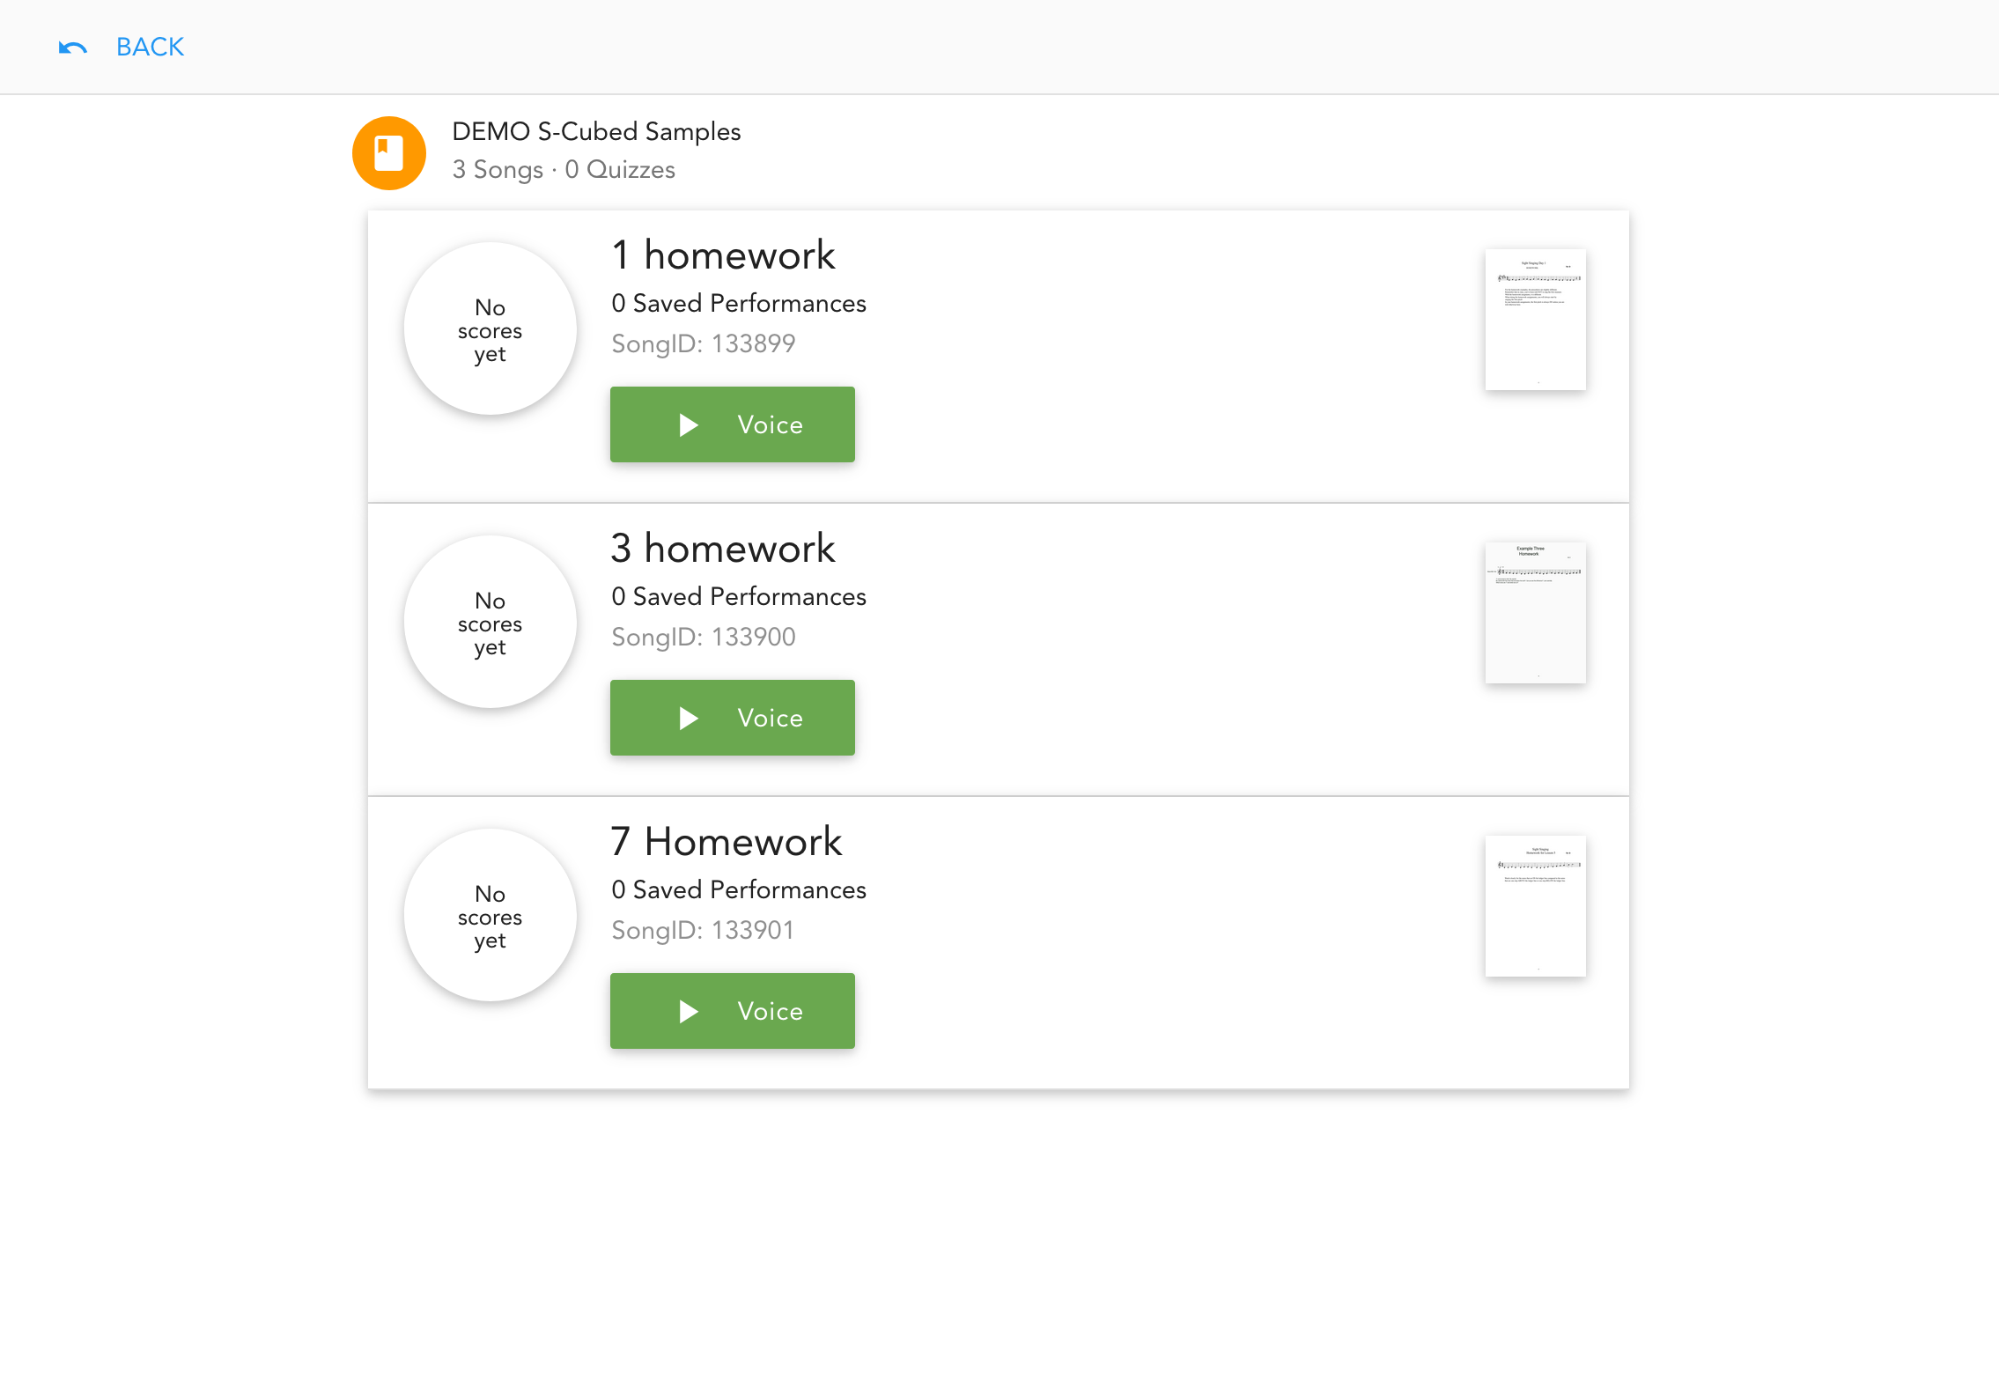
After logging in on whichever device they intend to use, and after selecting your class from the Classes screen (as described in the last section, Get Students Set Up with Music Prodigy). Students will see the Class Exercises screen (the student version looks different from the list of exercises you may recall from the Content section of your Class Details screen).
The student view of the class exercise list.
Clicking on the small thumbnail image of the sheet music on the right brings up a larger view of the music for that exercise. Clicking the green Play Button (labeled “Voice”) launches the music for practice (this is what students will do to complete their homework exercises).
Before students attempt to complete the first “real” homework exercises, you may want them to familiarize themselves with how the Practice App works (see the tip below).
|
|
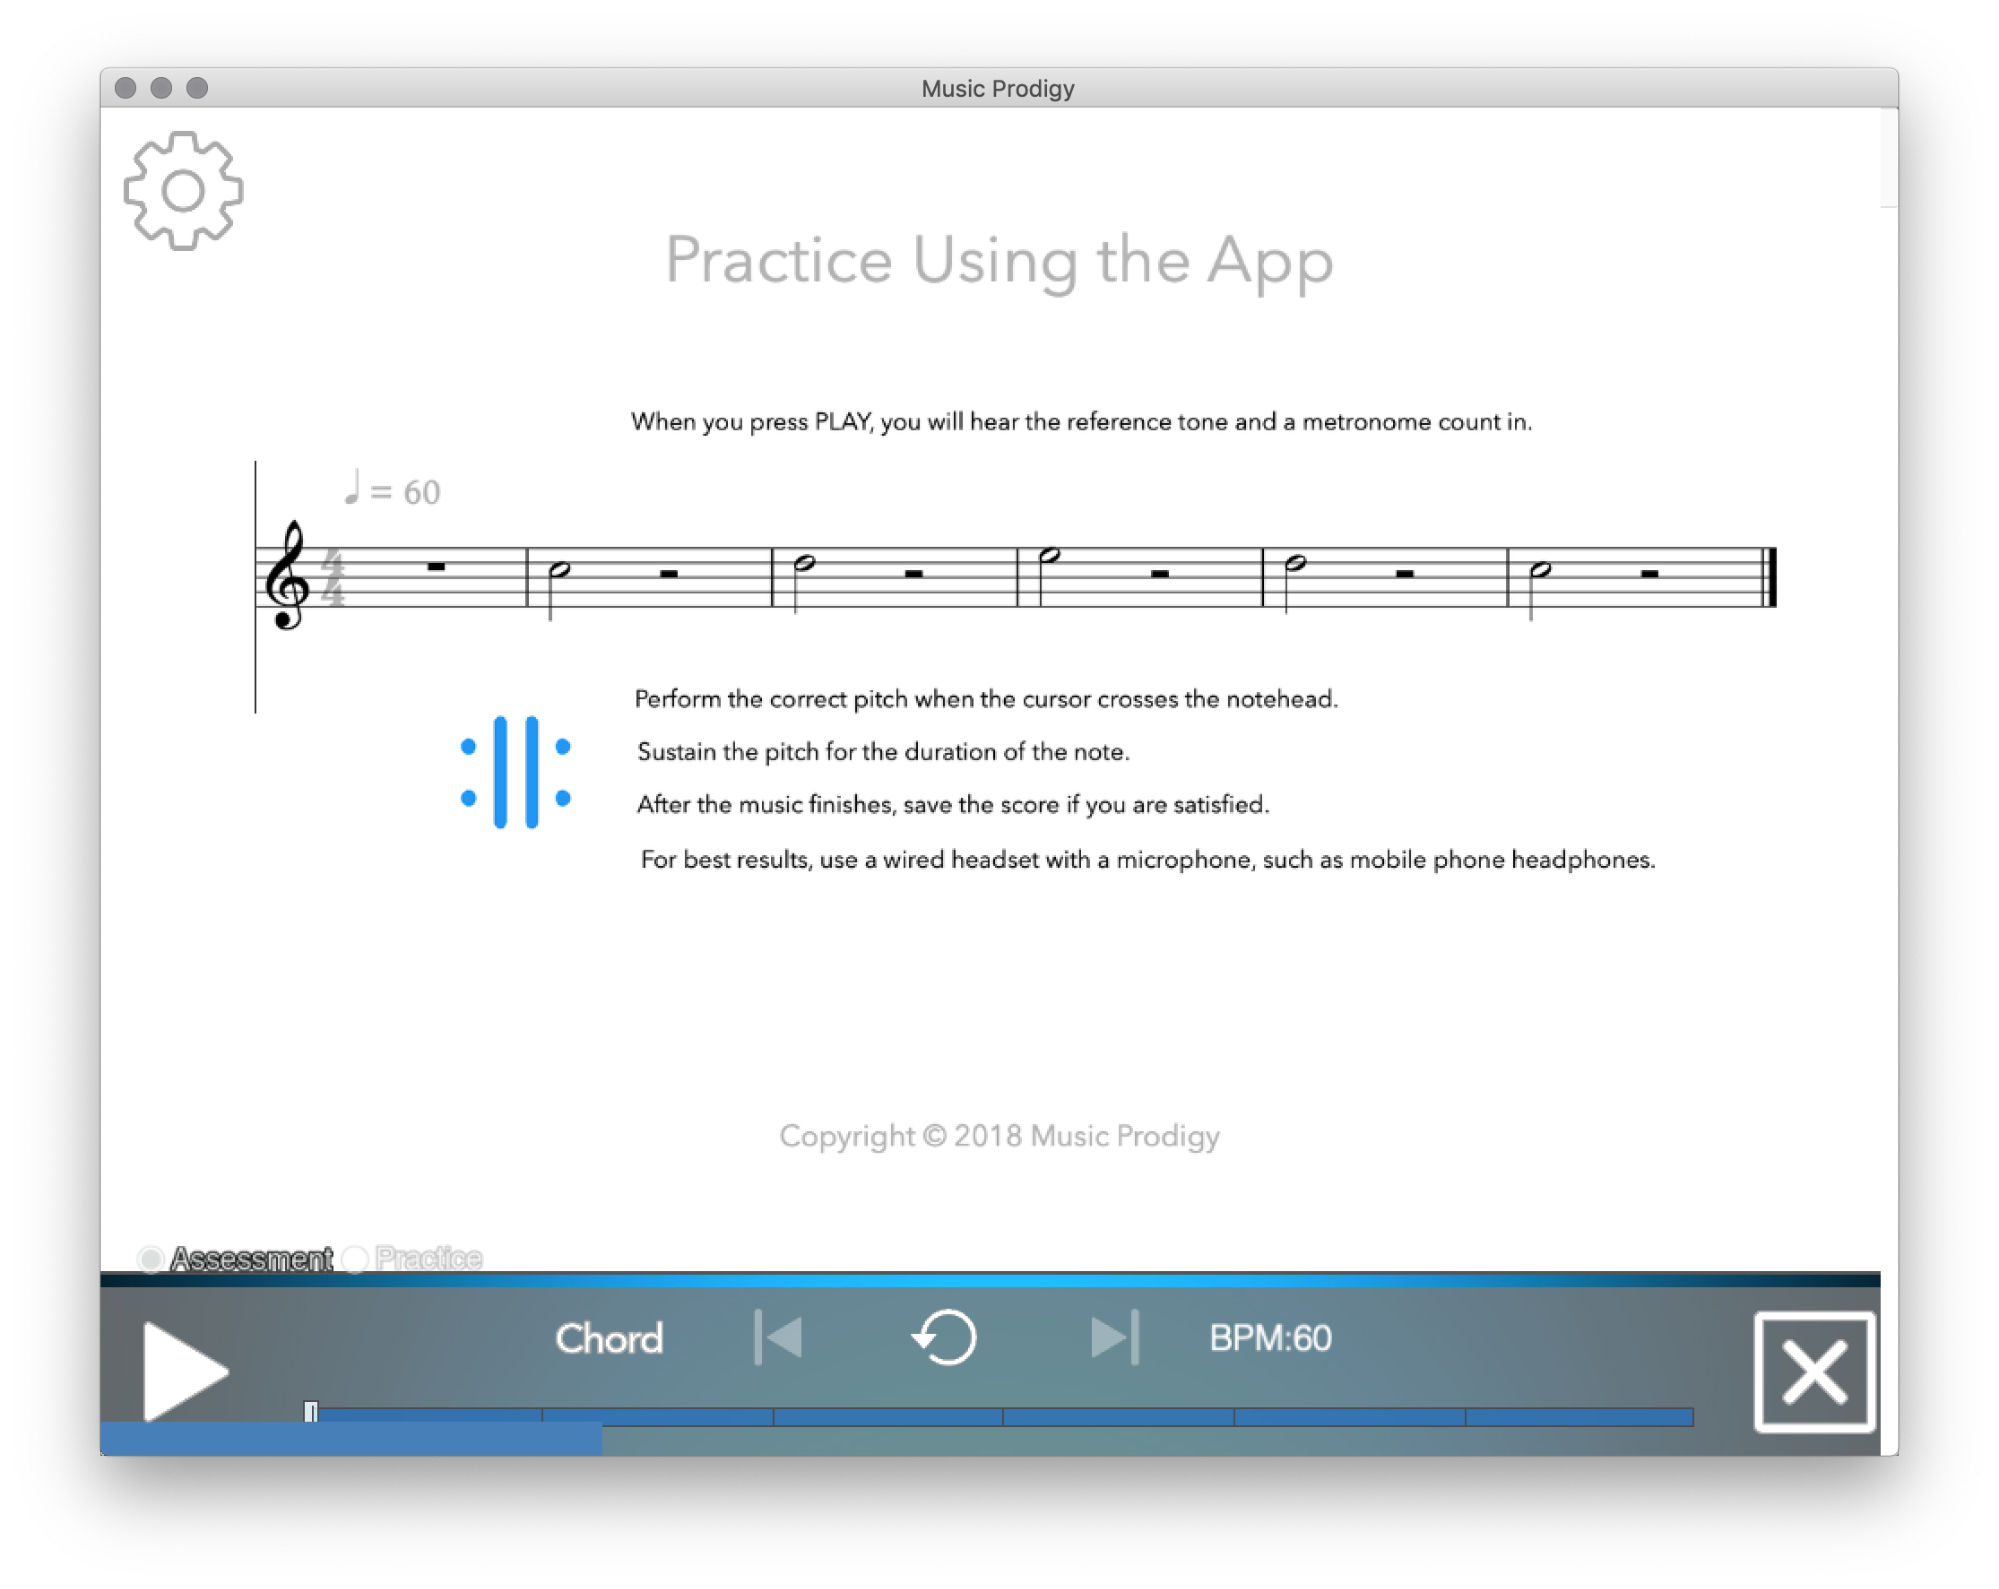
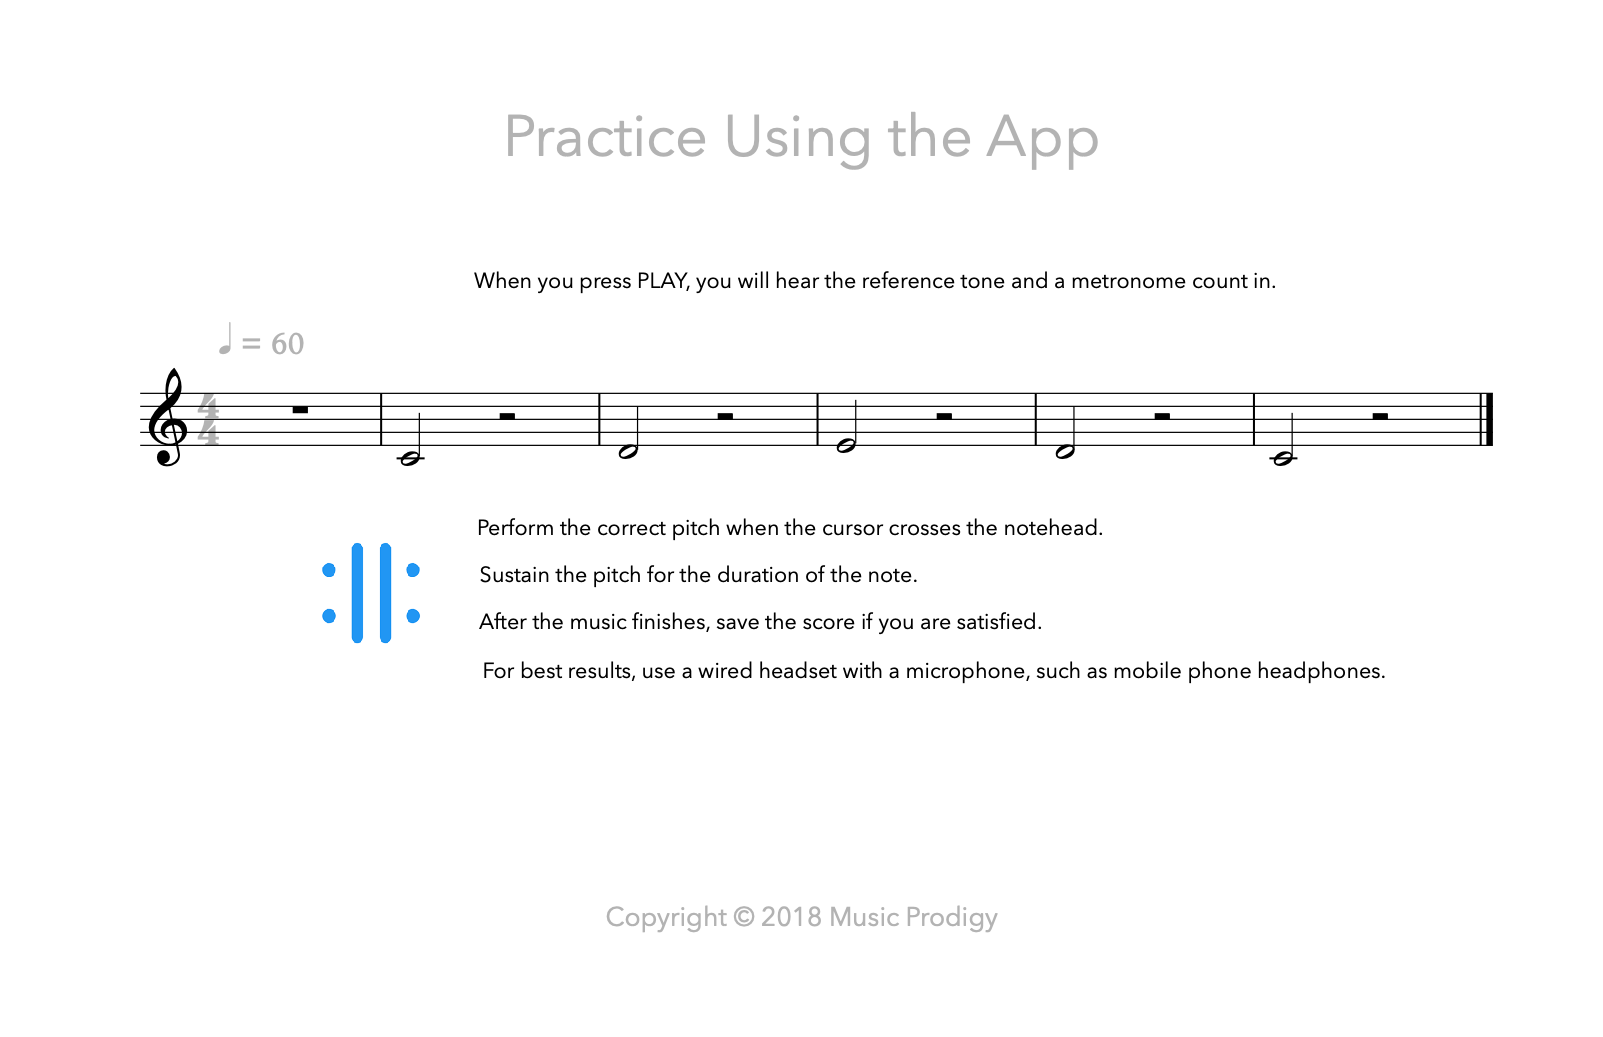
Tip: At the top of the list of exercises is an exercise named Practice Using The App! This super-simple exercise is provided so that Students may familiarize themselves with the controls, get comfortable, and get a feel for how things will work, without affecting their grade or scores, before they actually have assigned homework to complete. Please encourage them to try it out!
Practice Using The App! - A great way to get familiar with using the settings and controls without waiting until 11:30 pm the night before the first homework assignment is due! |
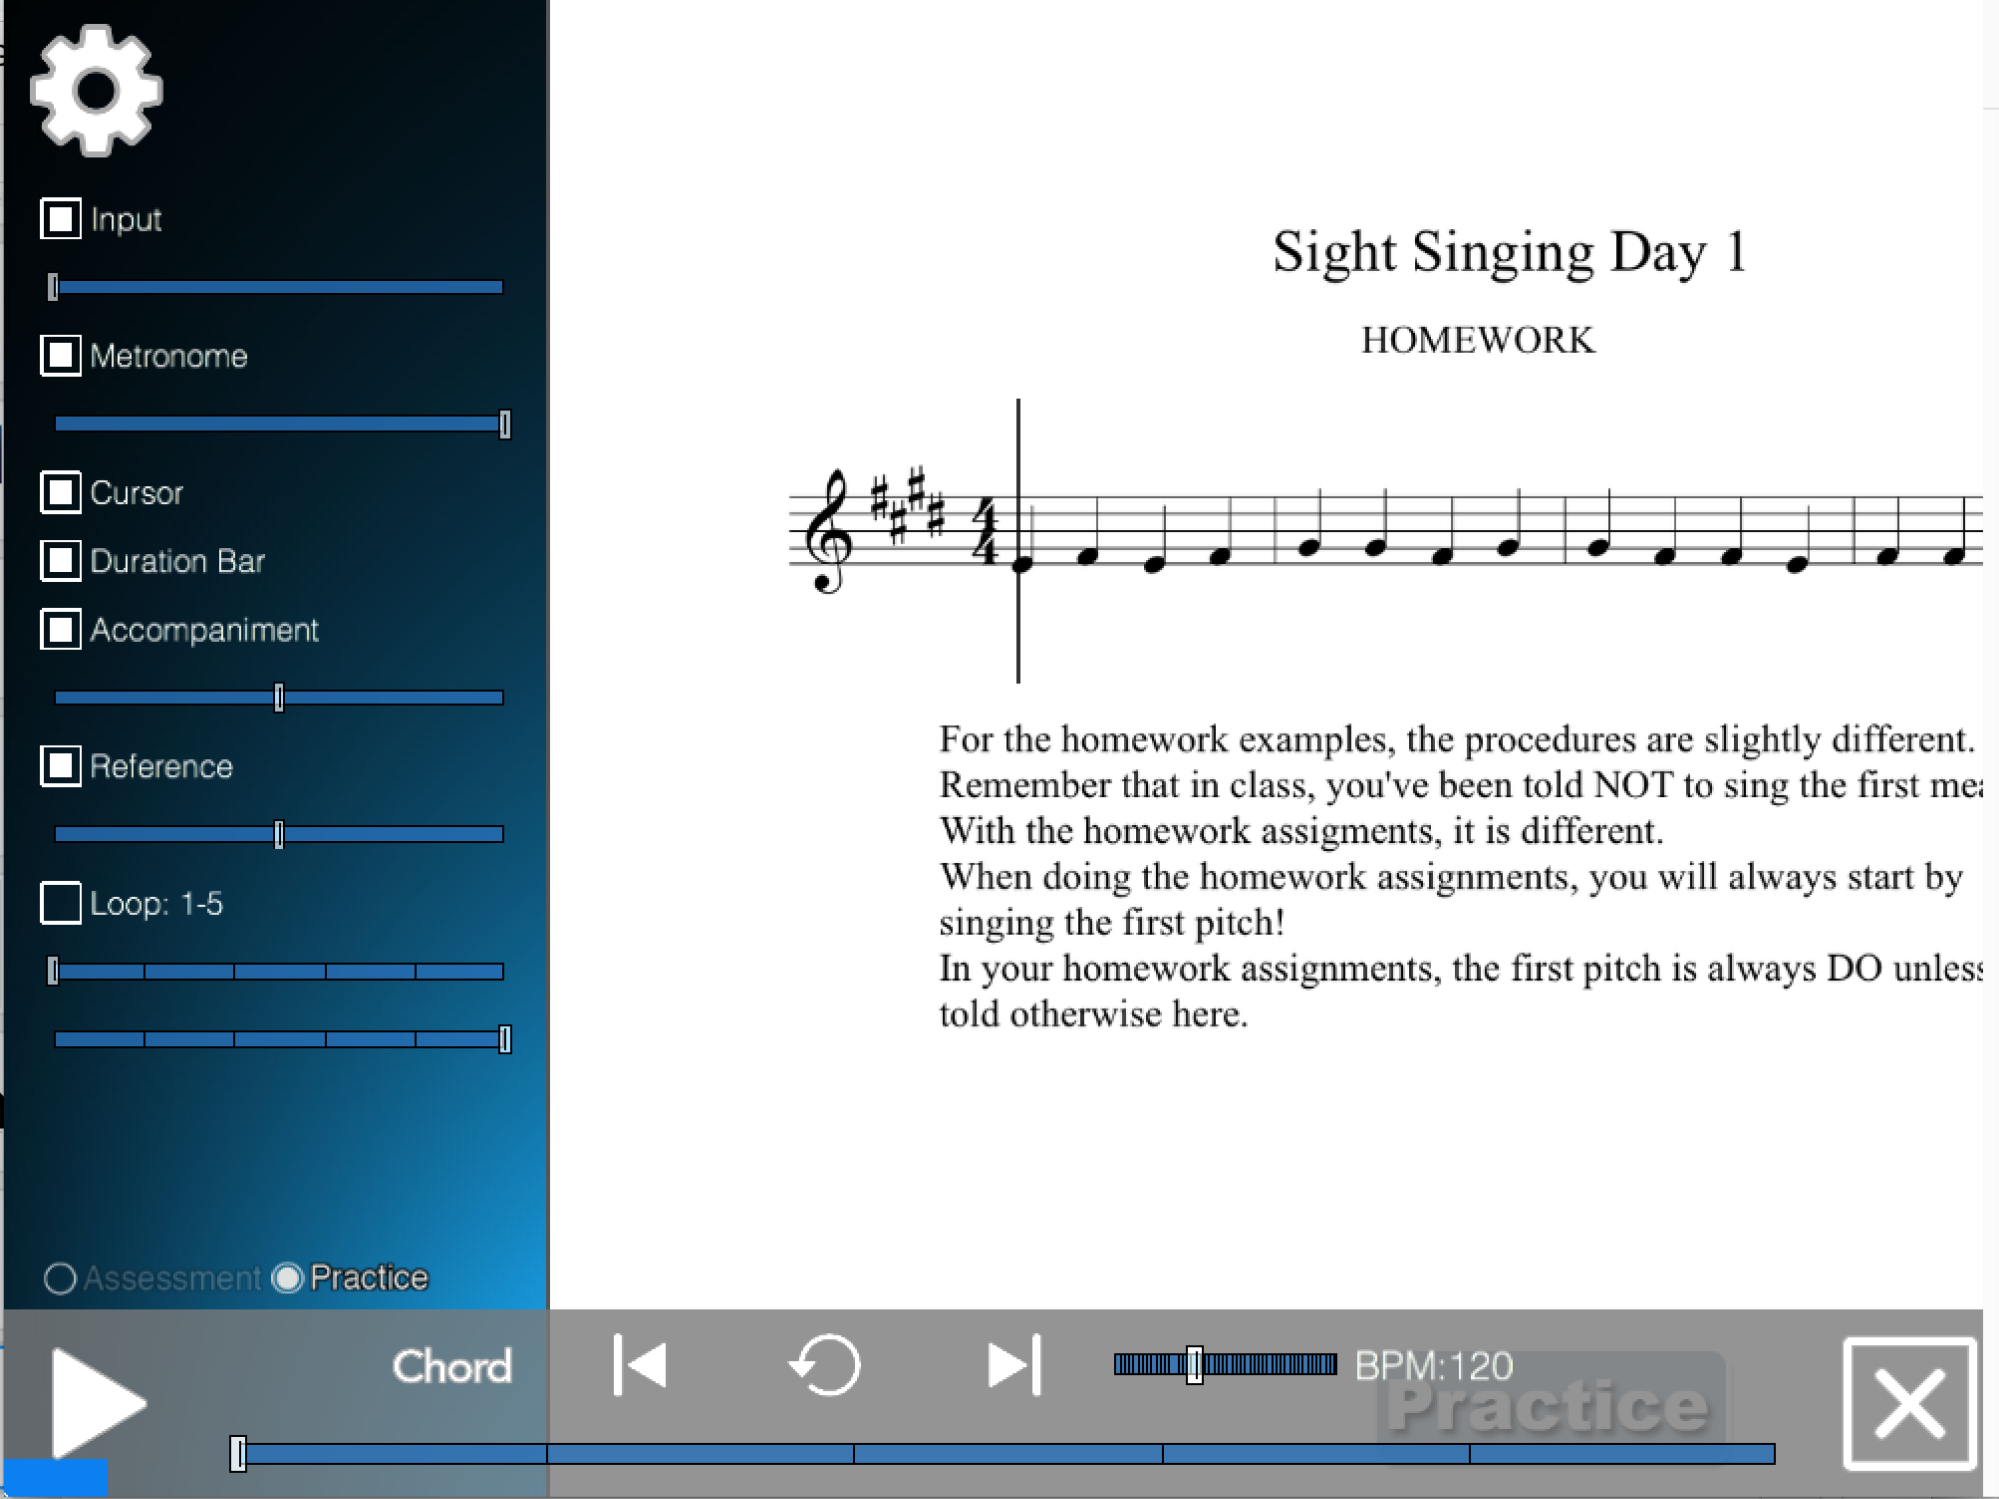
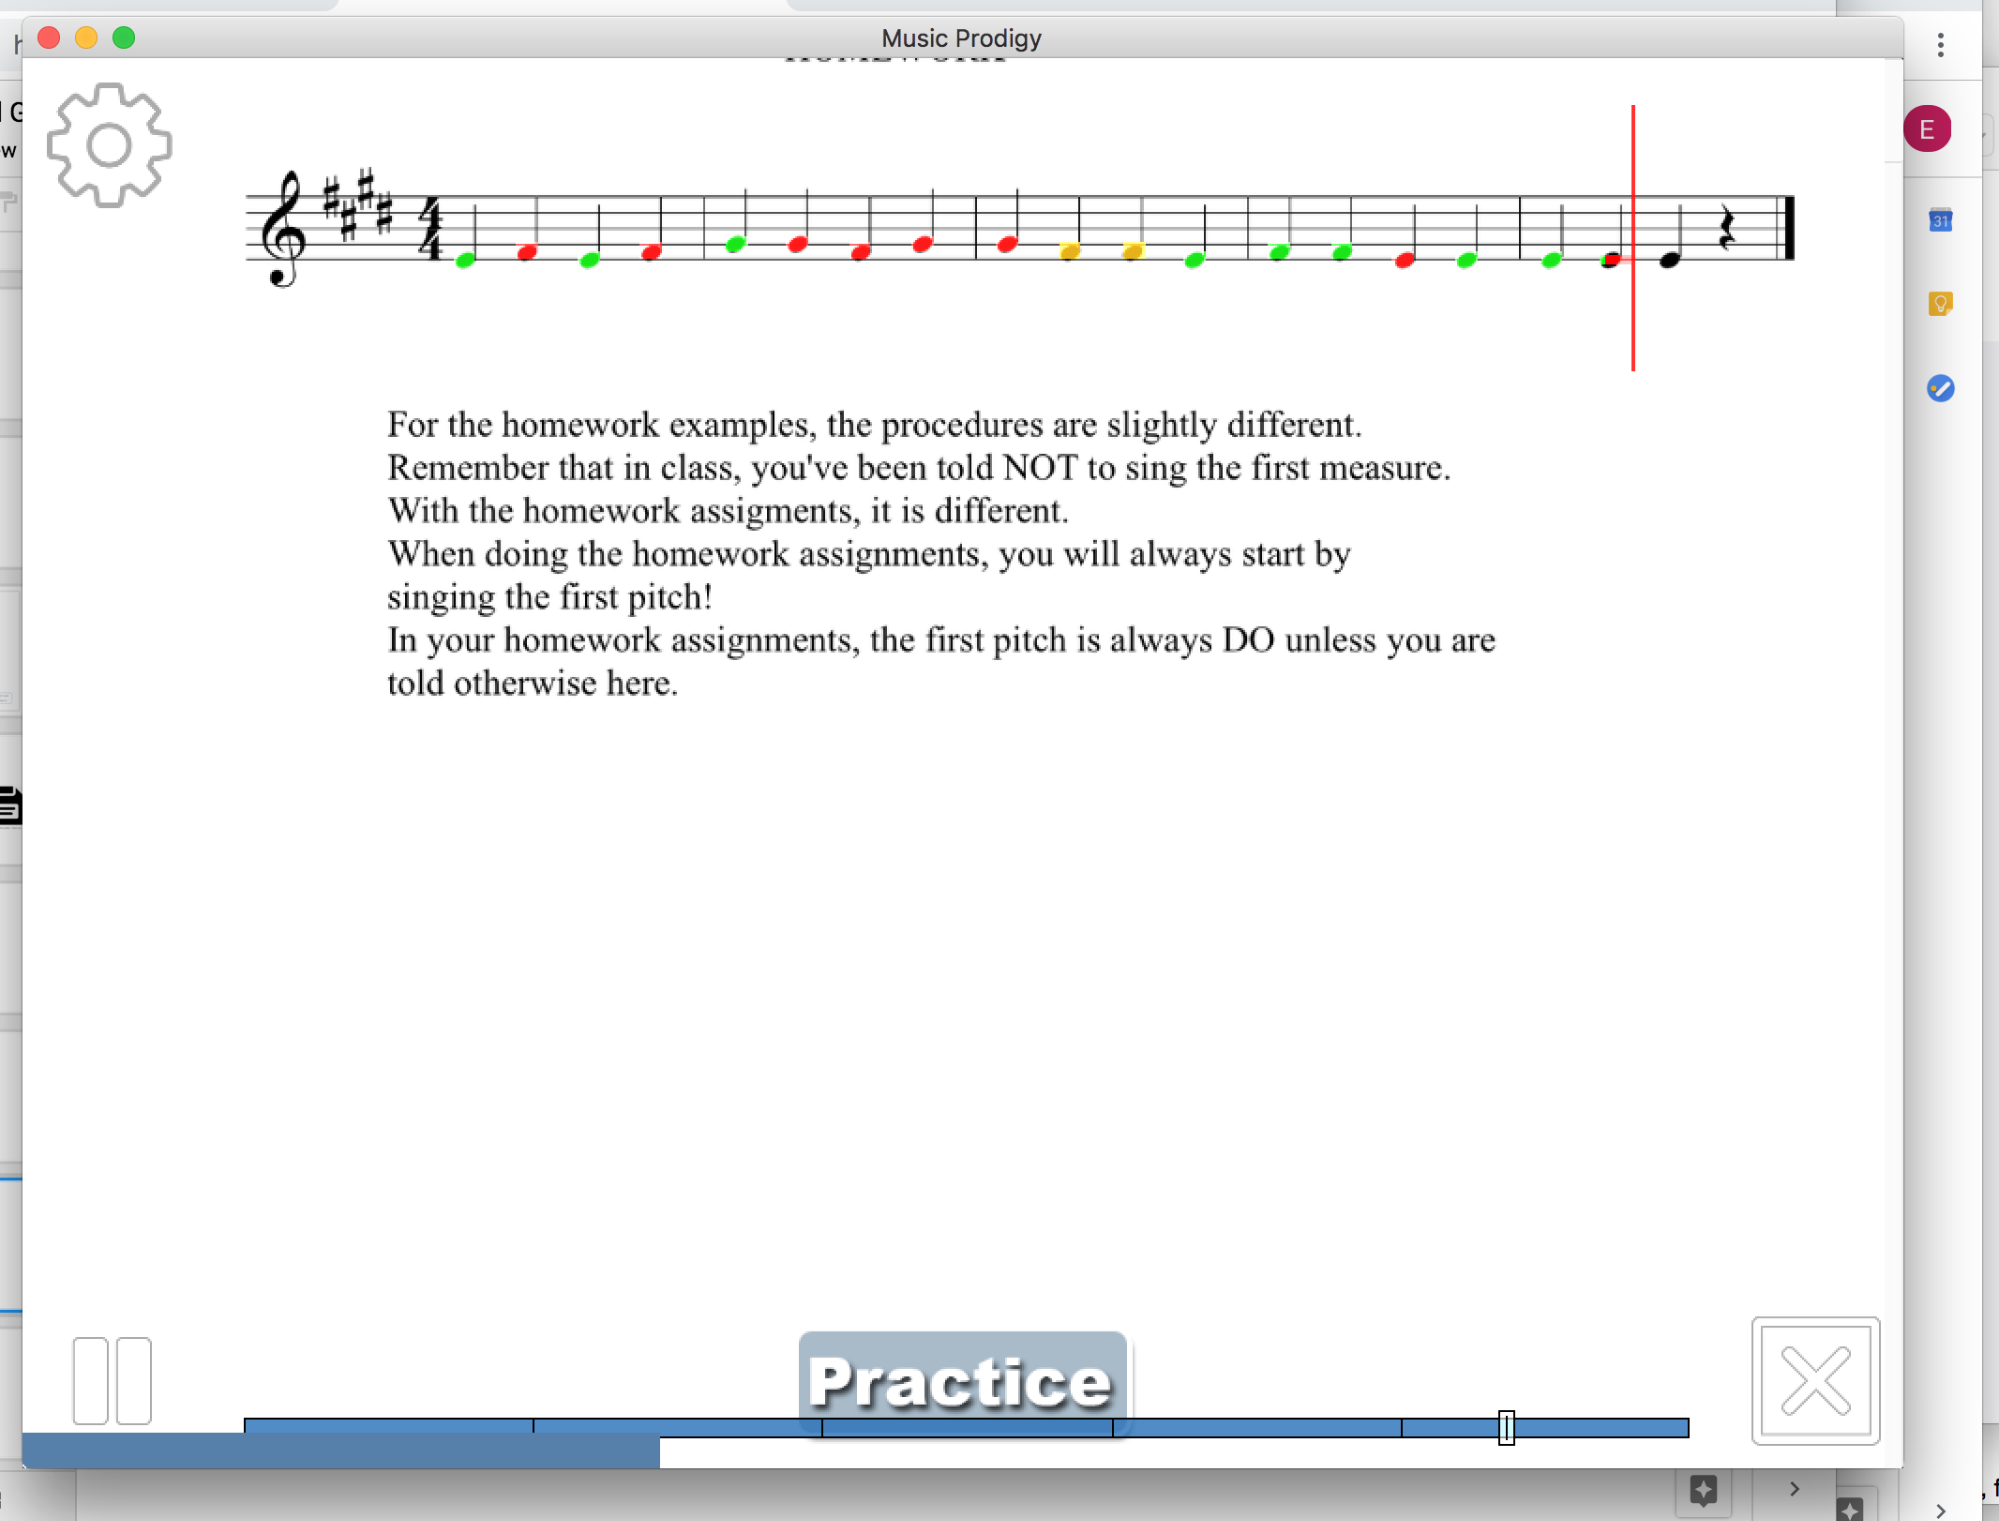
After clicking the green Play Button (labeled “Voice”) from the Class Exercises screen, students will see the Practice screen, which always starts off with the blue Settings Sidebar visible (see the screen below).
The first homework assignment, viewed from the Practice App - notice the blue sidebar at left.
The Settings Sidebar is opened / closed by clicking on the white Gear Button at the top left of the screen. It contains several controls that affect the way the practice exercise behaves. Students should feel free to experiment with these and set them to their liking (or according to your recommendations).
Most importantly, the Settings Sidebar contains the Assessment / Practice Control which we will talk more about soon. In the beginning, this can be left on Practice mode.
|
|
Note: When it’s visible, the Settings Sidebar pushes the music score off the right side of the screen a bit. Tell your students not to be alarmed by this. They may close the sidebar at any time by clicking the Gear Button. And, when they click the Play Button to perform the exercise, the Settings Sidebar hides itself automatically, which will bring the entire score into view! |
When the student is ready to try practicing the exercise they click the white Play Button at the bottom left of the screen.
The Play Button - hang on to your hats folks, here we go!
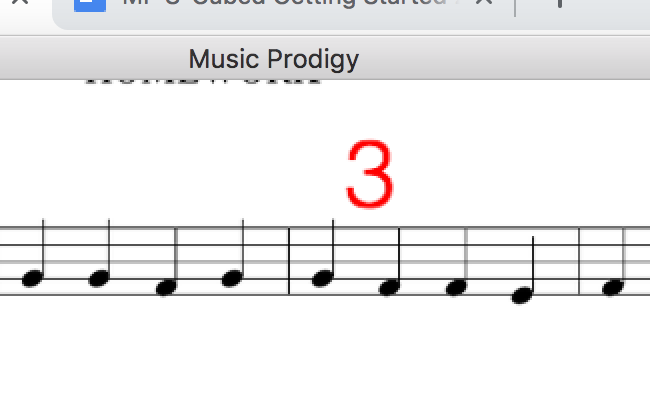
After clicking the Play Button, students will hear several piano notes (this is a reference pitch for the first note of the exercise) followed by several metronome beats (a reference for the tempo of the exercise) and then a red Count-In will appear at the top of the screen (see below).
The Count-In - do you feel like we’re reaching the top of the first climb on a roller coaster?
After the Count-In, the exercise begins! In Practice mode, piano notes will be audible, to demonstrate the notes. In Assessment mode there will be no accompaniment, but the metronome will still be audible if it is checked off in the Settings Sidebar. Notes will turn green, red or yellow as the student sings, indicating if a note was performed correctly (in pitch and in time) or not (see below).
As the student sings, notes will turn red, green or yellow.
|
|
Warning: In Practice mode, when the demonstration piano notes are playing, the app may “hear itself” playing these piano notes and think the student is singing the notes correctly. To avoid this, it is best to use headphones when practicing! |
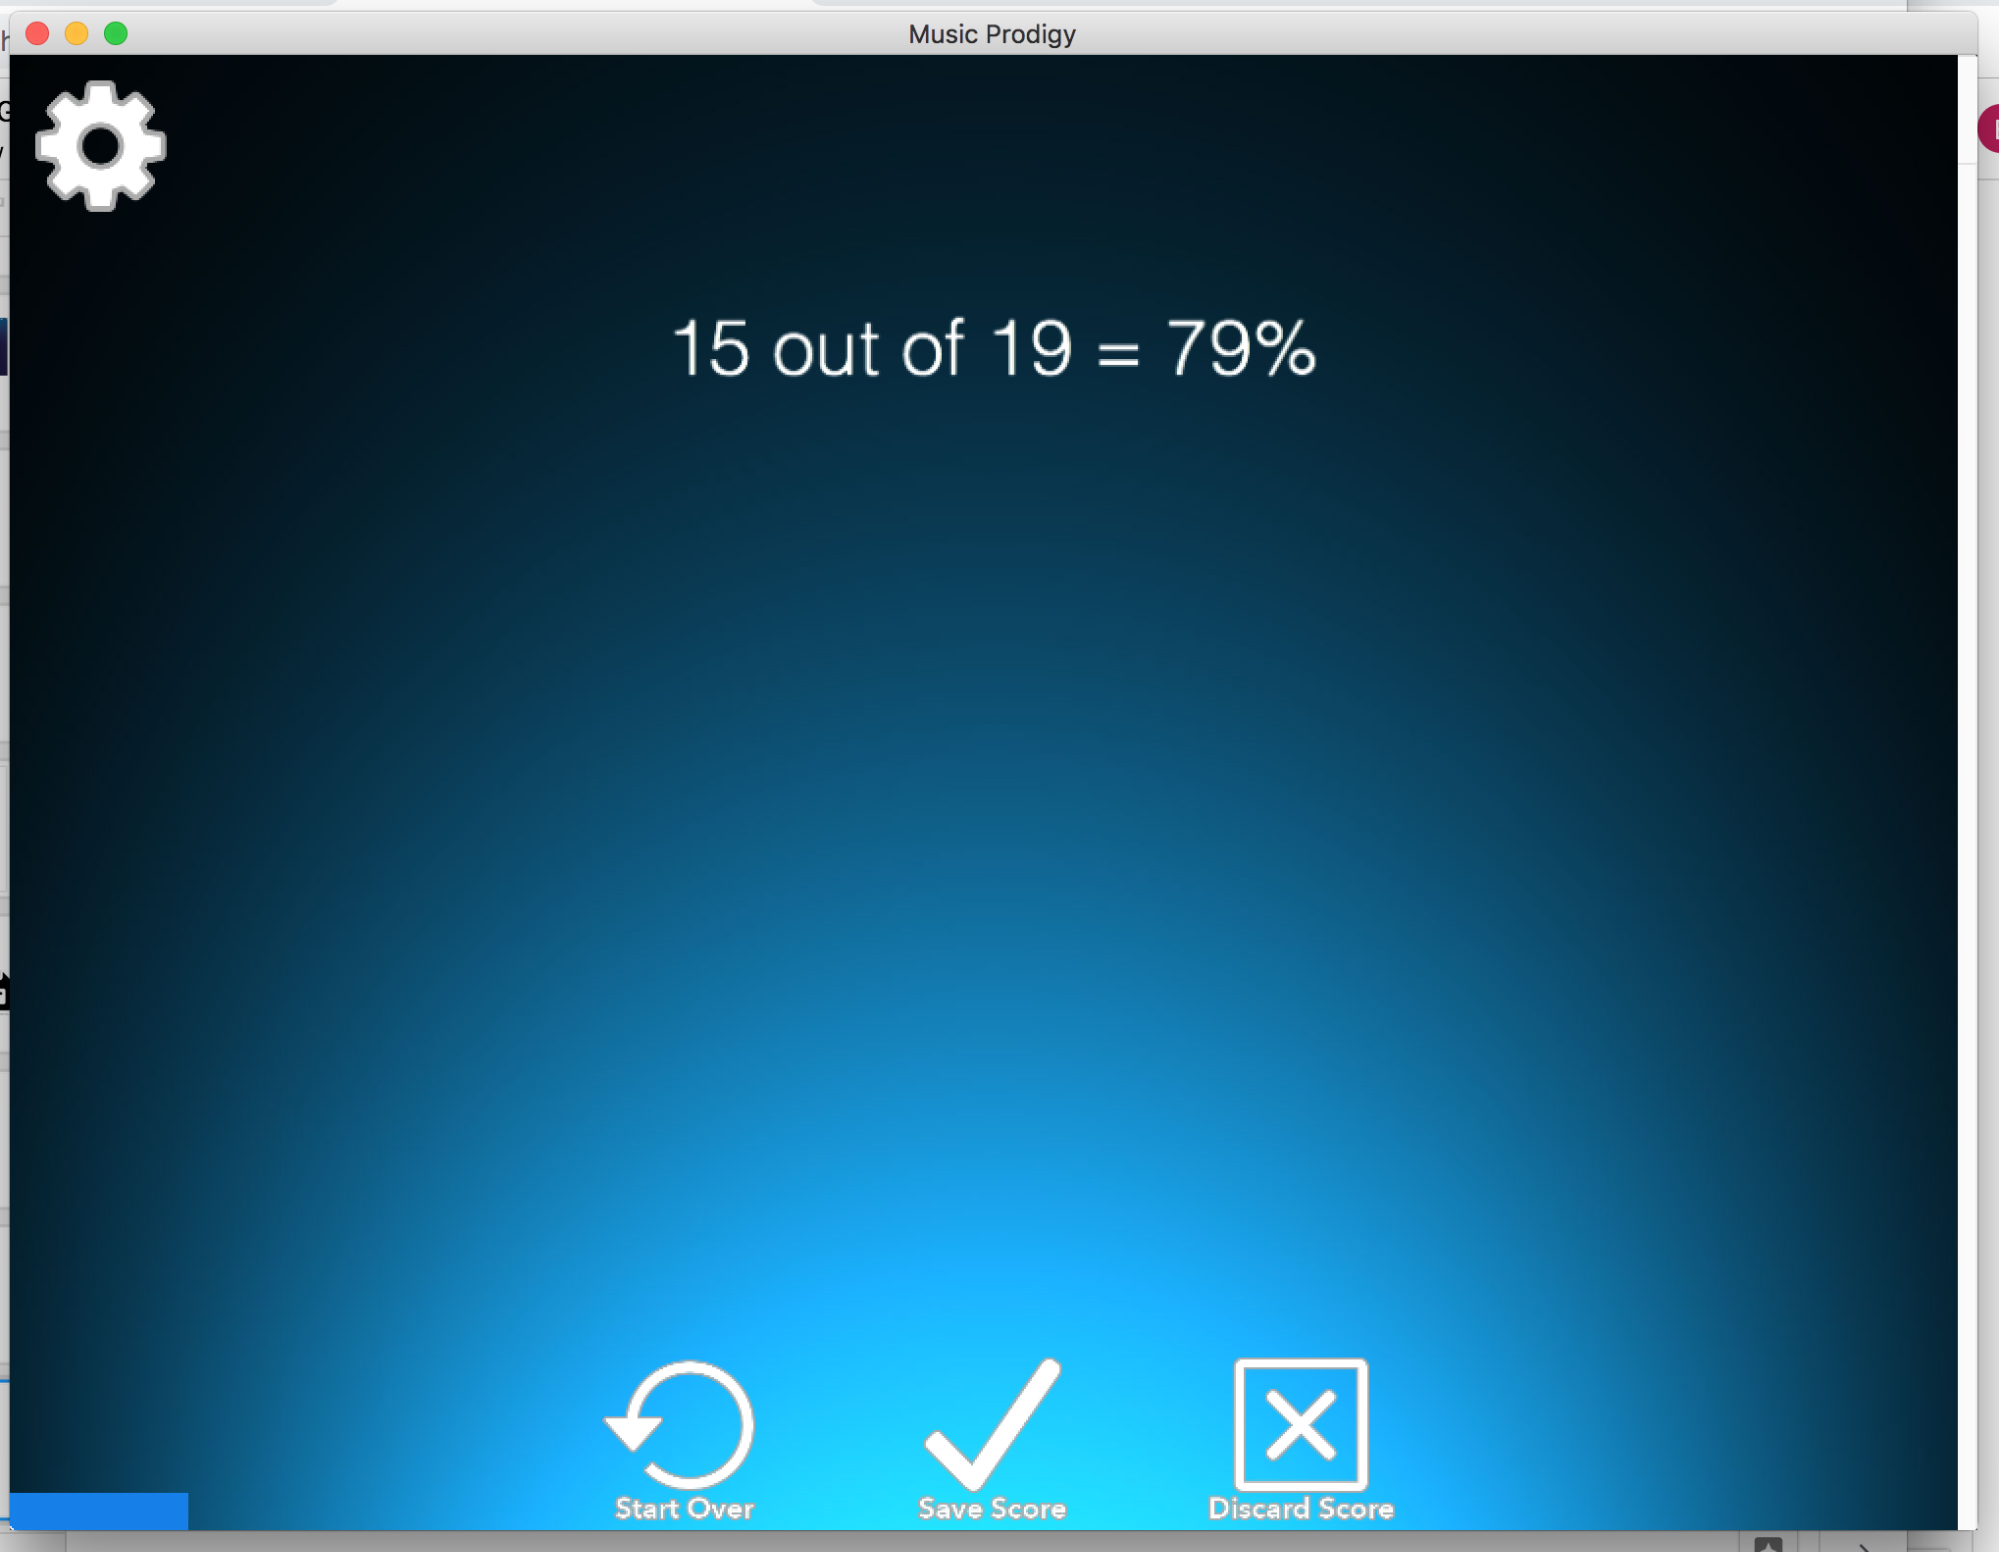
After the exercise completes, a blue Score Screen will appear, indicating the number of correct and incorrect notes, and giving the Student several options: a “Start Over” Button, a “Save Score” Button, and a “Discard Score” Button (see below).
|
|
Warning: It is vital to remind your students to save any score they feel good about by clicking “Save Score” after attempting an exercise (or feel free to have them save every attempt if you want - you should to come up with your own policy).
“Save Score” appears at the bottom of the screen after each attempt.
If students do not click “Save Score” no record of their work will be recorded!
When students feel confident enough to make a “real” attempt at the exercise, they must switch to Assessment mode, not Practice mode. This will turn off the accompaniment (piano notes) and make an actual audio recording of the student’s performance.
The Assessment / Practice mode selector - It may look blue or it may look white, but it’s always near the bottom left of the screen.
Singing unaccompanied is really the goal of Music Prodigy with S-Cubed, so don’t neglect this key “Assessment” step! |
The Score Screen - don’t forget to save!
|
|
Note: Did we mention how important it is to save? It’s important!
Most popular “Save” icons look like floppy disks! Does anyone even know what a floppy disk is anymore? Maybe we should try a stone tablet icon instead! |
When the student saves scores, the big circle at the left of each row in the Class Exercises screen will summarize the student’s performance history for that exercise.
|
|
Warning: Music Prodigy with S-Cubed requires a strong network connection to the internet so the Practice App can communicate with our servers. If many students are logged in at the same time (during school for example) app performance may slow down if the school network bandwidth is not built to handle concurrent traffic. Please check with your school’s network administrator if many students are logged in and you are noticing a slowdown. |
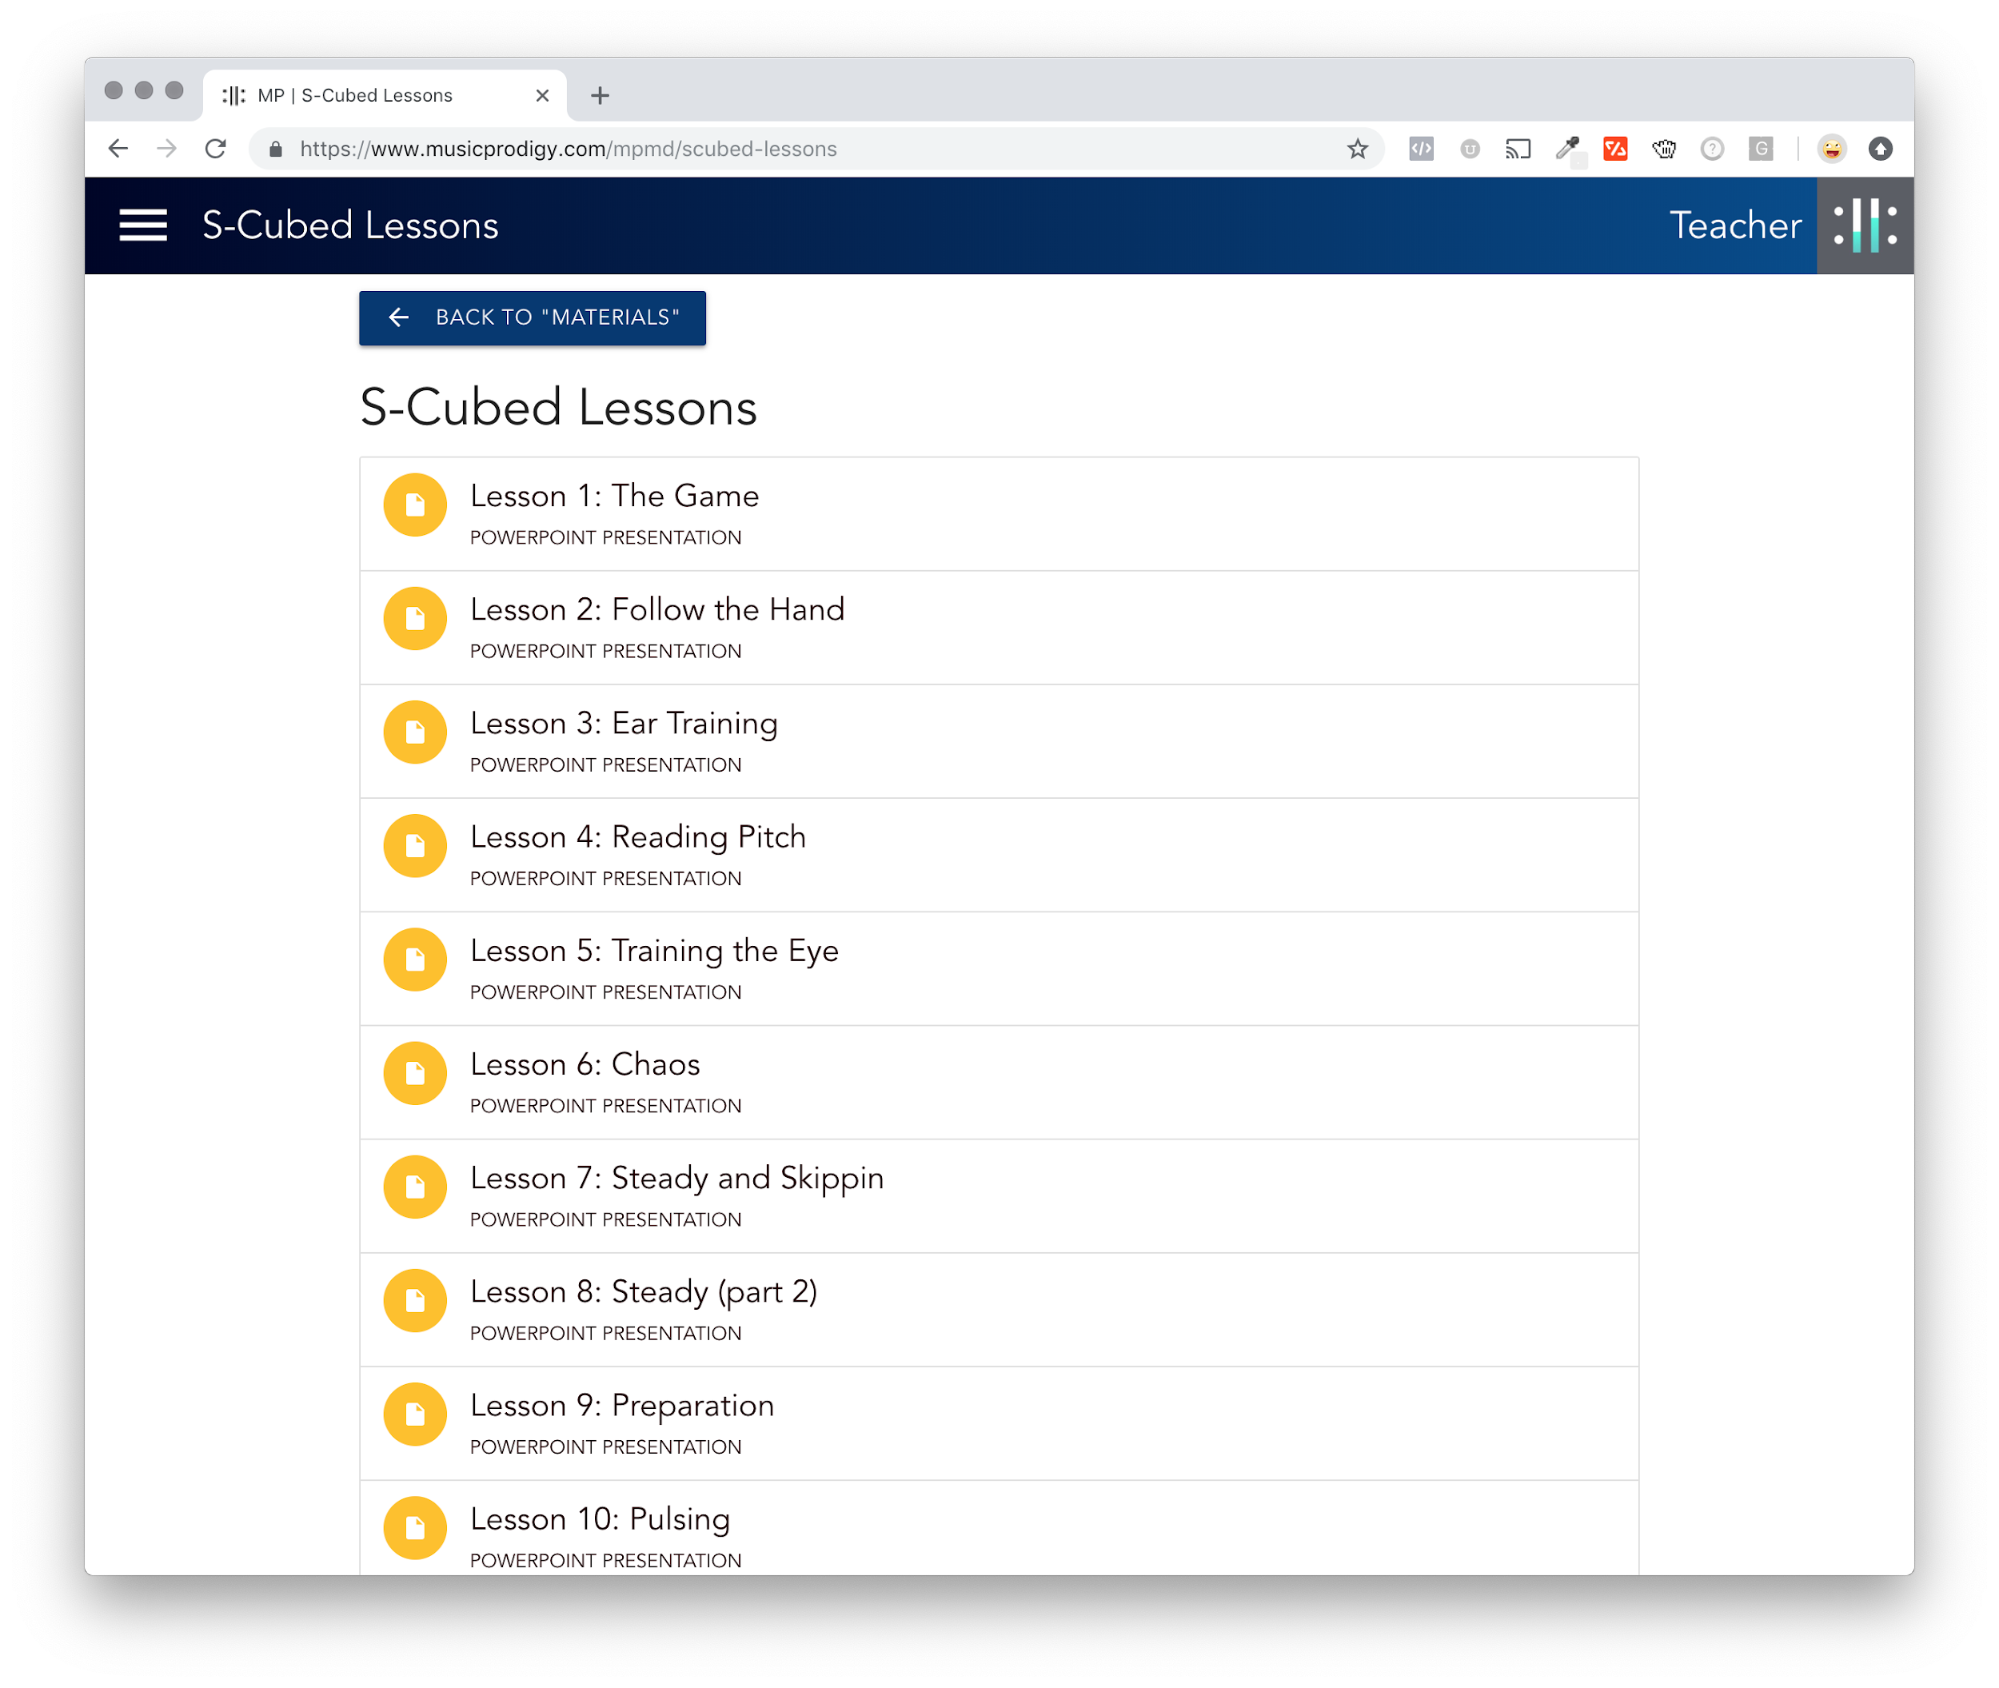
The S-Cubed courseware is accessed from the Main Menu under S-Cubed. Selecting this option will take you to a directory of all the S-Cubed content. Click to download an individual item or open a folder, or click the “Download All” button to download all of the S-Cubed materials at once. The bulk of the S-Cubed courseware consists of slide presentations (or decks) which are in Microsoft PowerPoint format.
|
|
Note: You may access the S-Cubed courseware at any time through the Main Menu, so feel free to download it all at once, a little at a time or even multiple times. The choice is yours. |
Behold! a PowerPoint document.
|
|
Note: These PowerPoint decks can easily be uploaded to Google Drive for conversion to Google Slides if you’d like (for example if you are using a ChromeBook).
If you don’t like PowerPoint, there are many alternatives that can directly open a PowerPoint deck. Just Google “PowerPoint alternatives.”
Why is this man sad? - Because you don’t like PowerPoint! |
You will notice that there are 27 presentations. These decks are titled as “Lesson 1”, “Lesson 2” etc. on their opening title-pages. Each Lesson deck corresponds (roughly) to one of the 27 weeks of the S-Cubed class.
Each deck also has sections labeled “Day 1”, “Day 2” etc. These correspond (again roughly) to the days of that week.
|
|
Note: There are usually between 2 and 5 “Days” within each Lesson, however sometimes there are more! In fact, it is rare for there to be exactly 5 day sections in any Lesson deck! Don’t let this upset you - the timing is not set in stone. It’s perfectly OK to progress more slowly or more rapidly through the courseware as the needs of your class dictate. YOU are in the best position to assess how quickly your class should be progressing! It is best to view the “Lesson” and “Day” labels as a set of rough milestones rather than a rigid schedule. |
Each Lesson deck is kind of a mixed bag, with some slides for the teacher, some slides for actual use in class, slides that duplicate the handouts, and then also embedded links and embedded video links. We’ll discuss each type of content that you may encounter below:
Lesson Objectives:
These slides list the key concepts and skills that should be conveyed in the lesson.
Warm-ups:
These simple exercises are meant to be completed at the beginning of each day’s class (they are not always labeled explicitly as “warm-ups” but they always appear at the beginning of each “Day” section). You should administer these in whatever way you see fit for that day. Some choices include:
Ultimately, you should feel free to use whichever combination of the above methods work best for your class!
|
|
Note: Whether you are using a monitor or projector, whiteboard or chalkboard, whether you are using pen and paper, Chromebooks, or any other technology is entirely up to you as long as your students are prompted to think about the material. Use whatever method or media you are comfortable with!
Some teachers like to have a lasting record of their in-class presentations - do whatever works for you!
|
Sight-Singing Examples (starting in Lesson 4):
Also referred to as “Handouts” (because it may be helpful to print them and distribute them to your students to keep in their folders or binders, in the same way they might keep the music for their repertoire or performance pieces).
|
|
Tip: The Sight-Singing Examples / Handouts, appear individually (in the decks) during the course of each lesson, however the examples for each week are also provided separately both with and without the teacher’s notes appearing below each example. (These are in the Handouts Folder that is visible on the S-Cubed Content screen). |
Rhythm Exercises (starting in Lesson 7):
Meant to be performed as a group using Kodaly “Ta” rhythm syllables (see Rhythm TA System under Key Components of the S-Cubed Curriculum). These may be projected, or printed like the handouts are, for practice at home.
Forbidden Patterns:
These are suggested note patterns and advice for conducting that day’s Forbidden Pattern game (see The Forbidden Pattern Game below under Key Components of the S-Cubed Curriculum for more information on this key activity).
Video Teaching Tips:
Links to YouTube video of Dale talking about the best way to run the day’s class.
Actual Classroom Video:
Links to YouTube video of Dale actually teaching the day’s class - very useful if you’re wondering just how a given element was presented, quiz administered, how the Forbidden Pattern game is run etc.
Assessments & Quizzes (starting in Lesson 5):
Occasionally assessments or quizzes are specifically included in the Lesson decks. As with the warm-ups, you should feel free to administer these in whichever way works best for your class. Some possibilities include:
You may or may not choose to review the answers with the class after the quiz or assessment is complete.
Helpful Written Tips & Advice:
Intermingled throughout each Lesson deck are a wealth of tips, advice, notes on progress, insights into the S-Cubed philosophy and more!
|
|
Tip: Because the Lesson’s various components may be interrelated and each day’s activities build off the last, it’s a good idea to read through the entire Lesson deck for the upcoming week beforehand to give yourself time in order to fully absorb the material before you and your class dive in on Monday! |
|
|
Note: Generally the S-Cubed material is intended to take up between 10 and 15 minutes of class time, after which you might normally work on performance / repertoire material. However, you may wish to spend some extra time each day (or during the “extra” days of the week that don’t have material provided explicitly in the deck) in reviewing the previous day’s or week’s key objectives, if your students need more time to master them. |
|
|
Tip (Yes, another tip!): Feel free to copy out just the “student-facing” slides for each day into a separate document if you’d rather not have to skip slides during class. Or add more slides of your own, if you think they will be helpful to your students. Remember, S-Cubed was not designed to turn you into a robot! YOU are the teacher and you should do what’s best for your class. |
This section describes some of the foundational concepts, methods and learning activities that S-Cubed is built from. Some of them are well-known and may be familiar to you, others will not be. This section is provided for your reference, so feel free to browse or skip through as you see fit.
|
|
Note: Familiarity with, and mastery of these crucial aspects is important when teaching the class. But, remember, S-Cubed is more than just the sum of these components. It is also a PHILOSOPHY…an APPROACH. Recognize what the children don't know. Don't fault them for not knowing it... Then, teach it to them in a fun way they will remember forever! |
Solfège (also called sol-fa, solfa, solfeo, among many names) is a method used to teach pitch and sight singing of Western music. Syllables are assigned to the notes of the scale and enable the student to mentally hear, the pitches of a piece of music in order to sight sing.
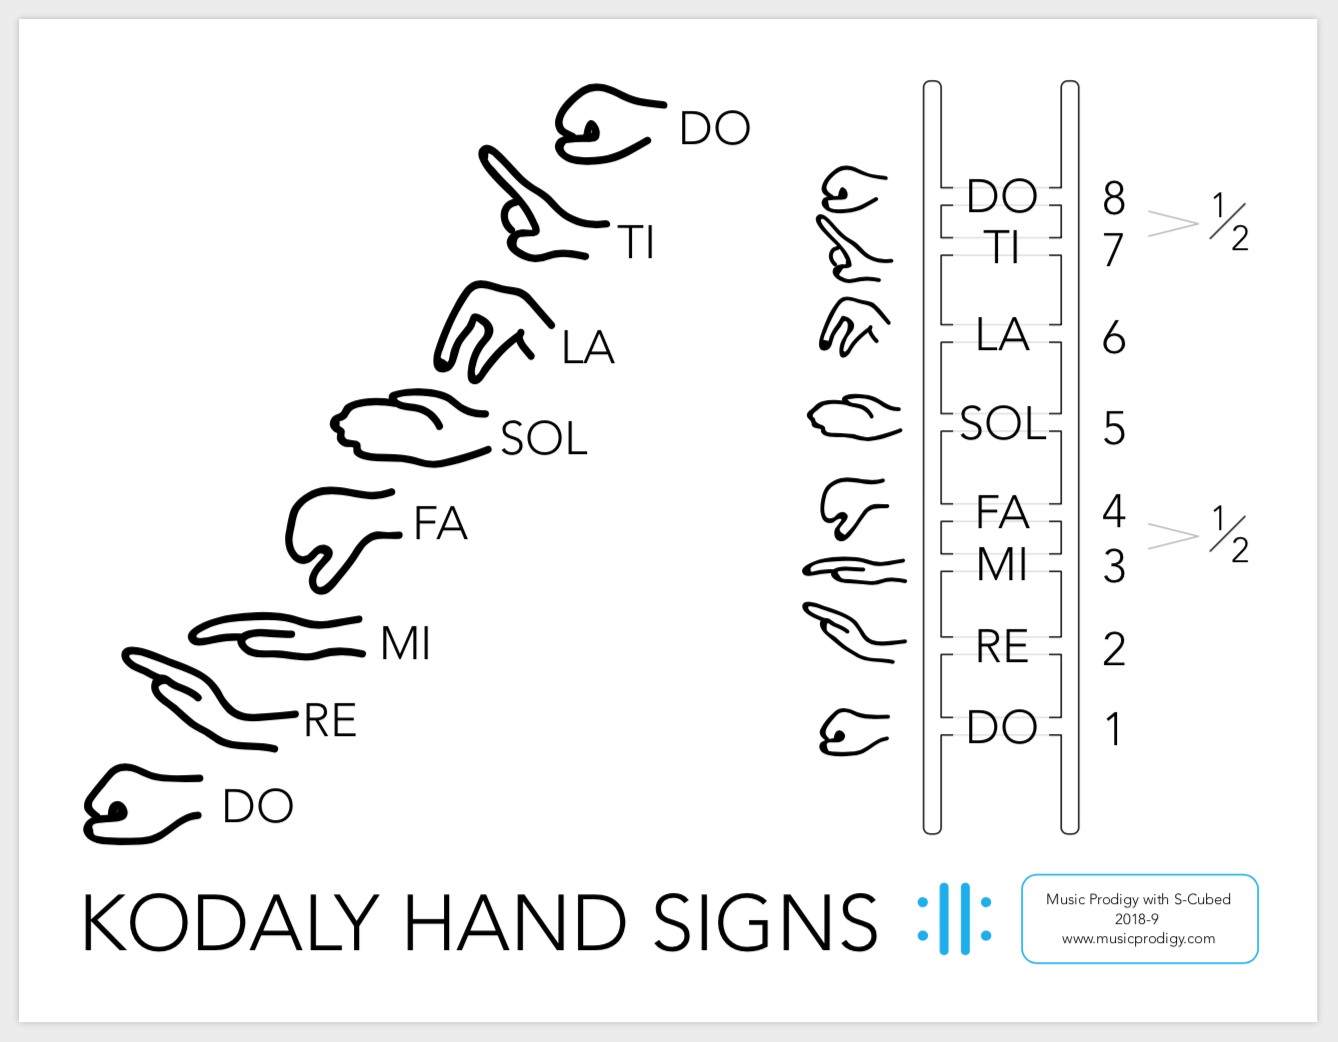
Kodaly hand signs (also called Solfege hand-signs or Curwen hand signs) are a system in which each tone of the seven-note solfege system is given a hand-gesture for the singer or director to make while singing. For beginning students they are helpful in learning and reinforcing the solfege method.
A poster or chart displaying the hand-signs should be prominently displayed at the front of your classroom. You might already have such a poster, or you may readily buy one online, but we have included the perfect poster for you to use, which will print cleanly at any size you’d like:
Music Prodigy with S-Cubed digital poster that you can print out for your classroom.
Click here to download the S-Cubed Kodaly Poster now
|
|
Note: If you’re old enough to remember Close Encounters of the Third Kind, you know that even aliens use Kodaly hand signs!
The alien signs “Re” |
When you teach this class, you will play a game (called Forbidden Pattern) almost every class day. As the host or MC of the game, you will need to be familiar-enough with the rules (which appear below) to ensure that the game runs smoothly and confident-enough to inject distractions and fun without distracting yourself!
|
|
How can a GAME be so important? A great question! The game not only teaches focus, posture, correct use of the syllables and hand signs as well as training the students ear, it is also a key hook, a fun element, that will draw your students into the class. This is a central part of the philosophy behind S-Cubed: when you’re teaching something really difficult, it’s important to try to make it fun and to establish a low-pressure and non-threatening atmosphere in which it’s OK to make mistakes. When you run the game correctly, you can accomplish all of these things effortlessly and without even having to think about it! |
The Basic Rules of Forbidden Pattern:
|
|
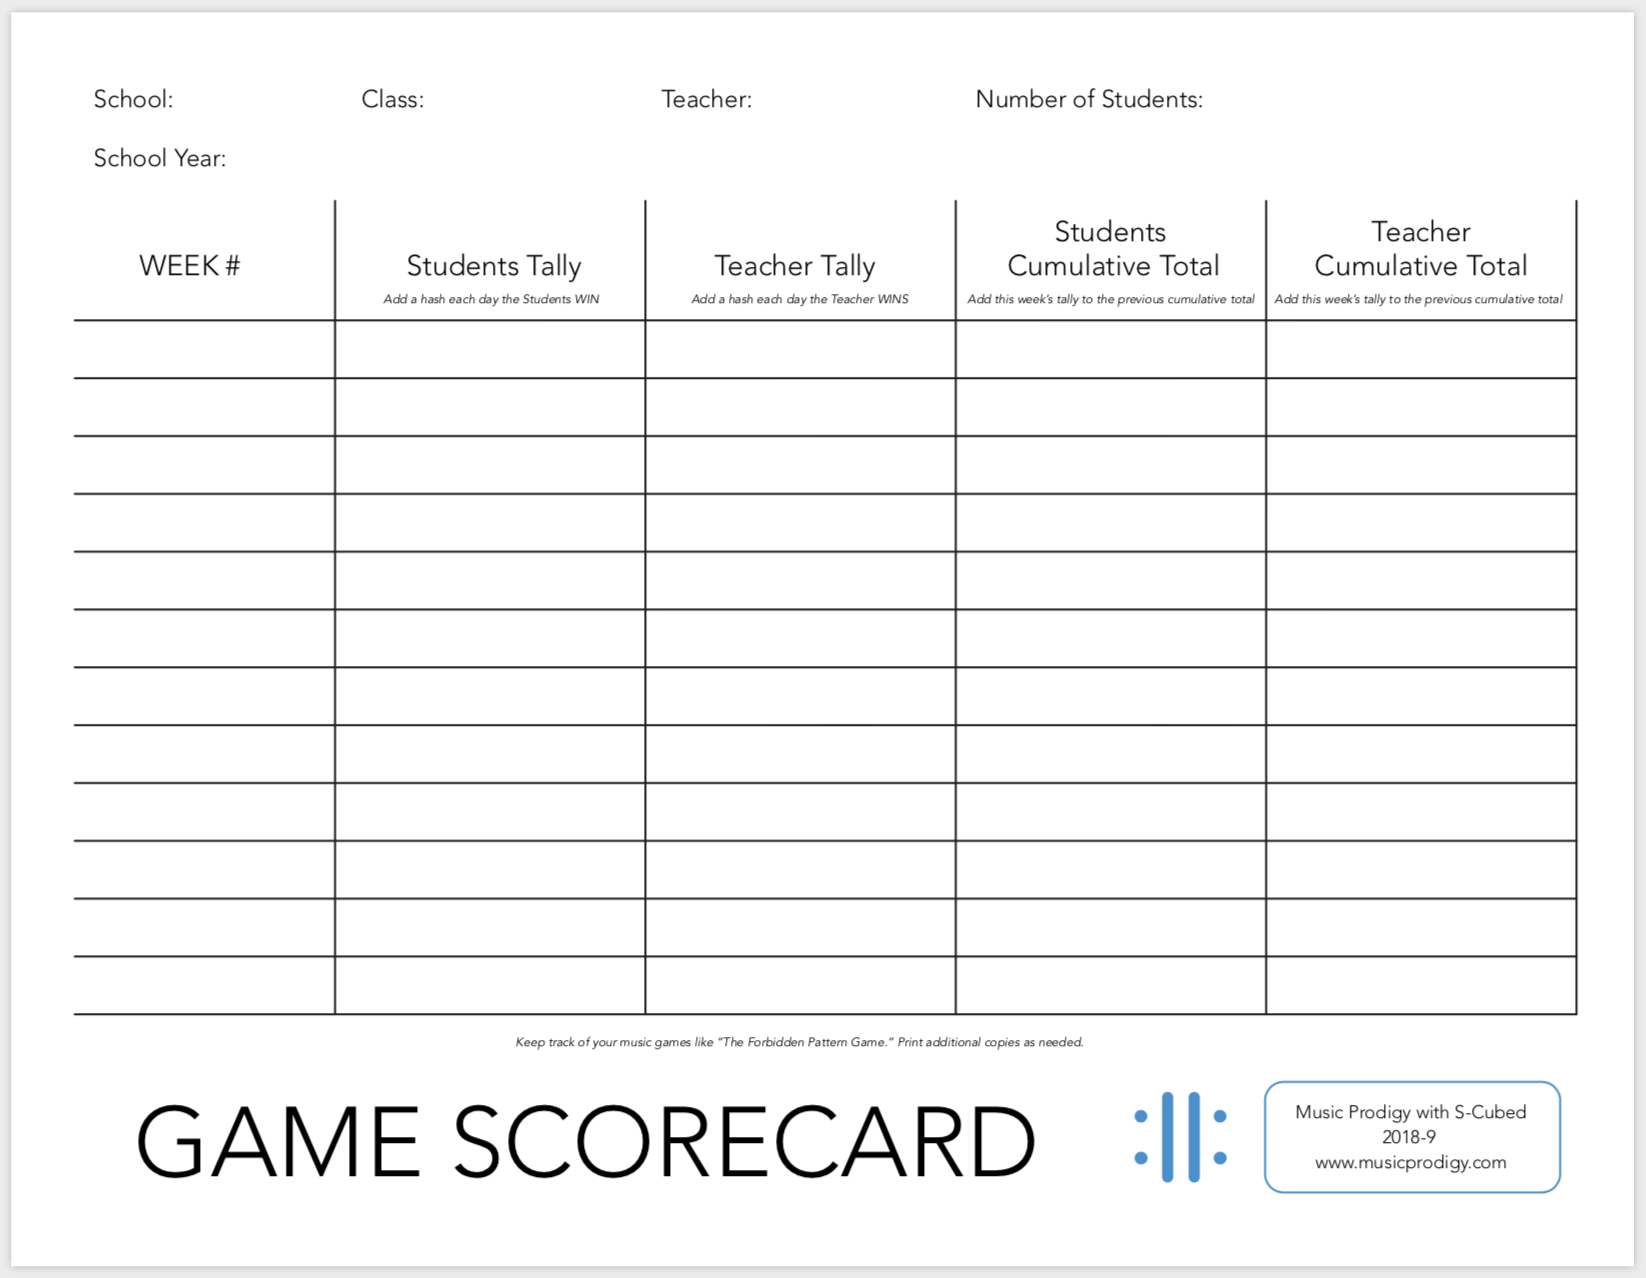
Tip: Keep track of the running tallies for each class all year in a highly-visible place. This should encourage a friendly competition with other classes in addition to competing with the teacher. Naturally, you may create your own score-poster, but we have included the perfect poster for you to use, which will print cleanly at any size you’d like:
Print out, post in the classroom, and keep score! Students love to win! “Oh, it’s on!” ;)
Click here to download the Forbidden Pattern Scores Poster now |
Other Guidelines:
|
|
Tip: Have fun with the game! Throw in distractions! For example, in the middle of the game, talk about your cat or what you did over the weekend. Then, sing and sign the forbidden pattern. Soon, they will realize what you are up to! It helps them focus even more because they think you are being sneaky in order to win (and you are!) The possibilities are endless, and the relationship you will build with them when you let loose with playful competitiveness in this way will help you bond with your students as you teach them! |
This is another activity which you will perform frequently when you teach the class (starting in Lesson / Week 2). Follow The Hand is a great way for students to practice recognizing the hand signs and knowing the pitch and Solfege syllable for each.
Essentially, in Follow The Hand, after first establishing the root-note of the scale (“Do”), the teacher silently signs to the class using Kodaly hand signs. The class sings the pitch and syllable while also hand-signing along with the teacher. (The Teacher does NOT sing).
Other Guidelines for Follow The Hand:
Similarly to Forbidden Pattern, sometimes material for Follow The Hand is suggested in the PowerPoint decks, but feel free to use whatever patterns will help your students most at the time.
|
|
Tip: When your students succeed, express excitement for them, and let them know how well they are doing! Go slowly, carefully and methodically. Be aware that each individual class is unique in ability, and you must sense their ability so that you can set them up for success. Later, you can reduce the repetition and begin moving up and down a bit more.
If students do make an error in pitch, they usually know it, but they may not be sure how to fix it. Encourage them to cue off of the hand position. If the hand sign drops lower, then their voices must go lower, while a higher position means a higher pitch. For this reason, it is very important to make sure that their Kodaly hand technique is very solid from playing Forbidden Pattern. |
|
|
Note: With two hands, you can even introduce two-part singing in Follow The Hand (you will do this in Lesson / Week 7) using your left hand for altos and right for sopranos. Usually it’s best to move one hand at a time. For example, altos will hold “Do” and stagger breathe while you move the other hand for sopranos. |
The Rhythm Ta system (also called Kodaly “Ta” system or Kodaly Rhythm Syllables) is a system of teaching rhythm where note values are assigned specific syllables that express their durations. For example, quarter notes are expressed by the syllable “Ta” while eighth note pairs are expressed using the syllables “Ti-Ti”. Quarter rests are voiced as “Sh” and repeated (“Sh-Sh”) for half rests and longer. In S-Cubed, rhythm is taught separately from pitch at first (starting in Lesson / Week 7). Have students over-emphasize beat “1” with their voices when they “Ta”, and “rev” their voices like a car engine while singing half notes, dotted half notes and whole notes to keep the beat steady as they perform rhythm exercises.
“Chaos” is a one to two-minute independent practice period that occurs (Starting in Lesson / Week 6) before sight-singing exercises. After establishing tonality by singing the scale and arpeggio of the key, the teacher directs each student to sing and sign the example out loud on their own. Students must place themselves into a “bubble world” and block out the other singers. They must do so for the entire duration of the Chaos period. Once the teacher stops the Chaos session, he or she re-establishes tonality and then has the class sing the example as a choir.
|
|
Tip: When teaching this concept, compare it to how an orchestra warms up before a concert. Emphasize the importance of holding onto “Do” during Chaos. If you hear students wander from “Do” when they are first using Chaos as a tool, stop the class and ask them to sing “Do”. This will give you a chance to drive home the importance of never losing “Do”. You can tell them that it is like knowing where you live! You should always be able to recite your home address.
It is critical that students sing out loud during Chaos, and that they be encouraged to work at their own pace. |
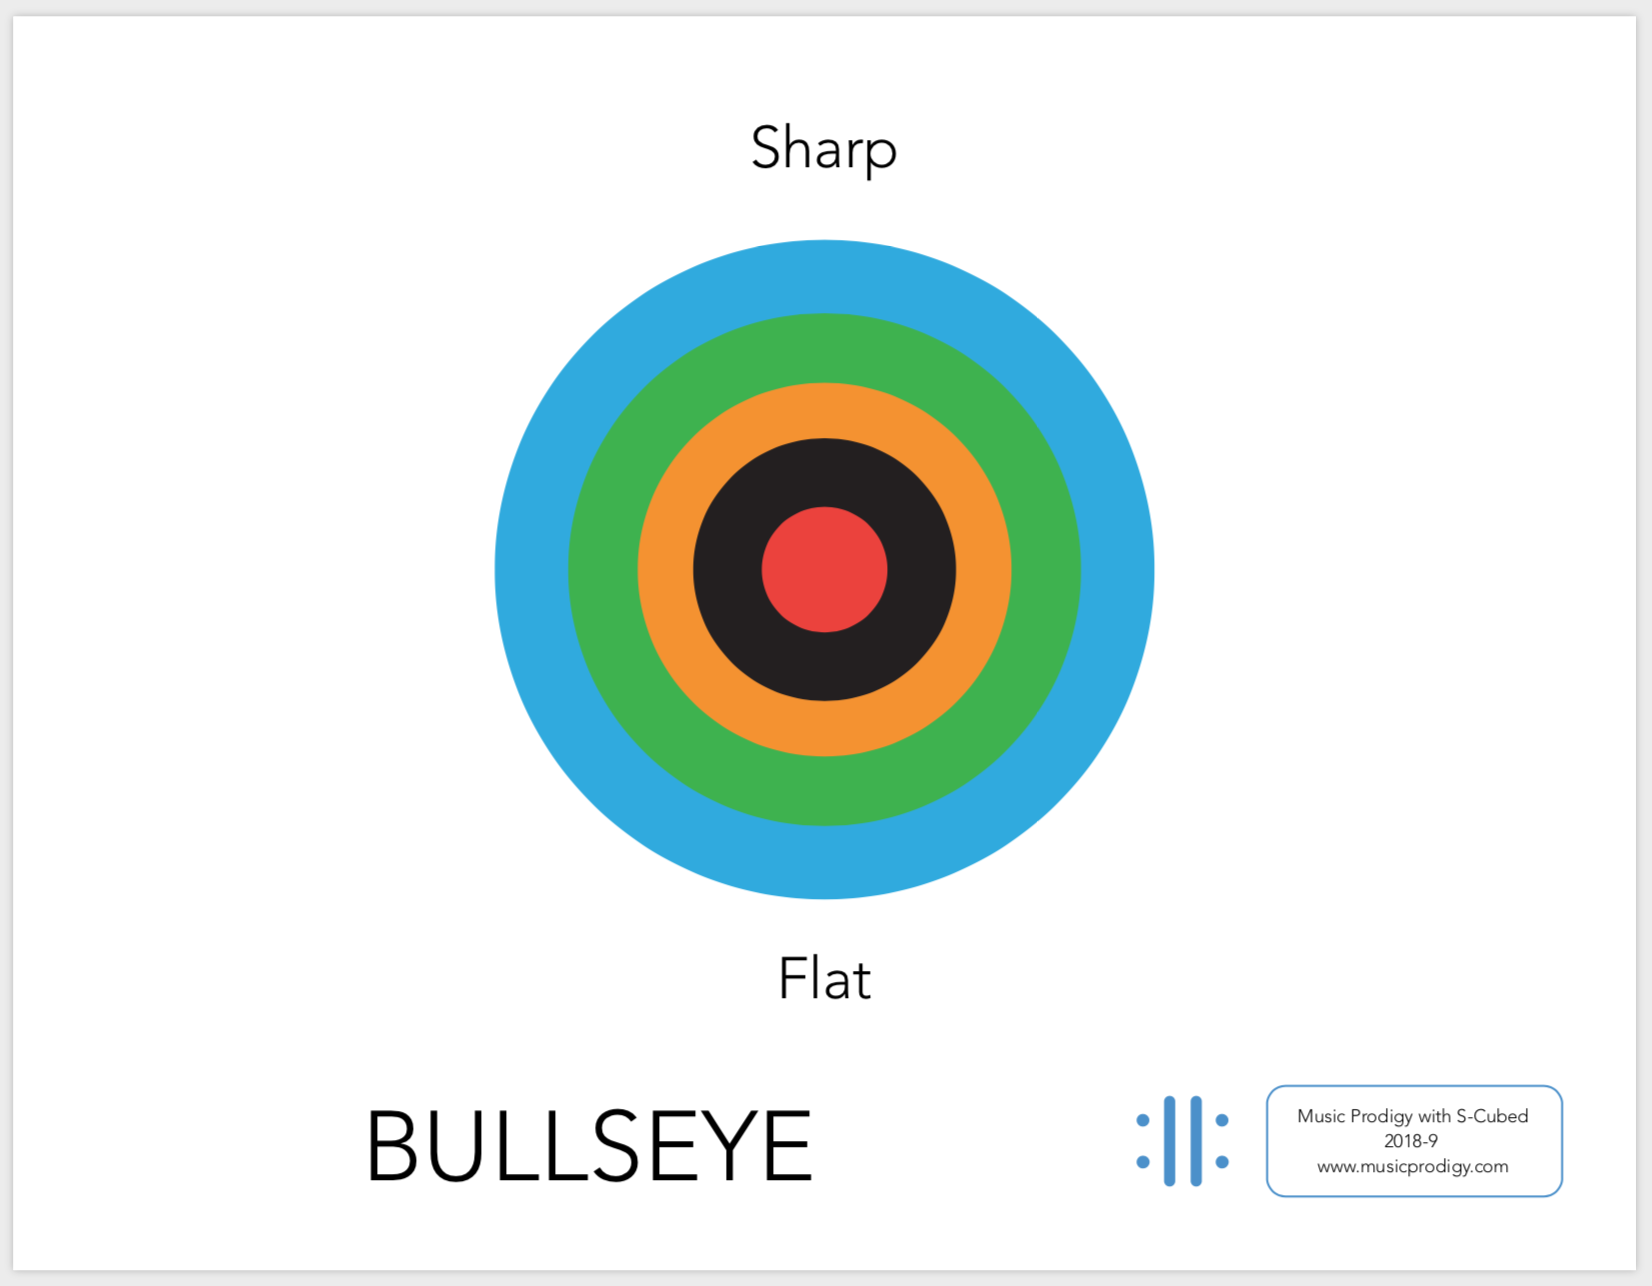
As discussed previously, the Lesson decks contain many types of slides. Some of them are intended to be viewed by the students as part of the class and some are not (the differences should be apparent). If you are unable or prefer not to project these student-facing slides, feel free to print them or otherwise distribute them instead, as handouts.
Click here to download the Bullseye Poster now
When teaching S-Cubed, it may be helpful for each student to have a folder or binder to keep written warm-up other exercises, sight-singing handouts, notes, copies of repertoire pieces etc. In addition, unless you intend to print out every warm-up, quiz and assessment, each student will probably need a small supply of blank or lined paper in their folder or binder to complete the written warm-ups and assessments or to take notes.
|
|
Note: If you are using Google classroom, another learning management system or any other technological solution to manage handouts, notes, quizzes and so on, you may choose to utilize it to eliminate the need for some of these physical materials. Music Prodigy with S-Cubed is not here to constrain you but help you - do whatever you and your students are comfortable with! |
As mentioned previously, because each Lesson’s various components may be interrelated and each day’s activities build off the last, it’s a good idea to read through the entire Lesson deck for the upcoming week beforehand to give yourself time to fully absorb the material before you and your class attempt it.
Make sure to:
S-Cubed material is intended to occupy the first 15 minutes or so of class time. Usually a class will follow this routine:
|
|
Note: The sequence of steps above are just one example. You should feel free to present each activity in an order that works best for you, as long as the students are exposed to each activity in turn. |
There are many published sight singing methods, but Music Prodigy with S-Cubed is the first method to incorporate revolutionary new technology which gives students instant performance feedback as they practice individually and which allows you to monitor and assess each student’s progress in real time. This process starts with assigning homework!
You will want to make sure that every student has successfully logged in to the Music Prodigy app or website using whichever device they’ll be completing their homework on (see Get Students Set Up with Music Prodigy). Students will also feel much more confident if they’ve had a chance to practice with the program before it comes time to get down to “real” homework.
A practice exercise for students to try. This provides a low-stakes way for students to get acquainted with the Music Prodigy app, i.e. encouraging students to give it a go and NOT wait until 11:30 pm the night before the first assignment.
|
|
Tip: At the top of the list of exercises is an exercise named Practice Using The App. This super-simple exercise is provided so that Students may familiarize themselves with the controls, get comfortable, and get a feel for how things will work, without affecting their grade or scores, before they actually have assigned homework to complete. Please encourage them to try it out! |
The list of homework exercises can be found by selecting Classes from the Main Menu (this will display a list of the classes the student is enrolled in - there may only be one class on the list for most students). Clicking the name of the class will display the list of homework exercises for that class.
S-Cubed homework assignments are named by Lesson number and “Day” number (for example: “Lesson 12 Day 2”). Homework exercises for a each Lesson / Week follow the order of topics as they appear in the Lesson and roughly correlate to the Day in which they appear.
|
|
Note: Although we often use the terms “Week” and “Day” when referring to Lessons and segments of the Lessons, remember that, as with all other aspects of the program, you are not required to adhere to a rigid schedule. You may choose to assign some homework each day, assign an entire Lesson’s worth at once or skip some altogether. Proceed at your own pace and don’t worry too much about “Weeks” and “Days” if you don’t want to. |
|
|
Another Tip: You may find it useful to use the Show / Hide button to control the number of exercises visible to students at any given time. (See Managing Class Content for more detailed information).
The exercise above is visible - click the crossed-out eyeball, to hide it from students...
Now the exercise is hidden from students - click the green eyeball to show it again.
There are a couple of reasons for this: First, it may overwhelm or confuse students to see a giant list of seventy-one exercises when they really only need to focus on a few. Second, it will prevent some students from racing through all the exercises prematurely - which would defeat the purpose, which is regular independent practice (not “let’s get it over with!”). |
Once your students begin using the Music Prodigy practice app, you can begin monitoring their progress as they learn sight-singing. There are two main ways you will do this: by logging into the Teacher’s Dashboard web application and visiting the Gradebook screen, and through progress reports which are emailed to you each morning. In this section we’ll take a look at both.
|
|
You may access the Gradebook screen by either selecting Gradebook from the Main Menu, or by selecting Classes from the Main Menu, clicking on the Class Card for the class you wish to view, and then, in the Class Details screen sidebar area, clicking Gradebook. |
The Gradebook Screen - Appearance will vary considerably depending on how many classes you have and how many exercises your students have completed.
If you have more than one class and didn’t enter the Gradebook from Class Details you may need to click the tab with your class name on it to display scores for that class.
Students are listed vertically at the left side of the Gradebook screen and exercises are listed horizontally across the top. As your students practice their homework exercises, their scores will appear in the central area - it works like a spreadsheet, but with some extra added features we’ll examine now.
|
|
Note: What does all this green mean?
If a “cell” of the “spreadsheet” contains a shade of green, it indicates a score recorded in “Assessment” mode (see 3.3 – Practicing with Music Prodigy for more information). The darker the shade of green, the better the score.
If a “cell” appears white, it was recorded in “Practice” mode only.
|
|
|
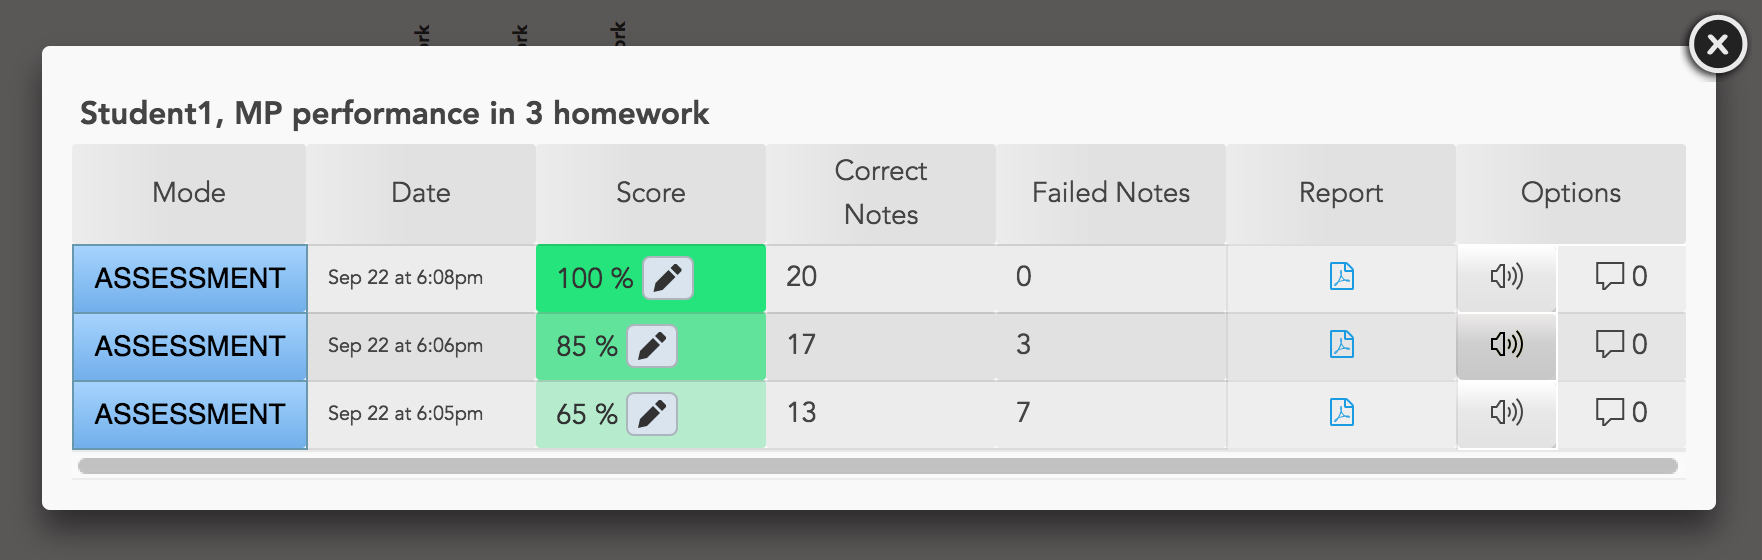
To see more information about a particular score by an individual student, click on the square where the score appears. The score details for that student’s progress on the homework exercise will appear. |
Clicking on the score (a “cell” of the “spreadsheet”) opens this window - with seven column’s worth of extra information!
This may appear daunting at first, but the idea here is simple: each row in this little table is a performance of the homework which that student chose to save. (Any performance the student does NOT save will not appear here - see 3.3 – Practicing with Music Prodigy for more information).
Now let’s check out what each column means:
Pressing the Speaker Button lets you hear the performance for yourself
|
|
Warning: “The Practice App is broken!”
You may hear this from Students, especially in the first weeks when they are unfamiliar with how things work.
Before you take them at their word, use the Speaker Button in the Gradebook to review the actual audio of their performance!
Often, the student is making some obvious mistake (like not following the tempo and singing too fast, for example, which will produce a low score). They may need help using the app at first. As they gain familiarity, these complaints should become less frequent.
|
|
|
Tip: You should feel free to use the Pencil Button to override grades as you see fit, based on listening to the student’s recordings.
Remember, the amount of reliance you place on these machine-scored assessments is entirely up to you. No machine will be able to assess student sight singing the way you can, so use your own judgement!
Also! The concept behind Music Prodigy with S-Cubed isn’t to create an exacting, high-pressure, “not fun” experience that students will dread! Ideally, the Practice App provides a way for students to practice independently and regularly and a way in which you can monitor their progress and identify those who may need individual help. |
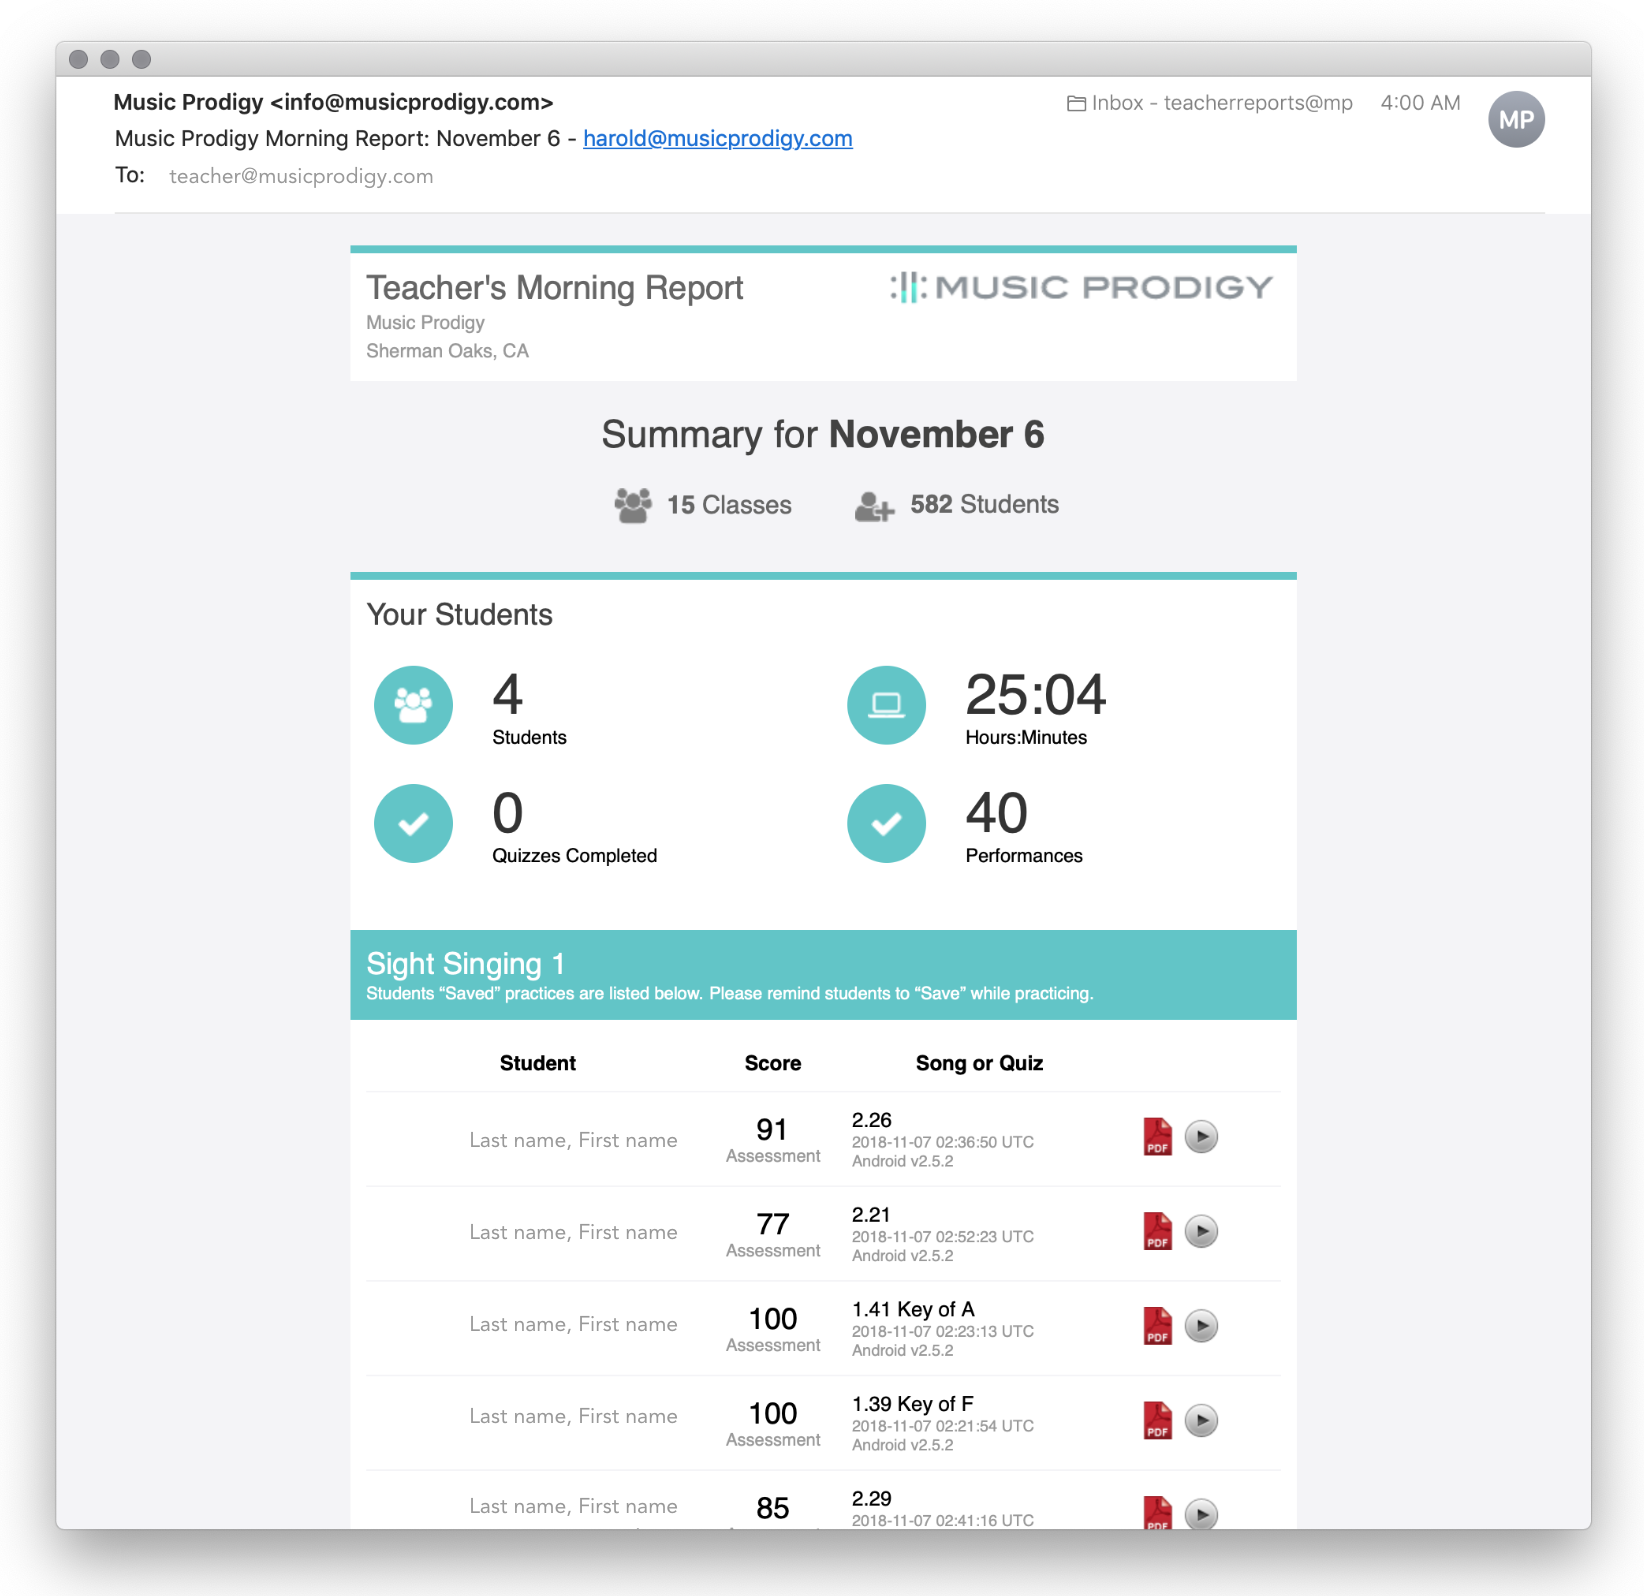
Teachers by default receive a “Music Prodigy Morning Report” showing their students’ activity from the previous 24 hours. These are typically sent out around 8:00 am ET/5:00 am PT each day.
A typical example of a morning report email appears below.
Example of a morning report with students’ activity from the previous 24 hours.
About the Teacher's Morning Report emails:
|
|
Tip: Clicking on the various icons and numbers in the Teacher's Morning Report will automatically log you in and take you to a detailed view of that statistic, or performance. |
Domains
The following websites are used by Music Prodigy and should be added to your whitelist. These websites may not be accessible through a web browser, but will still need to be added.
Email addresses
Firewall, Security Settings
Personal computer and mobile device information
Contact Us
For more information, email us at: support@musicprodigy.com